SUPPLEMENTAL RESTRAINT SYSTEMS CURTAIN SHIELD AIRBAG ASSEMBLY(for Front Side) INSTALLATION
CAUTION / NOTICE / HINT
- HINT:
- ·
Use the same procedure for RHD and LHD vehicles.
·The procedure listed below is for LHD vehicles.
·Use the same procedure for the RH and LH sides.
·The procedure listed below is for the LH side.
PROCEDURE

 62180D
1.INSTALL FRONT CURTAIN SHIELD AIRBAG ASSEMBLY LH
62180D
1.INSTALL FRONT CURTAIN SHIELD AIRBAG ASSEMBLY LH
When reusing the front curtain shield airbag assembly LH:
- CAUTION:
-
Do not reuse the clip and roof side inner garnish clip.
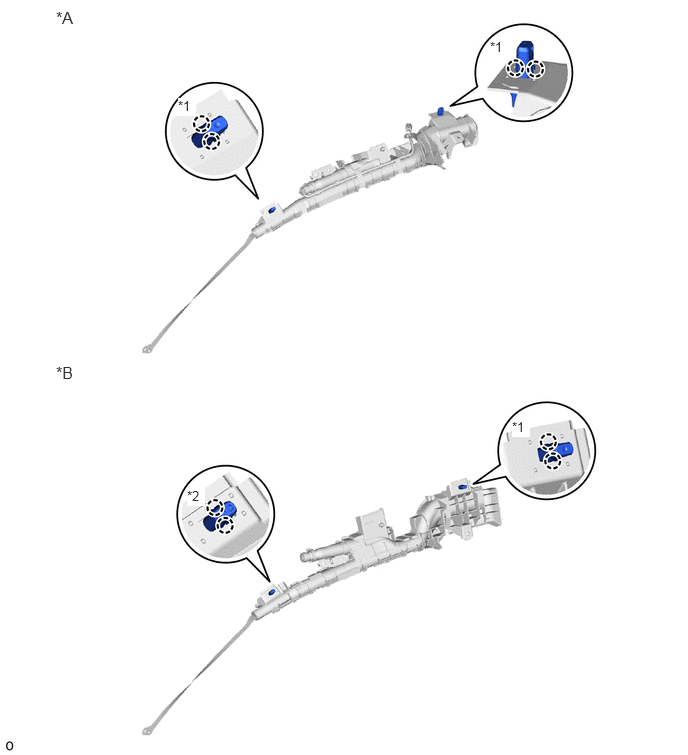
| *A | for Standard Roof | *B | for High Roof |
| *1 | Roof Side Inner Garnish Clip | *2 | Clip |
for Standard Roof:
Attach the claw to install 2 new roof side inner garnish clips.
- NOTICE:
-
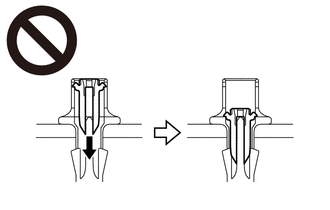
-
Do not push the pin and lock the clip at this time.
for High Roof:
Attach the claw to install the new clip and new roof side inner garnish clip.
- NOTICE:
-
-
Do not push the pin and lock the clip at this time.
Check that the ignition switch is off.
Check that the cable is disconnected from the negative (-) battery terminal.
- CAUTION:
- ·
Do not begin this procedure within 90 seconds after disconnecting the cable from the negative (-) battery terminal.
·If the airbag deploys for any reason, it may cause a serious accident.
Install the front curtain shield airbag assembly LH inflator in the following order.
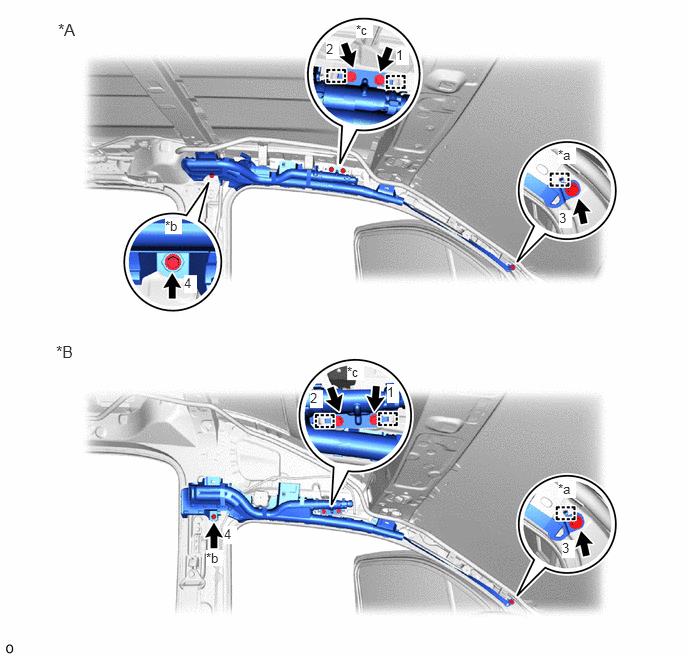
| *A | for Standard Roof | *B | for High Roof |
| *a | Strap | *b | Rear Side Bolt |
| *c | Front Curtain Shield Airbag Assembly LH Inflator | - | - |
Attach the hook to set the front curtain shield airbag assembly LH inflator with 2 new bolts.
Temporarily install the rear side of the front curtain shield airbag assembly LH deployment portion with a new bolt.
Attach the hook and temporarily install the front curtain shield airbag assembly LH strap with a new bolt.
Tighten the 4 bolts order shown in the illustration.
- Torque:
- 9.8 N*m (100 kgf*cm, 87 in.*lbf)
Install the front curtain shield airbag assembly LH deployment portion in the following order.
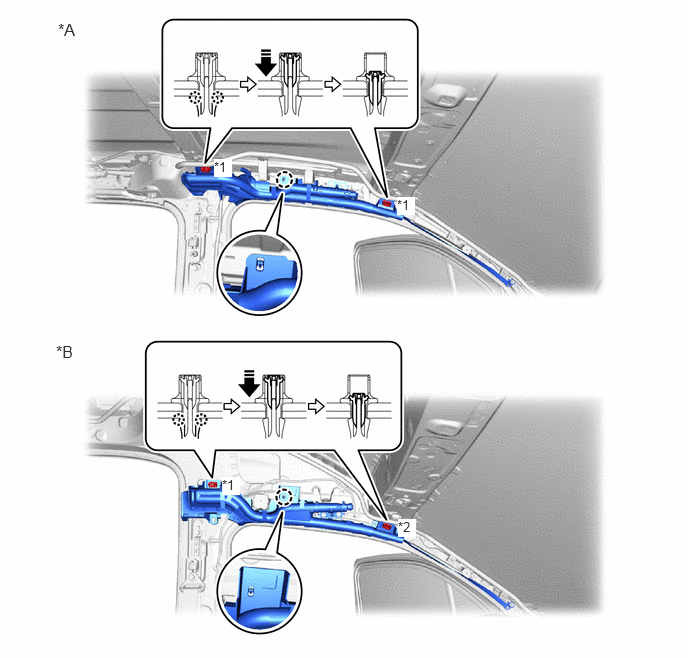
| *A | for Standard Roof | *B | for High Roof |
| *1 | Roof Side Inner Garnish Clip | *2 | Clip |

|
Push in this Direction | - | - |
Attach the claw.
for Standard Roof:
Attach the claw to install the 2 roof side inner garnish clips.
- NOTICE:
-
Do not push the pin and lock the clip at this time.
for High Roof:
Attach the claw to install the clip and roof side inner garnish clip.
- NOTICE:
-
Do not push the pin and lock the clip at this time.
Check that there is no twisting in the front curtain shield airbag assembly LH deployment portion.
- CAUTION:
-
Make sure the strap is twisted less than 3 turns.
for Standard Roof:
Push the 2 pins to lock the 2 roof side inner garnish clips.
- CAUTION:
-
Make sure that the pins of the clips are pushed in firmly.
for High Roof:
Push the 2 pins to lock the clip and roof side inner garnish clip.
- CAUTION:
-
Make sure that the pins of the clips are pushed in firmly.
for Standard Roof:
Lightly pull on the 2 roof side inner garnish clips to check whether it is locked.
for High Roof:
Lightly pull on the clip and roof side inner garnish clip to check whether it is locked.
Connect the airbag connector.
- NOTICE:
- ·
When connecting any airbag connector, take care not to damage the airbag wire harness.
·Make sure the lock button is securely locked.
- HINT:
-
Refer to How to Connect or Disconnect Airbag Connector:
- ··
2.INSTALL ROOF HEADLINING ASSEMBLY
3.CONNECT CABLE TO NEGATIVE BATTERY TERMINAL
4. INITIALIZATION AFTER RECONNECTING BATTERY TERMINAL
- HINT:
-
When disconnecting and reconnecting the battery, there is an automatic learning function that completes learning when the respective system is used.
5.PERFORM DIAGNOSTIC SYSTEM CHECK
6.CHECK SRS WARNING LIGHT
7.PERFORM SYSTEM INITIALIZATION AND CALIBRATION