INTERIOR PANELS / TRIM REAR SUNSHADE ASSEMBLY(for Side Trim) REMOVAL
CAUTION / NOTICE / HINT
The necessary procedures (adjustment, calibration, initialization or registration) that must be performed after parts are removed, installed or replaced during the rear window curtain removal/installation are shown below.
| Replacement Part or Procedure | Necessary Procedures | Effect/Inoperative Function When Necessary Procedures not Performed | Link |
|---|---|---|---|
| Disconnect cable from negative (-) battery terminal | Memorize steering angle neutral point | Parking assist monitor system | ( 201902,999999,_56,_079315,_0385736,RM100000001GNRA,) 201902,999999,_56,_079315,_0385736,RM100000001GNRA,)
|
| Panoramic view monitor system | (201906,999999,_56,_079315,_0396274,RM100000001IGR3,)
|
- CAUTION:
- ·
Wear protective gloves. Sharp areas on the parts may injure your hands.
·There is risk of injury.
- HINT:
- ·
When the cable is disconnected / reconnected to the battery terminal, systems temporarily stop operating. However, each system has a function that completes learning the first time the systems is used.
-Learning completes when vehicle is driven
Effect/Inoperative Function When Necessary Procedures not Performed Necessary Procedures Link *: w/ Stop and start system
Stop and start system* Drive the vehicle until stop and start control is permitted (approximately 5 to 60 minutes). ( 201902,999999,_51,_078825,_0382334,RM100000001GBQ1,)
Lane control system Drive the vehicle straight ahead at 15 km/h (10 mph) or more for 1 second or more. ( 201902,999999,_58,_078886,_0382740,RM100000001G6XB,)
Pre-collision system
-Learning completes when vehicle is operated normally
Effect/Inoperative Function When Necessary Procedures not Performed Necessary Procedures Link Power slide door system Fully close the slide door by hand.
- HINT:
-
Initialization is not necessary if the above procedures are performed while the slide door is closed.
( 201902,999999,_59,_078503,_0381017,RM100000001FWXM,)
Air conditioning system After the ignition switch is turned to ON, the servo motor standard position is recognized. -
·Use the same procedure for RHD and LHD vehicles.
·The procedure listed below is for LHD vehicles.
·Use the same procedure for the RH and LH sides.
·The procedure listed below is for the LH side.
PROCEDURE

 1. PRECAUTION (for First Row)
- CAUTION:
-
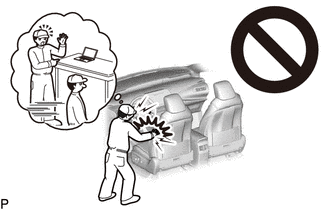
-
Be sure to read Precaution thoroughly before servicing.
- ·
- NOTICE:
- ·
After turning the ignition switch off, waiting time may be required before disconnecting the cable from the negative (-) battery terminal.
·If the pretensioner has been deployed, replace any damaged parts as necessary.
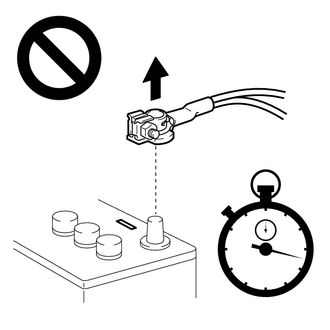
2.DISCONNECT CABLE FROM NEGATIVE BATTERY TERMINAL (for First Row)
Operate the rear power seat switch and move the ottoman to the uppermost position and seatback to the frontmost position.
Disconnet the cable from the negative (-) battery terminal.
- CAUTION:
-
- ·
Wait at least 90 seconds after disconnecting the cable from the negative (-) battery terminal to disable the SRS system.
·If the airbag deploys for any reason, it may cause a serious accident.
3.REMOVE REAR NO. 1 SEAT ASSEMBLY LH (for LH Side)
for Manual Captain Seat:
for Power Captain Seat:
4.REMOVE REAR NO. 1 SEAT ASSEMBLY RH (for RH Side)
for Manual Captain Seat:
for Power Captain Seat:
5.REMOVE REAR NO. 2 SEAT ASSEMBLY LH (for LH Side)
for Manual Captain Seat:
for Power Captain Seat:
6.REMOVE REAR NO. 2 SEAT ASSEMBLY RH (for RH Side)
for Manual Captain Seat:
for Power Captain Seat:
7.REMOVE REAR NO. 3 SEAT ASSEMBLY LH (for LH Side)
for 60/40 Split Seat Type 40 Side:
8.REMOVE REAR NO. 3 SEAT ASSEMBLY RH (for RH Side)
for 60/40 Split Seat Type 60 Side:
73233D
9.REMOVE OUTER LAP BELT ANCHOR COVER (w/ Seat Belt)
10.REMOVE REAR SEAT OUTER BELT ASSEMBLY (FLOOR ANCHOR) (w/ Seat Belt)
67935
11.REMOVE BACK DOOR SCUFF PLATE
67918D
12.REMOVE REAR DOOR SCUFF PLATE LH
- HINT:
-
Use the same procedure described for the RH side.
67872A
13.REMOVE NO. 1 SLIDE DOOR WEATHERSTRIP LH
- HINT:
- ·
Pull back the No. 1 slide door weatherstrip LH so that the quarter trim assembly LH can be removed.
·Use the same procedure described for the RH side.
62520B
14.REMOVE QUARTER TRIM PANEL ASSEMBLY LH
62510M
15.REMOVE QUARTER TRIM PANEL ASSEMBLY RH
65992C
16.REMOVE REAR WINDOW CURTAIN LH
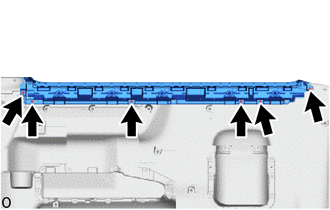
Remove the 6 screws.
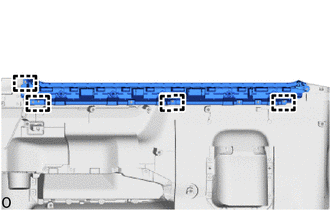
Detach the guide and remove the rear window curtain LH.
65991E
17.REMOVE REAR WINDOW CURTAIN RH
w/ Rear Cooler:
- HINT:
-
Use the same procedure described for the LH side.
w/ Rear Air Conditioning System:
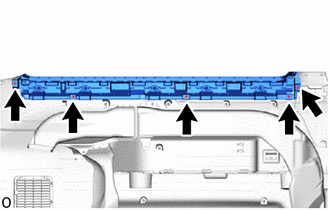
Remove the 5 screws.
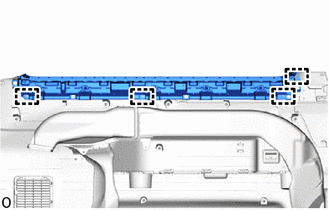
Detach the guide and remove the rear window curtain RH.