SEAT REAR SEAT ASSEMBLY(for 60/40 Split Seat Type 60 Side) REMOVAL
CAUTION / NOTICE / HINT
- CAUTION:
- ·
Wear protective gloves. Sharp areas on the parts may injure your hands.
·There is risk of injury.
- HINT:
- ·
Use the same procedure for RHD and LHD vehicles.
·The procedure listed below is for LHD vehicles.
PROCEDURE

 71940K
1.REMOVE NO. 3 SEAT HEADREST ASSEMBLY RH
71940K
1.REMOVE NO. 3 SEAT HEADREST ASSEMBLY RH
Remove the No. 3 seat headrest assembly RH.
71960E
2.REMOVE NO. 3 SEAT CENTER HEADREST ASSEMBLY (w/ Center Headrest)
Remove the No. 3 seat center headrest assembly.
79236H
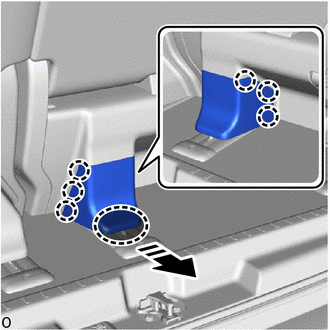
3.REMOVE NO. 3 SEAT LEG COVER RH

0,0 0,0
false
|
Place Hands Here |

|
Remove in this Direction |
Place your hands at the position shown in the illustration and pull in the removal direction and detach the claw and remove the No. 3 seat leg cover RH.
4.REMOVE REAR NO. 3 SEAT ASSEMBLY RH
|
|
Open in this Direction |
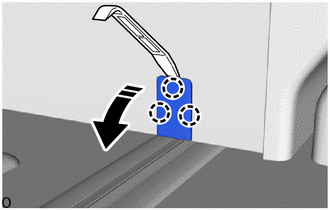
Using moulding remover A, detach the claw and open the cover as shown in the illustration.
- HINT:
-
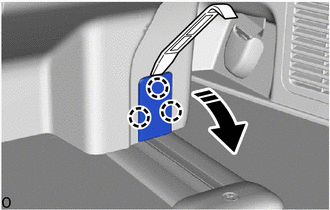
Use the same procedure for the RH side.
|
|
Open in this Direction |
Using moulding remover A, detach the claw and open the cover as shown in the illustration.
w/ Power Supply Unit:
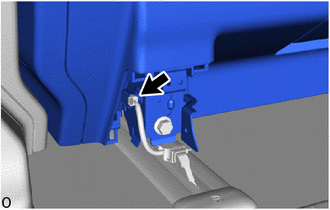
Disconnect the connector.
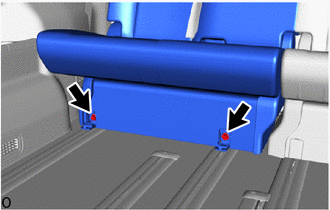
Remove the 2 bolts.
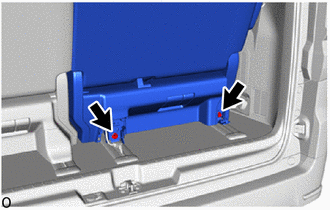
Remove the 2 bolts.
Remove the rear No. 3 seat assembly RH from the vehicle.
- NOTICE:
- ·
2 or more people are required when carrying the rear No. 3 seat assembly RH out of the vehicle.
·Do not damage the rear No. 3 seat assembly RH, body exterior or interior parts.