HEATING / AIR CONDITIONING REAR COOLING UNIT INSTALLATION
PROCEDURE

 87030A
1.INSTALL REAR COOLING UNIT ASSEMBLY
87030A
1.INSTALL REAR COOLING UNIT ASSEMBLY
for Standard Roof:
Temporarily set the front mounting position of the rear cooling unit assembly to the roof reinforcement and temporarily set the guide of the rear mounting position to the roof reinforcement. Then, while aligning the bolt A installation position, temporarily install the rear cooling unit assembly.
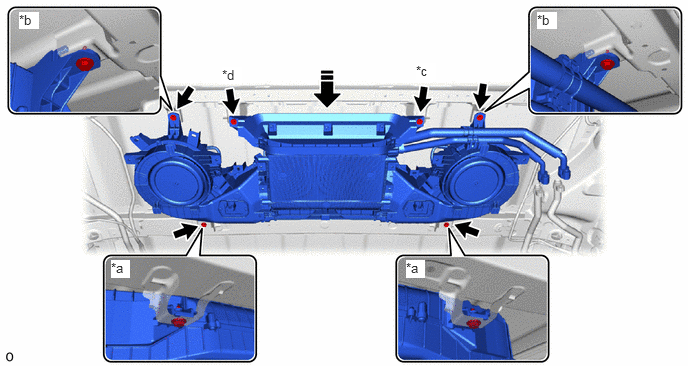
| *a | Front Mounting Position | *b | Rear Mounting Position |
| *c | Bolt A | *d | Bolt B |

|
Install in this Direction | - | - |
While aligning the installation position of bolt B, install the part. After installing the bolts to the remaining 4 positions, tighten bolt A.
- Torque:
- 9.8 N*m (100 kgf*cm, 87 in.*lbf)
Attach each clamp to install the vehicle wire harness.
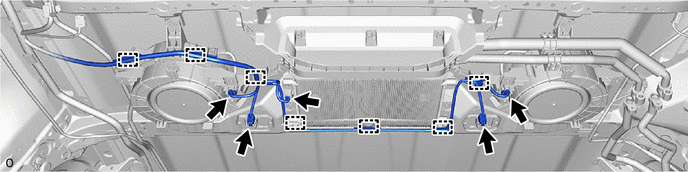
Connect each connector.
for High Roof:
Temporarily set the front mounting position of the rear cooling unit assembly to the roof reinforcement and temporarily set the guide of the rear mounting position to the roof reinforcement. Then, while aligning the bolt A installation position, temporarily install the rear cooling unit assembly.
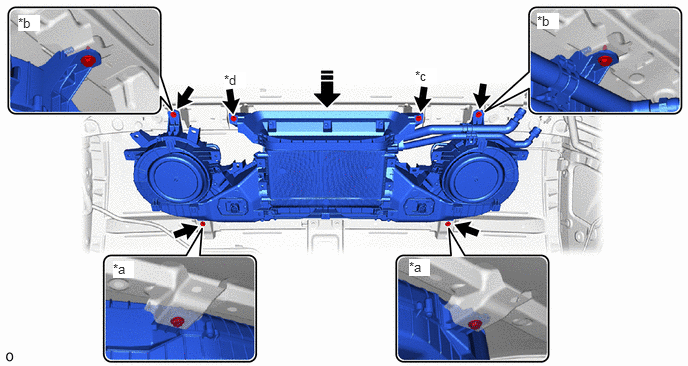
| *a | Front Mounting Position | *b | Rear Mounting Position |
| *c | Bolt A | *d | Bolt B |
|
|
Install in this Direction | - | - |
While aligning the installation position of bolt B, install the part. After installing the bolts to the remaining 4 positions, tighten bolt A.
- Torque:
- 9.8 N*m (100 kgf*cm, 87 in.*lbf)
Attach each clamp to install the vehicle wire harness.
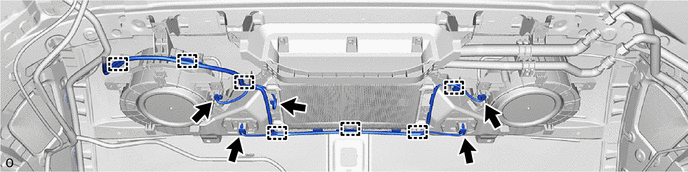
Connect each connector.
Remove the vinyl tape wrapped around the connection of the rear cooling unit assembly.
Apply a sufficient amount of compressor oil to the 2 new O-rings and the fitting surface of the Connect the cooler refrigerant liquid pipe D and cooler refrigerant suction pipe D to the rear cooling unit assembly with the union nut using a double wrench.
- Compressor oil:
ND-OIL 8 or equivalent
Install the 2 O-rings to the air conditioning tube and accessory assembly..
- NOTICE:
-
Keep the O-rings and O-ring fitting surfaces free of foreign matter.
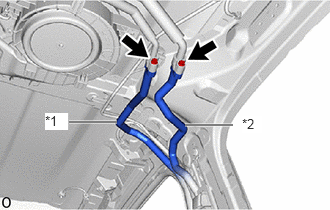
| *1 | Cooler Refrigerant Liquid Pipe D |
| *2 | Cooler Refrigerant Suction Pipe D |
for Standard Roof:
Connect the cooler refrigerant liquid pipe D and cooler refrigerant suction pipe D.
- NOTICE:
-
Do not apply excessive force to the evaporator.
Install the 2 bolts.
- Torque:
- 5.4 N*m (55 kgf*cm, 48 in.*lbf)
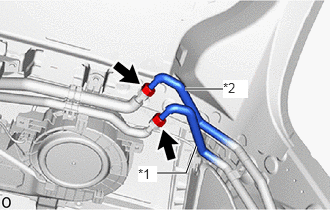
| *1 | Cooler Refrigerant Liquid Pipe D |
| *2 | Cooler Refrigerant Suction Pipe D |
for High Roof:
Connect the cooler refrigerant liquid pipe D and cooler refrigerant suction pipe D to the rear cooling unit assembly with the union nut using a double wrench.
- NOTICE:
-
Do not apply excessive force to the evaporator.
- Torque:
- 23 N*m (235 kgf*cm, 17 ft.*lbf)
for Standard Roof:
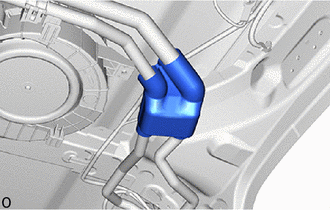
Wrap a new cooling unit parts around the connection of the rear cooling unit assembly and cooler refrigerant liquid pipe D and cooler refrigerant suction pipe D.
for High Roof:
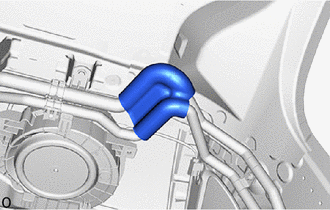
Wrap a new cooling unit parts around the connection of the rear cooling unit assembly and cooler refrigerant liquid pipe D and cooler refrigerant suction pipe D.
88539W
2.INSTALL NO. 2 COOLER UNIT DRAIN HOSE
for Standard Roof:
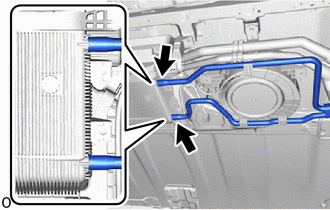
Align the standard position, install the No. 2 cooler unit drain hose.
for High Roof:
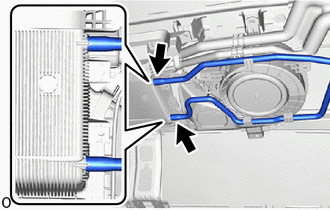
Align the standard position, install the No. 2 cooler unit drain hose.
88539K
3.INSTALL DRAIN COOLER HOSE
for Standard Roof:
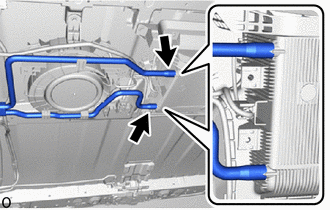
Align the standard position, install the drain cooler hose.
for High Roof:
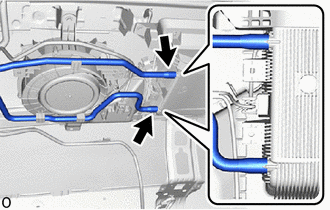
Align the standard position, install the drain cooler hose.
4.INSTALL ROOF HEADLINING ASSEMBLY
5.CONNECT CABLE TO NEGATIVE BATTERY TERMINAL (w/ Front Seat Side Airbag)
6. INITIALIZATION AFTER RECONNECTING BATTERY TERMINAL (w/ Front Seat Side Airbag)
- HINT:
-
When disconnecting and reconnecting the battery, there is an automatic learning function that completes learning when the respective system is used.
7. CHARGE AIR CONDITIONING SYSTEM WITH REFRIGERANT
8.WARM UP ENGINE
9.INSPECT FOR REFRIGERANT LEAK
10.PERFORM DIAGNOSTIC SYSTEM CHECK (w/ Front Seat Side Airbag)
11.CHECK SRS WARNING LIGHT (w/ Front Seat Side Airbag)