7GR-FKS LUBRICATION OIL PUMP REMOVAL
CAUTION / NOTICE / HINT
The necessary procedures (adjustment, calibration, initialization, or registration) that must be performed after parts are removed, installed, or replaced during the timing chain cover assembly removal/installation are shown below.
| Replaced Part or Performed Procedure | Necessary Procedure | Effect/Inoperative Function when Necessary Procedure not Performed | Link |
|---|---|---|---|
| Battery terminal is disconnected/reconnected | Memorize steering angle neutral point | Parking assist monitor system | ( 201902,999999,_56,_079315,_0385736,RM100000001GNRA,) 201902,999999,_56,_079315,_0385736,RM100000001GNRA,)
|
| Panoramic view monitor system | (201906,999999,_56,_079315,_0396274,RM100000001IGR3,)
|
||
| Replacement of ECM | Perform Vehicle Identification Number (VIN) or frame number registration | DTC P063051 is stored | (201902,999999,_51,_078720,_0381907,RM100000001G2WM,)
|
| ECU communication ID registration | Engine start function | See Service Bulletin for the registration method. | |
for RC60J:
Performing iMT installation information reset |
·
iMT system ·
DTCs are output |
(201902,999999,_52,_078740,_0383349,RM100000001GAF2,)
|
|
·
Throttle body with motor assembly ·
Cleaning the deposits from the throttle body with motor assembly ·
Engine assembly ·
Fuel injector assembly (for port injection) ·
Fuel pump assembly (for high pressure side) ·
Spark plug ·
Ignition coil assembly ·
Air leaks from intake system ·
Gas leaks from exhaust system |
Inspection after repair | ·
Poor idle, etc. ·
Engine start function, etc. |
(201902,999999,_51,_078720,_0381907,RM100000001G2VV,)
|
for AC60E:
Replacement of automatic transmission assembly |
Reset memory | ·
Large shift shock ·
Engine overruns |
(201902,999999,_52,_078741,_0385245,RM100000001GL7C,)
|
for AC60E:
Replacement of automatic transmission fluid |
ATF thermal degradation estimate reset | The value of the Data List item "ATF Thermal Degradation Estimate" is not estimated correctly | |
| Front wheel alignment adjustment | ·
Perform reset memory ·
Perform acceleration sensor zero point calibration and store system information memorization. |
·
VSC is disabled or malfunctions ·
DTCs are output ·
Slip indicator light illuminates ·
ABS warning light illuminates |
(201902,999999,_54,_078667,_0385049,RM100000001GK1P,)
|
| Suspension, tires, etc. | Television camera assembly optical axis (Back camera position setting) | Parking assist monitor system | (201902,999999,_56,_079315,_0385736,RM100000001GNRB,)
|
- HINT:
-
When the cable is disconnected / reconnected to the battery terminal, systems temporarily stop operating. However, each system has a function that completes learning the first time the system is used.
- ·
Learning completes when vehicle is driven
Effect/Inoperative when not Performed Necessary Procedures Link Lane control system Drive the vehicle straight ahead at 15 km/h (10 mph) or more for 1 second or more. ( 201902,999999,_58,_078886,_0382740,RM100000001G6XB,)
Pre-collision system
·Learning completes when vehicle is operated normally
Effect/Inoperative when not Performed Necessary Procedures Link Power slide door system Fully close the slide door by hand.
- HINT:
-
Initialization is not necessary if the above procedures are performed while the slide door is closed.
( 201902,999999,_59,_078503,_0381017,RM100000001FWXM,)
Air conditioning system After the ignition switch is turned to ON, the servo motor standard position is recognized. -
- CAUTION:
- ·
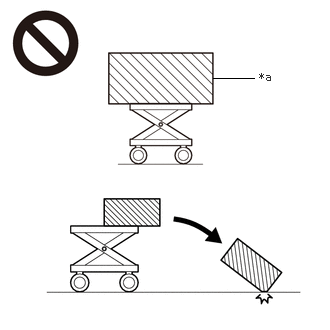 2.219,0.813 2.646,0.813 false 2.698,0.729 3.01,0.927 0.313,0.198 10 false *a
*a An Object Exceeding Weight Limit of Engine Lifter
The engine assembly with transmission is very heavy. Be sure to follow the procedure described in the repair manual, or the engine lifter may suddenly drop or the engine assembly may fall off the engine lifter.
·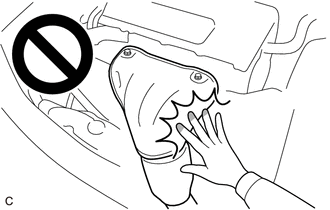
To prevent burns, do not touch the engine, exhaust manifold or other high temperature components while the engine is hot.
PROCEDURE

 1.REMOVE ENGINE ASSEMBLY
2.REMOVE AIR SWITCHING VALVE ASSEMBLY (w/ Secondary Air Injection System)
17360G
3.REMOVE AIR TUBE ASSEMBLY (w/ Secondary Air Injection System)
12601B
4.REMOVE NO. 1 ENGINE COVER SUB-ASSEMBLY (w/o Secondary Air Injection System)
12601B
5.REMOVE NO. 1 ENGINE COVER SUB-ASSEMBLY (w/o Secondary Air Injection System)
12261
6.REMOVE PCV HOSE
12262
7.REMOVE NO. 2 PCV HOSE
23901
8.REMOVE FUEL TUBE SUB-ASSEMBLY AND NO. 2 FUEL TUBE SUB-ASSEMBLY
19500
9.REMOVE IGNITION COIL ASSEMBLY
16268
10.REMOVE NO. 1 WATER BY-PASS PIPE
16261
11.REMOVE NO. 1 WATER BY-PASS HOSE
16264
12.REMOVE NO. 2 WATER BY-PASS HOSE
16267
13.REMOVE NO. 3 WATER BY-PASS HOSE
16281
14.REMOVE NO. 4 WATER BY-PASS HOSE
16331
15.REMOVE WATER OUTLET
15609
16.REMOVE OIL FILTER BRACKET SUB-ASSEMBLY
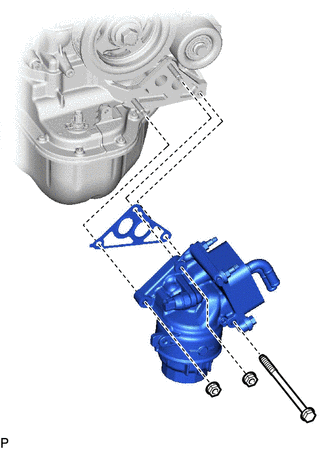
Remove the 2 nuts, bolt, oil filter bracket sub-assembly and gasket.
16603
17.REMOVE NO. 1 IDLER PULLEY SUB-ASSEMBLY
16604
18.REMOVE NO. 2 IDLER PULLEY SUB-ASSEMBLY
16620
19.REMOVE V-RIBBED BELT TENSIONER ASSEMBLY
88431
20.REMOVE NO. 1 COMPRESSOR MOUNTING BRACKET
23800
21.REMOVE FUEL DELIVERY WITH SENSOR PIPE ASSEMBLY
17111
22.REMOVE INTAKE MANIFOLD
23903
23.REMOVE NO. 3 FUEL TUBE SUB-ASSEMBLY
23801P
24.REMOVE NO. 1 FUEL PIPE SUB-ASSEMBLY
23100X
25.REMOVE FUEL (ENGINE ROOM SIDE) PUMP ASSEMBLY
23224D
26.REMOVE FUEL PUMP SPACER GASKET
11202
27.REMOVE CYLINDER HEAD COVER SUB-ASSEMBLY LH
w/ Secondary Air Injection System:
Remove the 2 bolts and 2 VVT sensors from the cylinder head cover sub-assembly LH.
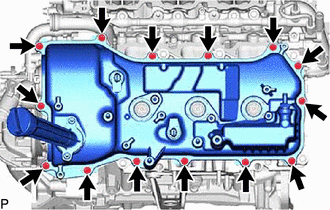
Remove the 14 bolts and cylinder head cover sub-assembly LH from the camshaft housing sub-assembly LH.
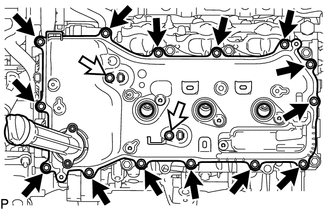

|
Bolt A |

|
Bolt B |
w/o Secondary Air Injection System:
Remove the 2 bolts and 2 VVT sensors from the cylinder head cover sub-assembly LH.
Remove the 14 bolts and cylinder head cover sub-assembly LH from the camshaft housing sub-assembly LH.
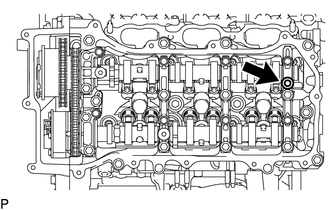
Remove the camshaft bearing cap oil hole gasket LH.
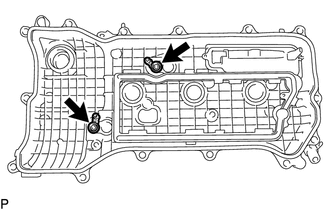
w/o Secondary Air Injection System:
Remove the 2 cylinder head cover gaskets.
11201
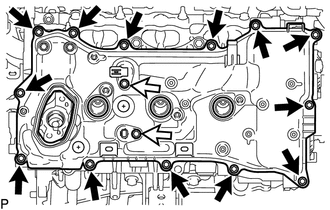
28.REMOVE CYLINDER HEAD COVER SUB-ASSEMBLY
w/ Secondary Air Injection System:
Remove the 2 bolts and 2 VVT sensors from the cylinder head cover sub-assembly.
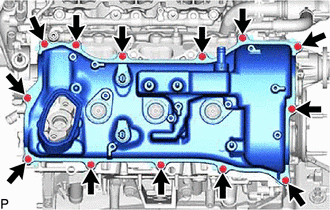
Remove the 13 bolts and cylinder head cover sub-assembly from the camshaft housing sub-assembly RH.
|
|
Bolt A |
|
|
Bolt B |
w/o Secondary Air Injection System:
Remove the 2 bolts and 2 VVT sensors from the cylinder head cover sub-assembly.
Remove the 13 bolts and cylinder head cover sub-assembly from the camshaft housing sub-assembly RH.
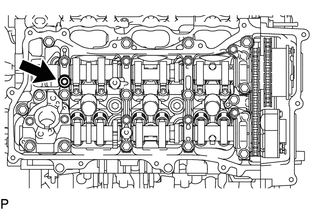
Remove the camshaft bearing cap oil hole gasket RH.
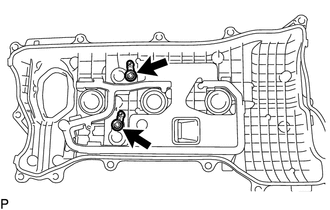
w/o Secondary Air Injection System:
Remove the 2 cylinder head cover gaskets.
11193
29.REMOVE SPARK PLUG TUBE GASKET
12102A
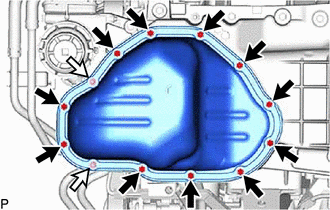
30.REMOVE NO. 2 OIL PAN SUB-ASSEMBLY
|
|
Bolt |
|
|
Nut |
Remove the 11 bolts and 2 nuts.
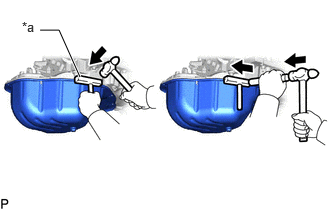
| *a | Oil Pan Seal Cutter |
Insert the blade of an oil pan seal cutter between the oil pans. Cut through the applied sealer and remove the No. 2 oil pan sub-assembly.
- NOTICE:
-
Be careful not to damage the contact surfaces of the oil pans.
15104
31.REMOVE OIL STRAINER SUB-ASSEMBLY
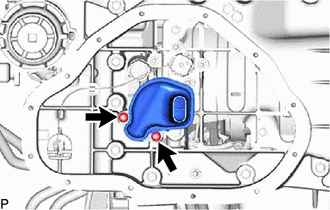
Remove the 2 nuts, oil strainer sub-assembly and gasket.
89491
32.REMOVE ENGINE OIL LEVEL SENSOR
15367
33.REMOVE OIL LEVEL SENSOR BRACKET
12101
34.REMOVE OIL PAN SUB-ASSEMBLY
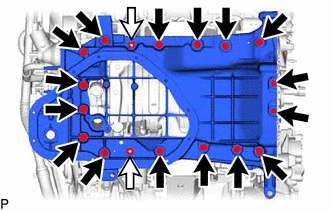
|
|
Bolt |
|
|
Nut |
Remove the 16 bolts and 2 nuts.
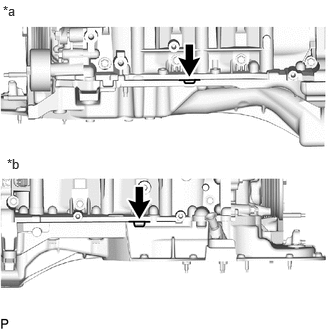
| *a | LH Side |
| *b | RH Side |
Remove the oil pan sub-assembly by prying between the oil pan sub-assembly and cylinder block sub-assembly with a screwdriver.
- NOTICE:
-
Be careful not to damage the contact surfaces of the cylinder block sub-assembly and oil pan sub-assembly.
- HINT:
-
Tape the screwdriver tip before use.
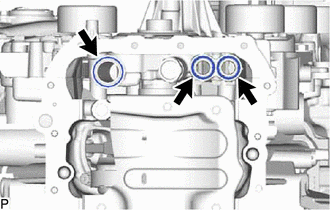
Remove the 3 O-rings from the timing chain cover assembly.
15370B
35.REMOVE CAMSHAFT TIMING OIL CONTROL SOLENOID ASSEMBLY (for Intake Side of Bank 1)
15370B
36.REMOVE CAMSHAFT TIMING OIL CONTROL SOLENOID ASSEMBLY (for Exhaust Side of Bank 1)
15370C
37.REMOVE CAMSHAFT TIMING OIL CONTROL SOLENOID ASSEMBLY (for Intake Side of Bank 2)
15370C
38.REMOVE CAMSHAFT TIMING OIL CONTROL SOLENOID ASSEMBLY (for Exhaust Side of Bank 2)
13471
39.REMOVE CRANKSHAFT PULLEY
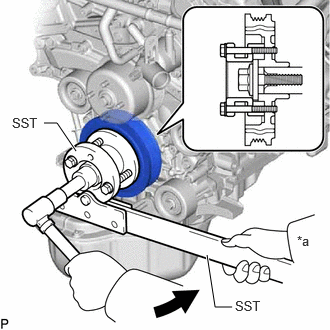
| *a | Hold |
|
|
Turn |
Using SST, hold the crankshaft pulley and loosen the crankshaft pulley set bolt. Continue to loosen the crankshaft pulley set bolt until only 2 or 3 threads are screwed into the crankshaft.
- SST
- 09213-54015 (91651-60855)
09330-00021
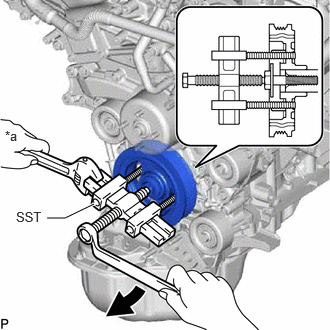
| *a | Hold |
|
|
Turn |
Using the crankshaft pulley set bolt and SST, remove the crankshaft pulley and crankshaft pulley set bolt.
- SST
- 09950-50013 (09951-05010, 09952-05010, 09953-05020, 09954-05031)
11310
40.REMOVE TIMING CHAIN COVER ASSEMBLY
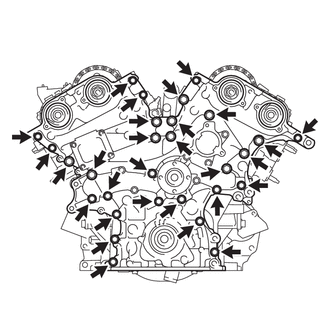
Remove the 29 bolts.
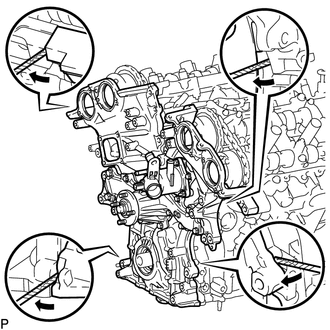
Remove the timing chain cover assembly by prying between the timing chain cover and cylinder head sub-assembly or cylinder block sub-assembly with a screwdriver.
- NOTICE:
-
Be careful not to damage the contact surfaces of the timing chain cover assembly, cylinder block sub-assembly and cylinder head sub-assembly.
- HINT:
-
Tape the screwdriver tip before use.
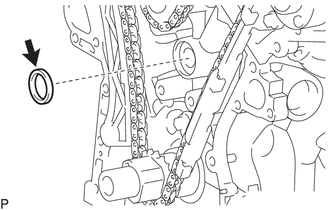
Remove the oil pump gasket from the cylinder block sub-assembly.
11301C
41.REMOVE FRONT CRANKSHAFT OIL SEAL
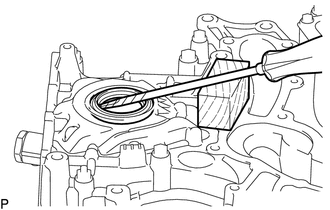
Using a screwdriver and wooden block, pry out the front crankshaft oil seal.
- NOTICE:
-
Do not damage the surface of the front crankshaft oil seal press fit hole.
- HINT:
-
Tape the screwdriver tip before use.