AUDIO / VIDEO STEREO COMPONENT AMPLIFIER INSTALLATION
CAUTION / NOTICE / HINT
- CAUTION:
- ·
Wear protective gloves. Sharp areas on the parts may injure your hands.
·There is risk of injury.
- HINT:
- ·
Use the same procedure for RHD and LHD vehicles.
·The procedure listed below is for LHD vehicles.
·A bolt without a torque specification is shown in the standard bolt chart.
PROCEDURE

 86280
1.INSTALL STEREO COMPONENT AMPLIFIER ASSEMBLY
86280
1.INSTALL STEREO COMPONENT AMPLIFIER ASSEMBLY
86285
2.INSTALL NO. 1 AMPLIFIER BRACKET
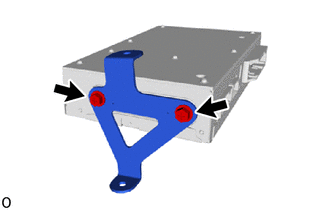
Install the No. 1 amplifier bracket with the 2 screws.
86286
3.INSTALL NO. 2 AMPLIFIER BRACKET
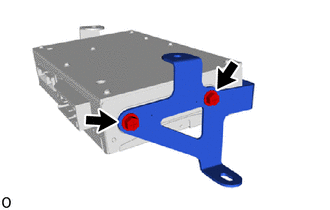
Install the No. 2 amplifier bracket with the 2 screws.
4.INSTALL STEREO COMPONENT AMPLIFIER ASSEMBLY WITH BRACKET
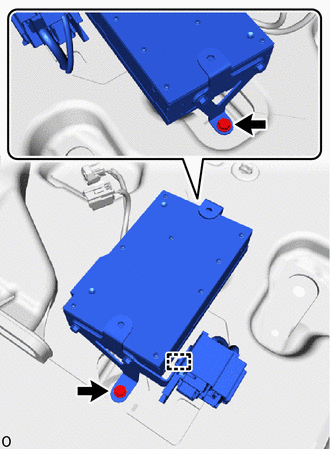
Install the stereo component amplifier assembly with bracket with the 2 bolts.
Attach the wire harness clamp.
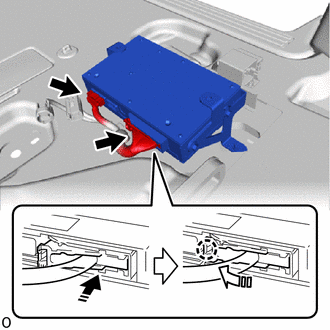

|
Connector |

|
Install in this Direction (1) |

|
Install in this Direction (2) |
Connect the 2 connectors.
86183E
5.INSTALL AUDIO AMPLIFIER COVER
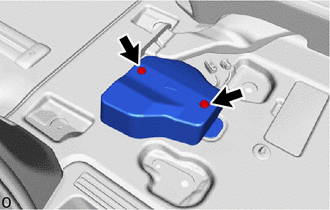
Install the audio amplifier cover with the 2 clips.
6.INSTALL FRONT SEAT ASSEMBLY RH
- HINT:
-
Use the same procedure described for the LH side.
- ··
for Separate Seat Type:
·for Sliding Bench Seat Type:
7. INITIALIZATION AFTER RECONNECTING BATTERY TERMINAL
- HINT:
-
When disconnecting and reconnecting the battery, there is an automatic learning function that completes learning when the respective system is used.
8. PERFORM DIAGNOSTIC SYSTEM CHECK (w/ Front Seat Side Airbag)
9.CHECK SRS WARNING LIGHT (w/ Front Seat Side Airbag)
10.INSPECT SEAT BELT WARNING SYSTEM (w/ Front Seat Side Airbag)
11.INSPECT FRONT SEAT ASSEMBLY (for Power Seat)