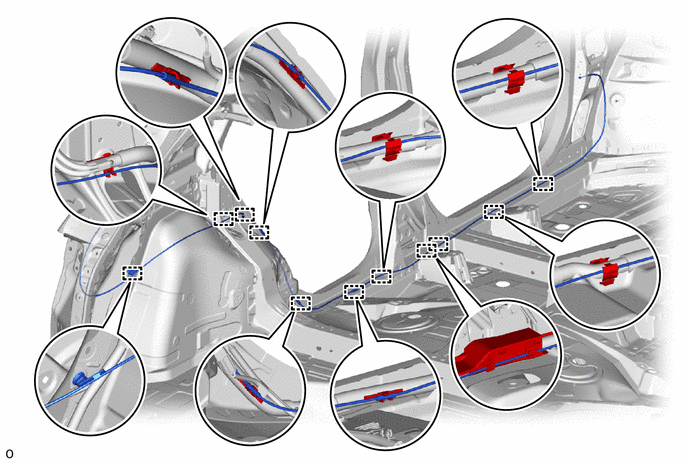
DOOR / HATCH FUEL LID LOCK CONTROL CABLE ASSEMBLY REMOVAL
CAUTION / NOTICE / HINT
The necessary procedures (adjustment, calibration, initialization, or registration) that must be performed after parts are removed and installed, or replaced during the fuel lid lock control cable assembly removal/installation are shown below.
- HINT:
-
When the cable is disconnected / reconnected to the auxiliary battery terminal, systems temporarily stop operating. However, each system has a function that completes learning the first time the system is used.
- ·
Learning completes when vehicle is driven
Effect/Inoperative Function When Necessary Procedures are not Performed Necessary Procedures Link Stop and start system Drive the vehicle until stop and start control is permitted (approximately 5 to 60 minutes). (  202409,999999,_51,_083056,_0402418,RM100000002NSFO,)
Lane tracing assist system Drive the vehicle straight ahead at 15 km/h (10 mph) or more for 1 second or more. ( 201910,999999,_58,_083101,_0401880,RM100000001JE9I,)
Pre-collision system
·Learning completes when vehicle is operated normally
Effect/Inoperative Function When Necessary Procedures are not Performed Necessary Procedures Link *: w/ Power back door system
Power back door function* Fully close the back door by hand.
- HINT:
-
Initialization is not necessary if the above procedures are performed while the back door is closed.
( 202304,999999,_59,_083093,_0584672,RM1000000029PGT,)
Power door lock control system If the back door is locked and therefore cannot be opened, it is necessary to unlock the back door using the door control switch, electrical key transmitter sub-assembly switch. ( 202409,999999,_58,_083092,_0403003,RM100000002NS90,)
Air conditioning system After the ignition switch is turned to ON, the servo motor standard position is recognized -
PROCEDURE

 1. PRECAUTION
- CAUTION:
-
-
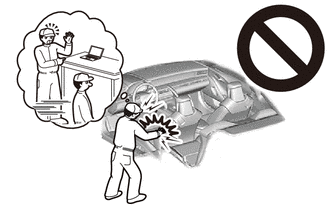
Be sure to read Precaution thoroughly before servicing.
- ·
- NOTICE:
-
After turning the ignition switch off, waiting time may be required before disconnecting the cable from the auxiliary negative (-) battery terminal.
2.REMOVE FRONT SEAT ASSEMBLY LH
for SFTM Made Manual Seat:
for GTMC Made Manual Seat:
for SFTM Made Power Seat:
for GTMC Made Power Seat:
3.REMOVE REAR SEAT ASSEMBLY
73706
4.REMOVE CHILD RESTRAINT SEAT ANCHOR BRACKET SUB-ASSEMBLY LH
58410B
5.REMOVE DECK BOARD ASSEMBLY
58417H
6.REMOVE REAR NO. 3 FLOOR BOARD
58386
7.REMOVE REAR FLOOR FINISH PLATE
58577E
8.REMOVE REAR NO. 1 FLOOR MAT SUPPORT SIDE PLATE
67914B
9.REMOVE FRONT DOOR SCUFF PLATE LH
62112
10.REMOVE COWL SIDE TRIM BOARD LH
62312B
11.REMOVE FRONT DOOR OPENING TRIM WEATHERSTRIP LH
- HINT:
-
Remove the front door opening trim weatherstrip LH so that the center pillar lower garnish LH can be removed.
67918E
12.REMOVE REAR DOOR SCUFF PLATE LH
62332C
13.REMOVE REAR DOOR OPENING TRIM WEATHERSTRIP LH
- HINT:
-
Remove the rear door opening trim weatherstrip LH so that the center pillar lower garnish LH and rear seat No. 3 side garnish LH can be removed.
73233
14.REMOVE OUTER LAP BELT ANCHOR COVER
73220
15.REMOVE FRONT SEAT OUTER BELT ASSEMBLY LH
62414A
16.REMOVE LOWER CENTER PILLAR GARNISH LH
62552F
17.REMOVE REAR SEAT SIDE GARNISH LH
73708A
18.REMOVE TETHER ANCHOR BRACKET SET
58460D
19.REMOVE LUGGAGE HOLD BELT STRIKER ASSEMBLY
64740E
20.REMOVE DECK TRIM SIDE PANEL ASSEMBLY LH
77306
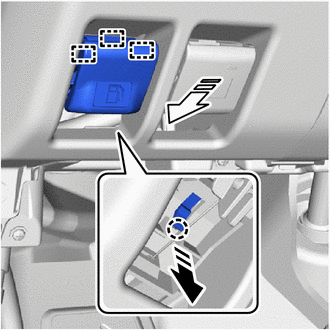
21.REMOVE FUEL LID LOCK OPEN LEVER SUB-ASSEMBLY

|
Remove in this Direction (1) |

|
Remove in this Direction (2) |
Detach the claw and guide to remove the fuel lid lock open lever sub-assembly in the direction indicated by the arrow as shown in the illustration.
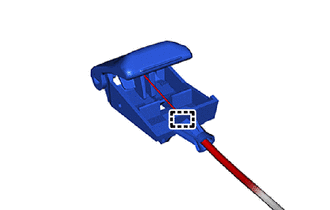
Detach the clamp and disconnect the fuel lid lock open lever sub-assembly from the fuel lid lock control cable assembly.
77377
22.REMOVE FUEL FILLER OPENING LID LOCK RETAINER
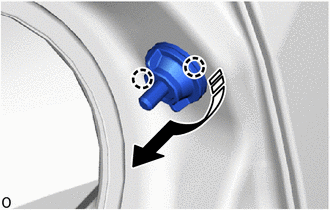
|
|
Remove in this Direction |
Rotate the fuel filler opening lid lock retainer 90° clockwise and detach the claw as shown in the illustration.
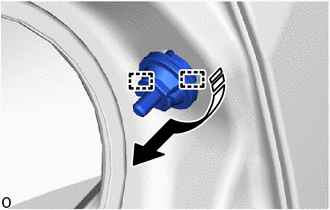
|
|
Remove in this Direction |
Rotate the fuel filler opening lid lock retainer a further 90° and detach the guide, then pull out the fuel filler opening lid lock retainer as shown in the illustration.
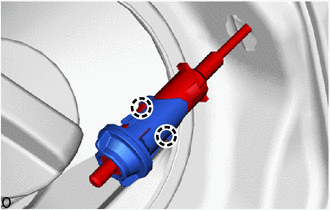
Detach the claw and remove the fuel filler opening lid lock retainer.
77035
23.REMOVE FUEL LID LOCK CONTROL CABLE SUB-ASSEMBLY
Partially remove the floor carpet.
- HINT:
-
It is not necessary to fully remove the floor carpet. Partially remove it so that the fuel lid lock control cable sub-assembly can be removed.
Detach the clamp and remove the fuel lid lock control cable sub-assembly as shown in the illustration.