SEAT BELT REAR SEAT INNER BELT ASSEMBLY(for Manual Captain Seat) INSTALLATION
CAUTION / NOTICE / HINT
- CAUTION:
- ·
Wear protective gloves. Sharp areas on the parts may injure your hands.
·There is risk of injury.
- HINT:
- ·
Use the same procedure for RHD and LHD vehicles.
·The procedures listed below are for LHD vehicles.
·Use the same procedure for the RH and LH sides.
·The procedure listed below is for the LH side.
·The procedure listed below is a representative example.
·Use the same procedure for first row and second row, unless otherwise specified.
PROCEDURE

 73380D
1.INSTALL REAR SEAT INNER BELT ASSEMBLY
73380D
1.INSTALL REAR SEAT INNER BELT ASSEMBLY
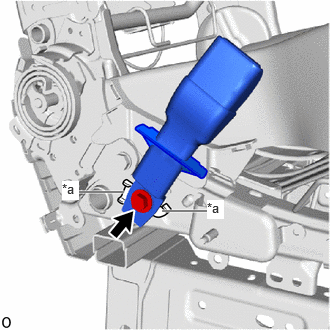
| *a | Protruding Part |
Install the rear seat inner belt assembly with the bolt.
- Torque:
- 42 N*m (428 kgf*cm, 31 ft.*lbf)
- NOTICE:
-
Do not allow the anchor part of the rear seat inner belt assembly to overlap the protruding part.
for First Row:
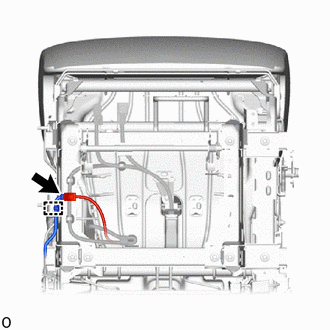
Connect the connector and attach the clamp.
for Second Row:
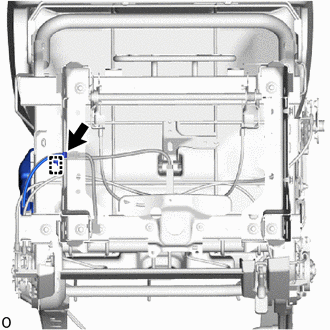
w/o Power Supply Unit:
Connect the connector and attach the clamp.
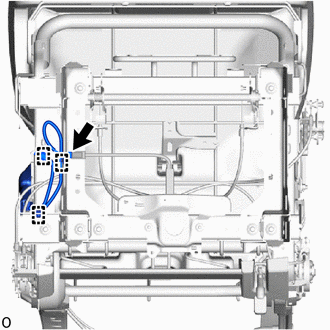
w/ Power Supply Unit:
Connect the connector and attach the claw and clamp.
71826A
2.INSTALL NO. 1 SEAT INNER CUSHION MOULDING RH
78060C
3.INSTALL NO. 1 SEAT SIDE TABLE ASSEMBLY (for First Row, RH Side)
71849K
4.INSTALL SEAT SIDE TABLE ADJUSTER COVER CAP (for First Row, RH Side)
5.INSTALL REAR SEAT ASSEMBLY LH
6.CONNECT CABLE TO NEGATIVE BATTERY TERMINAL (for First Row)
7. INITIALIZATION AFTER RECONNECTING BATTERY TERMINAL (for First Row)
- HINT:
-
When disconnecting and reconnecting the battery, there is an automatic learning function that completes learning when the respective system is used.
8. PERFORM DIAGNOSTIC SYSTEM CHECK (for First Row)
9.CHECK SRS WARNING LIGHT (for First Row)
10.INSPECT SEAT BELT WARNING SYSTEM