LIGHTING (EXT) HEADLIGHT ASSEMBLY REMOVAL
CAUTION / NOTICE / HINT
The necessary procedures (adjustment, calibration, initialization, or registration) that must be performed after parts are removed and installed, or replaced during headlight assembly removal/installation are shown below.
| Replaced Part or Performed Procedures | Necessary Procedures | Effect/Inoperative Function When Necessary Procedures are not Performed | Link |
|---|---|---|---|
|
*: Even when not replacing the part, it is necessary to perform the specified necessary procedures after installation. |
|||
| Front bumper assembly* | Front television camera view adjustment | Panoramic View Monitor System | ( 202409,999999,_56,_111825,_0500432,RM100000002O1F6,) 202409,999999,_56,_111825,_0500432,RM100000002O1F6,)
|
Replacement or removal and installation of 2 or more parts:
·
Front television camera assembly, radiator grille sub-assembly or front bumper assembly ·
Rear television camera assembly ·
Side television camera assembly LH or outer rear view mirror assembly LH ·
Side television camera assembly RH or outer rear view mirror assembly RH |
Television camera view adjustment | Panoramic View Monitor System | (202409,999999,_56,_111825,_0500432,RM100000002O1F6,)
|
- HINT:
- ·
Use the same procedure for the RH side and LH side.
·The following procedure is for the LH side.
PROCEDURE

 1.REMOVE FRONT BUMPER ASSEMBLY
for SFTM Made:
for GTMC Made:
81150
2.REMOVE HEADLIGHT ASSEMBLY
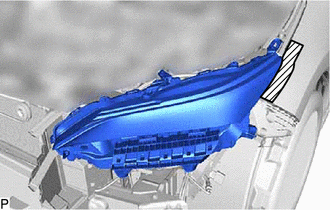

|
Protective Tape |
Apply protective tape around the headlight assembly as shown in the illustration.

| *a | Bolt |
| *b | Screw |
Remove the bolt and 3 screws.
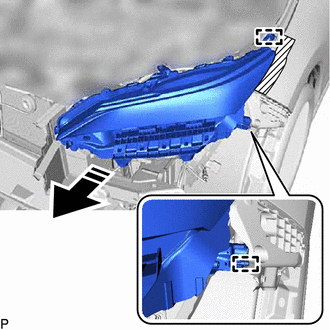

|
Remove in this Direction |
Disengage the 2 guides to separate the headlight assembly as shown in the illustration.
Disconnect the 2 connectors to remove the headlight assembly.
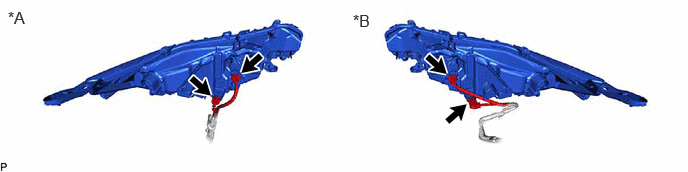
| *A | for LH Side | *B | for RH Side |