SEAT BELT SEAT BELT WARNING SYSTEM(for NR Series Engine) Rear Seat Belt Warning Light Malfunction
DESCRIPTION
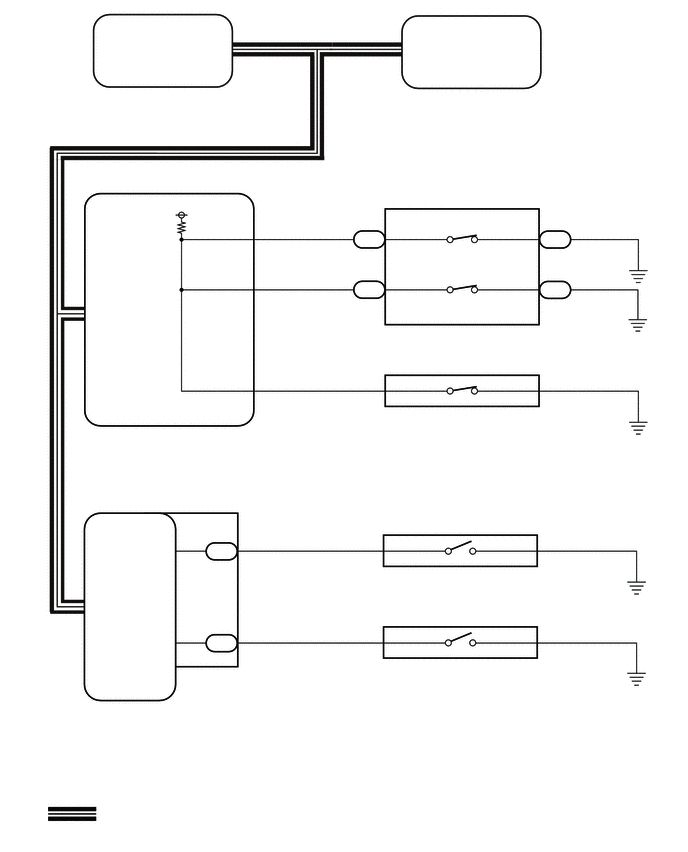
The main body ECU (multiplex network body ECU) detects whether either the rear doors are open or closed based on the courtesy light switch condition and then sends the rear door status signal to the combination meter assembly. The combination meter assembly detects rear seat belt state. The rear seat belt warning light on the combination meter assembly illuminates, blinks or turns off in accordance with the rear door state, vehicle speed and rear seat belt state.
WIRING DIAGRAM
CAUTION / NOTICE / HINT
- NOTICE:
- ·
The seat belt warning system uses the CAN communication system. First, confirm that there is no malfunction in the CAN communication system. Refer to the How to Proceed with Troubleshooting procedure.
·Inspect the fuses for circuits related to this system before performing the following procedure.
PROCEDURE
Connect the GTS to the DLC3.
Turn the ignition switch to ON.
Turn the GTS on.
Enter the following menus: Body Electrical / Main Body / Data List.
Read the Data List according to the display on the GTS.
- Body Electrical > Main Body > Data List
-
Tester Display Measurement Item Range Normal Condition Diagnostic Note RR Door Courtesy SW Rear door courtesy light switch RH ON or OFF ON: Rear door RH open
OFF: Rear door RH closed- RL Door Courtesy SW Rear door courtesy light switch LH ON or OFF ON: Rear door LH open
OFF: Rear door LH closed-
- Body Electrical > Main Body > Data List
-
Tester Display RR Door Courtesy SW RL Door Courtesy SW - 50003 123 24,25
- OK:
The GTS display changes correctly in response to the rear door condition.
- Result:
Proceed to OK NG
OK
NG

| *1 | Rear Seat Belt Warning Light (Combination Meter Assembly) |
| *a | LH |
| *b | Center |
| *c | RH |
Check the rear seat belt warning function.
- Result:
Result Proceed to The rear seat belt warning lights operation is normal A The rear seat belt warning lights (all seats) do not operate normally B The rear seat belt warning light (RH) does not operate normally C The rear seat belt warning light (center) does not operate normally D The rear seat belt warning light (LH) does not operate normally E
A
B
C
D
E
Connect the GTS to the DLC3.
Turn the ignition switch to ON.
Turn the GTS on.
Enter the following menus: Body Electrical / Combination Meter / Data List.
Read the Data List according to the display on the GTS.
- Body Electrical > Combination Meter > Data List
-
Tester Display Measurement Item Range Normal Condition Diagnostic Note Rear Right Seat Buckle / Occupant Detection Warning Switch Rear seat inner with center belt RH buckle signal ON or OFF OFF: Rear RH seat belt fastened
ON: Rear RH seat belt not fastened-
- Body Electrical > Combination Meter > Data List
-
Tester Display Rear Right Seat Buckle / Occupant Detection Warning Switch - 50003 409 30
- Result:
Result Proceed to ON or OFF does not appear on the tester screen according to the rear seat belt condition A ON or OFF appears on the tester screen according to the rear seat belt condition B
A
B
Disconnect the I5 combination meter assembly connector.
Disconnect the O84 rear seat 3 point type belt assembly RH connector.
Measure the resistance according to the value(s) in the table below.
- Standard Resistance:
Tester Connection Condition Specified Condition I5-35 (RRSB) - O84-5 (RBR+) Always Below 1 Ω I5-35 (RRSB) or O84-5 (RBR+) - Body ground Always 10 kΩ or higher O84-4 (RBR-) - Body ground Always Below 1 Ω
- Result:
Proceed to OK NG
OK
NG
Connect the GTS to the DLC3.
Turn the ignition switch to ON.
Turn the GTS on.
Enter the following menus: Body Electrical / Combination Meter / Data List.
Read the Data List according to the display on the GTS.
- Body Electrical > Combination Meter > Data List
-
Tester Display Measurement Item Range Normal Condition Diagnostic Note Rear Center Seat Buckle / Occupant Detection Warning Switch Rear seat inner with center belt LH (for center) buckle signal ON or OFF OFF: Rear LH seat belt (for center) fastened
ON: Rear LH seat belt (for center) not fastened-
- Body Electrical > Combination Meter > Data List
-
Tester Display Rear Center Seat Buckle / Occupant Detection Warning Switch - 50003 409 32
- Result:
Result Proceed to ON or OFF does not appear on the tester screen according to the rear seat belt condition A ON or OFF appears on the tester screen according to the rear seat belt condition B
A
B
Disconnect the I5 combination meter assembly connector.
Disconnect the O86 rear seat inner with center belt assembly LH (for center) connector.
Measure the resistance according to the value(s) in the table below.
- Standard Resistance:
Tester Connection Condition Specified Condition I5-19 (RCSB) - O86-1 (CBR+) Always Below 1 Ω I5-19 (RCSB) or O86-1 (CBR+) - Body ground Always 10 kΩ or higher O86-2 (CBR-) - Body ground Always Below 1 Ω
- Result:
Proceed to OK NG
OK
NG
Connect the GTS to the DLC3.
Turn the ignition switch to ON.
Turn the GTS on.
Enter the following menus: Body Electrical / Combination Meter / Data List.
Read the Data List according to the display on the GTS.
- Body Electrical > Combination Meter > Data List
-
Tester Display Measurement Item Range Normal Condition Diagnostic Note Rear Left Seat Buckle / Occupant Detection Warning Switch Rear seat inner with center belt LH (for LH) buckle signal ON or OFF OFF: Rear LH seat belt (for LH) fastened
ON: Rear LH seat belt (for LH) not fastened-
- Body Electrical > Combination Meter > Data List
-
Tester Display Rear Left Seat Buckle / Occupant Detection Warning Switch - 50003 409 31
- Result:
Result Proceed to ON or OFF does not appear on the tester screen according to the rear seat belt condition A ON or OFF appears on the tester screen according to the rear seat belt condition B
A
B
Disconnect the I5 combination meter assembly connector.
Disconnect the O85 rear seat inner with center belt assembly LH (for LH) connector.
Measure the resistance according to the value(s) in the table below.
- Standard Resistance:
Tester Connection Condition Specified Condition I5-36 (RLSB) - O85-5 (LBR+) Always Below 1 Ω I5-36 (RLSB) or O85-5 (LBR+) - Body ground Always 10 kΩ or higher O85-4 (LBR-) - Body ground Always Below 1 Ω
- Result:
Proceed to OK NG
OK
NG