SEAT FRONT SEAT ASSEMBLY(for GTMC Made Power Seat) REMOVAL
CAUTION / NOTICE / HINT
The necessary procedures (adjustment, calibration, initialization, or registration) that must be performed after parts are removed and installed, or replaced during front seat assembly removal/installation are shown below.
| Replaced Part or Performed Procedure | Necessary Procedure | Effect/Inoperative Function when Necessary Procedure not Performed | Link |
|---|---|---|---|
|
*: Even when not replacing the part, it is necessary to perform the specified necessary procedures after installation. |
|||
| Disconnect cable from negative auxiliary battery terminal | Reset back door close position | Power Back Door System | ( 202111,999999,_59,_111831,_0505274,RM100000001ZMEG,) 202111,999999,_59,_111831,_0505274,RM100000001ZMEG,)
|
·
Position control ECU assembly* ·
Reclining motor (Front seatback frame sub-assembly LH)* ·
Slide motor (Front seat adjuster assembly LH)* ·
Power seat lifter motor assembly LH (Front seat adjuster assembly LH)* ·
Power seat tilt motor assembly LH (Front seat adjuster assembly LH)* |
Initialize position control ECU | Front Power Seat Control System (w/ Memory) | (202111,999999,_58,_111839,_0505694,RM10000000206XI,)
|
| Replaced Part or Performed Procedure | Necessary Procedure | Effect/Inoperative Function when Necessary Procedure not Performed | Link |
|---|---|---|---|
|
*: Even when not replacing the part, it is necessary to perform the specified necessary procedures after installation. |
|||
| Disconnect cable from negative auxiliary battery terminal | Reset back door close position | Power Back Door System | (202111,999999,_59,_111831,_0505274,RM100000001ZMEG,)
|
·
Position control ECU assembly* ·
Reclining motor (Front seatback frame sub-assembly LH)* ·
Slide motor (Front seat adjuster assembly LH)* ·
Power seat lifter motor assembly LH (Front seat adjuster assembly LH)* ·
Power seat tilt motor assembly LH (Front seat adjuster assembly LH)* |
Initialize position control ECU | Front Power Seat Control System (w/ Memory) | (202111,999999,_58,_111839,_0505694,RM10000000206XI,)
|
- CAUTION:
- ·
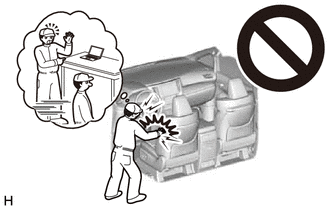
Be sure to read Precaution thoroughly before servicing.
·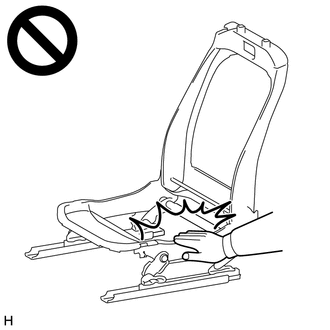
Wear protective gloves. Sharp areas on the parts may injure your hands.
- NOTICE:
-
If the front seat airbag assembly has been deployed, replace the front seat airbag assembly, separate type front seatback spring assembly, separate type front seatback pad and separate type front seatback cover with the necessary parts in accordance with the extent of the collision damage.
- HINT:
- ·
When the cable is disconnected / reconnected to the auxiliary battery terminal, systems temporarily stop operating. However, each system has a function that completes learning the first time the system is used.
for HV Model:-Learning completes when vehicle is driven Effect/Inoperative Function when Necessary Procedure not Performed Necessary Procedure Link Lane Tracing Assist System Drive the vehicle straight ahead at 35 km/h (22 mph) or more for 5 seconds or more. ( 202111,999999,_95,_111850,_0502173,RM100000001Z92I,)
Pre-collision System
-Learning completes when vehicle is operated normally Effect/Inoperative Function when Necessary Procedure not Performed Necessary Procedure Link Power Door Lock Control System
·Back door opener
Perform door unlock operation with door control switch or electrical key transmitter sub-assembly switch. ( 202111,999999,_58,_111830,_0505351,RM100000001ZMT3,)
Air Conditioning System After the ignition switch is turned to ON, the servo motor standard position is recognized. -
for Gasoline Model:-Learning completes when vehicle is driven Effect/Inoperative Function when Necessary Procedure not Performed Necessary Procedure Link Lane Tracing Assist System Drive the vehicle straight ahead at 15 km/h (10 mph) or more for 1 seconds or more. ( 202111,999999,_95,_111850,_0502173,RM100000001Z92I,)
Pre-collision System Stop and Start System Idle the engine for approximately 5 to 60 minutes or drive the vehicle until stop and start control is permitted ( 202406,999999,_51,_111803,_0509671,RM100000002KOGF,)
-Learning completes when vehicle is operated normally Effect/Inoperative Function when Necessary Procedure not Performed Necessary Procedure Link Power Door Lock Control System
·Back door opener
Perform door unlock operation with door control switch or electrical key transmitter sub-assembly switch. ( 202111,999999,_58,_111830,_0505351,RM100000001ZMT3,)
Air Conditioning System After the ignition switch is turned to ON, the servo motor standard position is recognized. -
- ·
Use the same procedure for the RH side and LH side.
·The following procedure is for the LH side.
PROCEDURE

 1. PRECAUTION
- NOTICE:
-
After the ignition switch is turned off, there may be a waiting time before disconnecting the negative (-) auxiliary battery terminal.
58416K
2.REMOVE REAR NO. 2 FLOOR BOARD (for HV Model)
65351A
3.REMOVE BATTERY HOLE COVER (for HV Model)
71910A
4.REMOVE FRONT SEAT HEADREST ASSEMBLY
Remove the front seat headrest assembly from the front seat assembly.
72124
5.REMOVE FRONT OUTER SEAT TRACK BRACKET COVER
Operate the slide and vertical power seat switch knob and move the front seat assembly to the rearmost position.
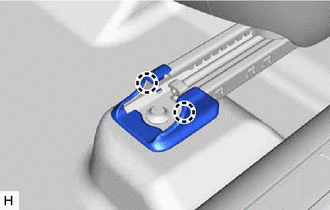
Disengage the 2 claws to remove the front outer seat track bracket cover.
72128A
6.REMOVE FRONT INNER SEAT TRACK BRACKET COVER
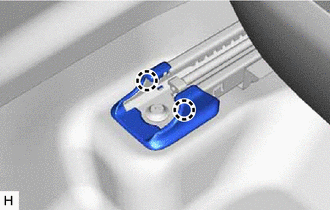
Disengage the 2 claws to remove the front inner seat track bracket cover.
72138N
7.REMOVE REAR OUTER SEAT TRACK BRACKET COVER
Operate the slide and vertical power seat switch knob and move the front seat assembly to the foremost position.
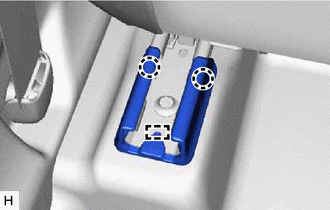
Disengage the 2 claws and guide to remove the rear outer seat track bracket cover.
72158E
8.REMOVE REAR INNER SEAT TRACK BRACKET COVER
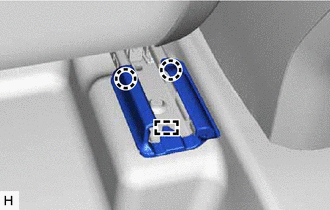
Disengage the 2 claws and guide to remove the rear inner seat track bracket cover.
9.REMOVE FRONT SEAT ASSEMBLY
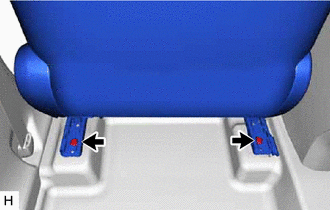
Using a T50 "TORX" socket wrench, remove the 2 bolts on the rear side of the front seat assembly.
Operate the slide and vertical power seat switch knob and move the front seat assembly to the rearmost position.
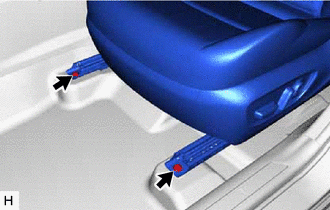
Using a T50 "TORX" socket wrench, remove the 2 bolts on the front side of the front seat assembly.
Operate the reclining power seat switch knob and move the seatback to the upright position.
Operate the slide and vertical power seat switch knob and move the front seat assembly to the center position.
for Driver Side:
Operate the slide and vertical power seat switch knob and move the front seat assembly to the uppermost position.
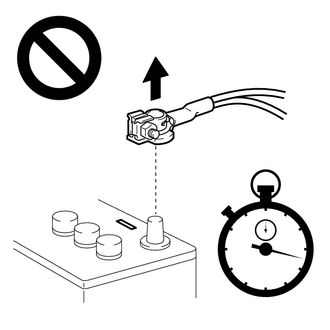
Disconnect the cable from the negative (-) auxiliary battery terminal.
for M20C-FKS, M20D-FKS: Click hereGeneral>MAINTENANCE>M20C-FKS, M20D-FKS BATTERY>REMOVAL202406,999999,_V1,_112220,_0503321,RM100000002MSAX_01_0013,
for A25D-FXS, A25F-FXS: Click hereGeneral>MAINTENANCE>A25D-FXS, A25F-FXS AUXILIARY BATTERY>REMOVAL202406,999999,_V1,_112220,_0503322,RM100000002MSAY_01_0013,
- CAUTION:
-
-
Wait at least 60 seconds after disconnecting the cable from the negative (-) auxiliary battery terminal to disable the SRS system.
Disconnect the front seat airbag assembly connector under the front seat assembly.
- NOTICE:
-
When disconnecting any airbag connector, take care not to damage the airbag wire harness.
- HINT:
-
Refer to How to Connect or Disconnect Airbag Connector.
Disconnect each connector and disengage each clamp under the front seat assembly.
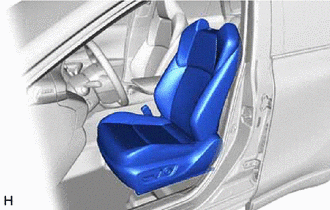
Remove the front seat assembly.
- NOTICE:
-
Be careful not to damage the vehicle body.