EXTERIOR PANELS / TRIM WINDSHIELD OUTSIDE MOULDING INSTALLATION
CAUTION / NOTICE / HINT
- HINT:
- ·
Use the same procedure for the RH side and LH side.
·The following procedure is for the LH side.
PROCEDURE

 75547C
1.INSTALL NO. 3 WINDSHIELD OUTSIDE MOULDING CLIP
75547C
1.INSTALL NO. 3 WINDSHIELD OUTSIDE MOULDING CLIP
- HINT:
-
Perform the following procedure only when replacement of a No. 3 windshield outside moulding clip is necessary.
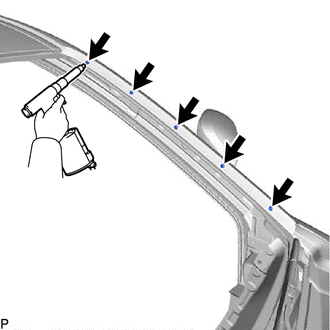
Using a riveter with a nose piece, install 5 new No. 3 windshield outside moulding clips.
- NOTICE:
-
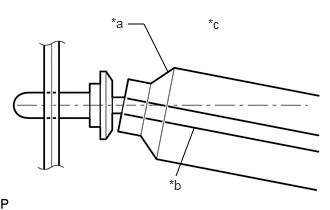 1.75,0.75 1.5,0.25 1.5,0.25 1.333,0.25 false 1.833,1.833 2.021,1.333 false 1.156,0.156 1.469,0.313 0.313,0.156 10 false *a 1.76,1.844 2.073,2 0.313,0.156 10 false *b 2.167,0.167 2.479,0.323 0.313,0.156 10 false *c
*a Riveter *b Mandrel *c Incorrect
- ·
Do not pry the No. 3 windshield outside moulding clip with the riveter, as this will cause damage to the riveter and mandrel.
- ·
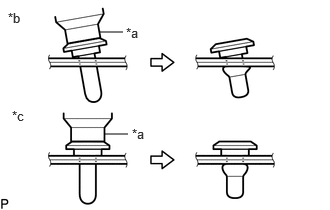 1.031,0.333 1.281,0.333 false 1.083,1.396 1.333,1.396 false 1.313,0.26 1.625,0.417 0.313,0.156 10 false *a 0.083,0.104 0.427,0.469 0.344,0.365 10 false *b 1.375,1.313 1.688,1.469 0.313,0.156 10 false *a 0.125,1.125 0.51,1.438 0.385,0.313 10 false *c
*a Riveter *b Incorrect *c Correct
Confirm that the No. 3 windshield outside moulding clips are seated properly against the vehicle body.
- ·
Do not tilt the riveter when installing the No. 3 windshield outside moulding clip to the vehicle body.
- HINT:
-
If the mandrel of the No. 3 windshield outside moulding clip does not come off on the first operation of the rivet gun, slide the rivet gun forward on the mandrel and operate it again.
Install the windshield glass sub-assembly.
75545B
2.INSTALL NO. 1 WINDSHIELD OUTSIDE MOULDING CLIP
- HINT:
-
Perform the following procedure only when replacement of a No. 1 windshield outside moulding clip is necessary.
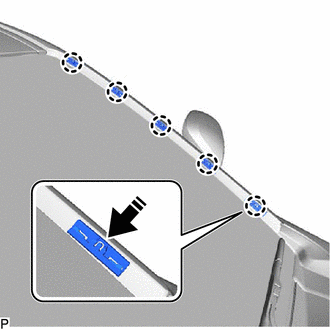

|
Install in this Direction |
Engage the 5 claws to install the 5 No. 1 windshield outside moulding clips as shown in the illustration.
75536D
3.INSTALL WINDSHIELD OUTSIDE LOWER MOULDING
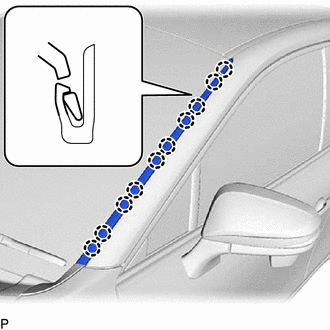
Engage the 10 claws to install the windshield outside lower moulding.
53867H
4.INSTALL FRONT FENDER TO COWL SIDE SEAL