MAINTENANCE K121F CONTINUOUSLY VARIABLE TRANSAXLE FLUID REPLACEMENT
CAUTION / NOTICE / HINT
The necessary procedures (adjustment, calibration, initialization, or registration) that must be performed after parts are removed, installed, or replaced during CVT fluid replacement are shown below.
| Replacement Part or Procedure | Necessary Procedure | Effect/Inoperative when not Performed | Link |
|---|---|---|---|
| CVT fluid | ATF thermal degradation estimate reset | The value of the Data List item "ATF Thermal Degradation Estimate" is not estimated correctly | ( 202409,999999,_52,_138817,_0596468,RM100000002NRBH,) 202409,999999,_52,_138817,_0596468,RM100000002NRBH,)
|
| Air bleed oil pump with motor assembly | Stop and start system | (202409,999999,_51,_083056,_0402418,RM100000002NSFT,)
|
PROCEDURE

 53895B
1.REMOVE FRONT FENDER FRONT SPLASH SHIELD RH
53895B
1.REMOVE FRONT FENDER FRONT SPLASH SHIELD RH
53896B
2.REMOVE FRONT FENDER FRONT SPLASH SHIELD LH
51441
3.REMOVE NO. 1 ENGINE UNDER COVER
51420
4.REMOVE NO. 2 ENGINE UNDER COVER ASSEMBLY
53737D
5.REMOVE FRONT FENDER APRON SEAL LH
6.REPLACE CONTINUOUSLY VARIABLE TRANSAXLE FLUID
Lift the vehicle. [#1]
- NOTICE:
-
Set the vehicle on a lift so that the vehicle is kept level when it is lifted up (make sure that the tilt angle from the front to rear and side to side of the vehicle is within +/- 1°).
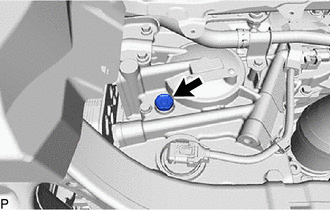
Remove the refill plug and gasket from the rear transaxle case sub-assembly. [#2]
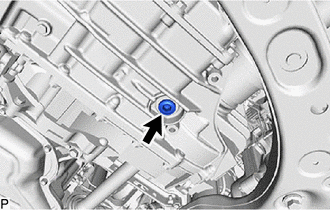
Using a 10 mm hexagon socket wrench, remove the overflow plug and gasket from the transaxle case sub-assembly and drain the fluid. [#3]
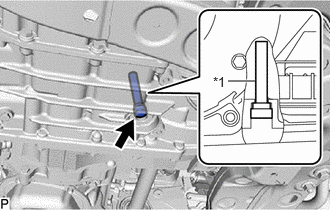
| *1 | Overflow (CVT) Tube |
Using a 6 mm hexagon socket wrench, remove the overflow (CVT) tube from the transaxle case sub-assembly and drain the fluid. [#4]
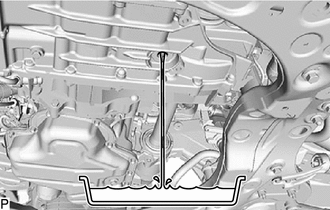
Measure the amount of fluid drained. [#5]
- HINT:
-
Add the same amount of fluid in step [#8].
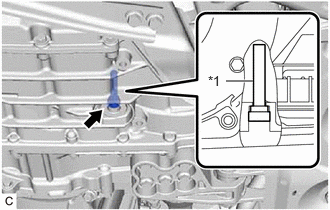
| *1 | Overflow (CVT) Tube |
Using a 6 mm hexagon socket wrench, install the overflow (CVT) tube to the transaxle case sub-assembly. [#6]
- Torque:
- 0.8 N*m (8 kgf*cm, 7 in.*lbf)
Using a 10 mm hexagon socket wrench, temporarily install the overflow plug and gasket to the transaxle case sub-assembly. [#7]
- HINT:
-
Reuse the old gasket as the overflow plug will be removed again to adjust the fluid level.
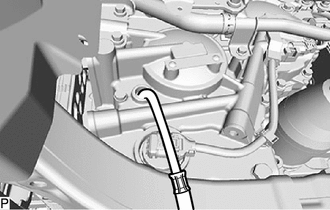
Add fluid to the refill hole using the same amount of fluid drained in step [#5]. [#8]
- NOTICE:
-
Use Toyota Genuine CVT fluid FE.
-
Using CVT (Continuously Variable Transaxle) fluid other than the above type may cause abnormal noise or vibration, or damage the CVT (Continuously Variable Transaxle) of your vehicle.
Temporarily install the refill plug and gasket to the rear transaxle case sub-assembly. [#9]
- HINT:
-
Reuse the old gasket as the refill plug will be removed again to adjust the fluid level.
Lower the vehicle. [#10]
Start the engine. [#11]
Slowly move the shift lever from P to D, and then back to P (keep the shift lever in each position for approximately 3 seconds). [#12]
- HINT:
-
Slowly move the shift lever to circulate the fluid through each part of the continuously variable transaxle assembly.
Allow the engine assembly to idle for 30 seconds to warm it up. [#13]
Turn the ignition switch off. [#14]
Repeat steps [#1] to [#14].
Repeat steps [#1] to [#10].
7.ADD SPECIFIED AMOUNT OF FLUID
8.BLEED AIR FROM OIL PUMP ASSEMBLY
9.ADJUST FLUID TEMPERATURE (when Using the GTS)
10.ADJUST FLUID TEMPERATURE (when Not Using the GTS)
11.ADJUST FLUID LEVEL
12.PERFORM FLUID THERMAL DEGRADATION ESTIMATE RESET
- NOTICE:
-
If approximately 50% or more of the CVT fluid has been replaced during a repair of the transaxle or a similar operation, perform ATF Thermal Degradation Estimate Reset.
13. REBUILD WORK
53737D
14.INSTALL FRONT FENDER APRON SEAL LH
51420
15.INSTALL NO. 2 ENGINE UNDER COVER ASSEMBLY
51441
16.INSTALL NO. 1 ENGINE UNDER COVER
53896B
17.INSTALL FRONT FENDER FRONT SPLASH SHIELD LH
53895B
18.INSTALL FRONT FENDER FRONT SPLASH SHIELD RH