WIPER / WASHER HEADLIGHT CLEANER ACTUATOR REMOVAL
CAUTION / NOTICE / HINT
The necessary procedures (adjustment, calibration, initialization or registration) that must be performed after parts are removed and installed, or replaced during headlight washer actuator sub-assembly removal/installation are shown below.
| Replaced Part or Performed Procedure | Necessary Procedure | Effect/Inoperative Function when Necessary Procedure not Performed | Link |
|---|---|---|---|
| Front bumper assembly (Including removal and installation) | Front television camera view adjustment | Panoramic view monitor system | ( 201906,202310,_56,_079315,_0396274,RM100000001IGR4,202310,999999,_56,_079315,_0396274,RM100000002G5L7,) 201906,202310,_56,_079315,_0396274,RM100000001IGR4,202310,999999,_56,_079315,_0396274,RM100000002G5L7,)
|
PROCEDURE

 52119A
1.REMOVE FRONT BUMPER COVER
52119A
1.REMOVE FRONT BUMPER COVER
85354
2.REMOVE HEADLIGHT WASHER COVER LH
85353
3.REMOVE HEADLIGHT WASHER COVER RH
- HINT:
-
Use the same procedure described for the LH side.
85208A
4.REMOVE HEADLIGHT WASHER ACTUATOR SUB-ASSEMBLY LH
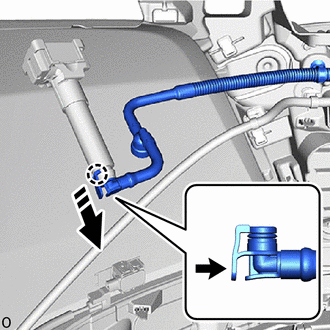

|
Push |

|
Disconnect in this Direction |
Detach the claw and disconnect the headlight cleaner hose as shown in the illustration.
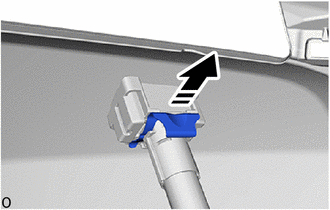
|
|
Remove in this Direction |
Remove the headlight cleaner clamp as shown in the illustration.
Slide the collar as shown in the illustration.
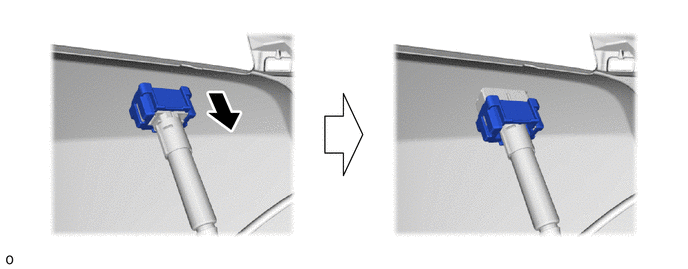
Detach the claw and guide as indicated by the arrows in the order shown in the illustration to remove the headlight washer actuator sub-assembly LH.
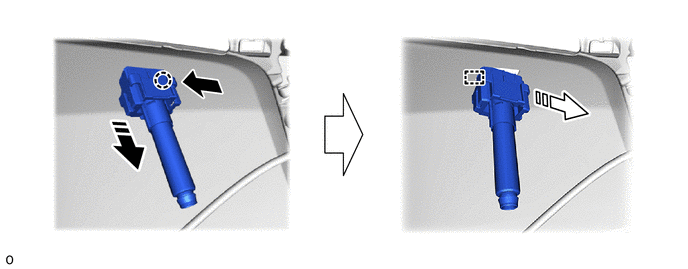
|
|
Push |
|
Remove in this Direction (1) |

|
Remove in this Direction (2) | - | - |
85207A
5.REMOVE HEADLIGHT WASHER ACTUATOR SUB-ASSEMBLY RH
- HINT:
-
Use the same procedure described for the LH side.