HEATING / AIR CONDITIONING REAR EVAPORATOR TEMPERATURE SENSOR(for Rear Air Conditioning System) INSTALLATION
PROCEDURE

 88605C
1.INSTALL NO. 2 AIR CONDITIONING HARNESS ASSEMBLY (REAR EVAPORATOR TEMPERATURE SENSOR)
88605C
1.INSTALL NO. 2 AIR CONDITIONING HARNESS ASSEMBLY (REAR EVAPORATOR TEMPERATURE SENSOR)
- HINT:
-
If damaged during removal, replace the part with a new one.
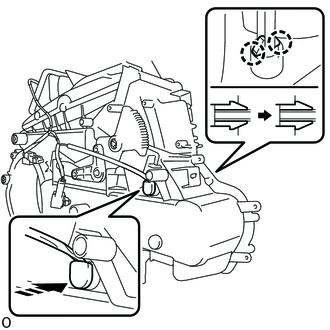

|
Install in this Direction |
Attach the claw to install the No. 2 air conditioning harness assembly (rear evaporator temperature sensor) in the direction indicated by the arrow as shown in the illustration.
88501R
2.INSTALL REAR EVAPORATOR SUB-ASSEMBLY
Remove the vinyl tape from the rear evaporator sub-assembly.
Sufficiently apply compressor oil to 2 new O-rings and the fitting surface of the rear evaporator sub-assembly.
- Compressor oil:
ND-OIL 8 or equivalent
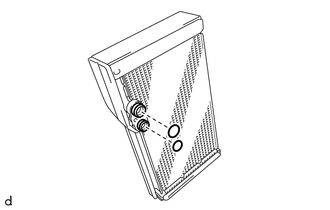
Install the 2 O-rings to the rear evaporator sub-assembly.
- NOTICE:
-
Keep the O-rings and O-ring fitting surfaces free of foreign matter.
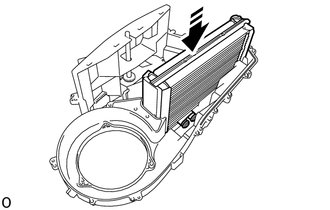
|
|
Install in this Direction |
Install the rear evaporator sub-assembly in the direction indicated by the arrow as shown in the illustration.
Attach the claw and guide to install the heater case LH.
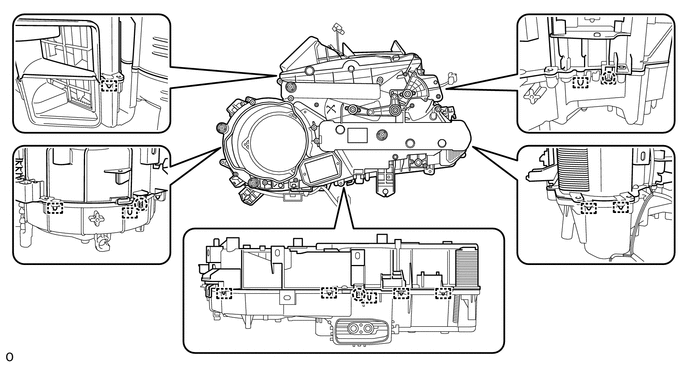
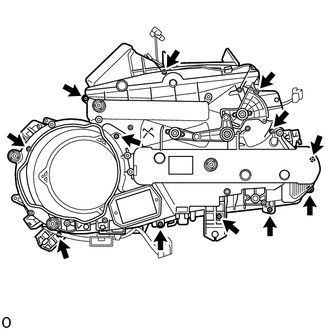
Install the heater case LH with the 12 screws.
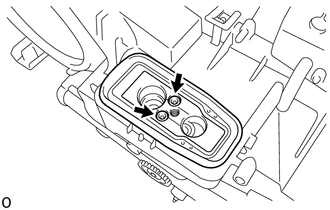
Remove the vinyl tape from the connector tube.
Using a 4 mm hexagon socket wrench, install the connector tube with the 2 bolts.
- Torque:
- 3.5 N*m (36 kgf*cm, 31 in.*lbf)
- NOTICE:
-
Make sure not to cut the O-ring while installing it. (Cut O-rings cannot be installed)
Install the grommet.
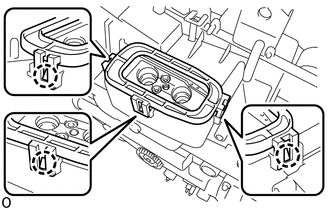
Attach the claw to install the plate.
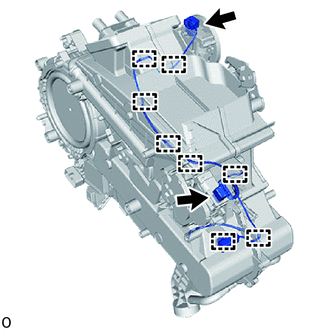
Attach the clamp.
Connect the 2 connectors.
3.INSTALL WIRE HARNESS
87107B
4.INSTALL HEATER RADIATOR UNIT SUB-ASSEMBLY
88710H
5.INSTALL AIR CONDITIONING TUBE AND ACCESSORY ASSEMBLY
87212C
6.INSTALL REAR AIR DUCT
87220
7.INSTALL AIR DUCT ASSEMBLY
87030
8.INSTALL AIR CONDITIONING BLOWER ASSEMBLY