PARK ASSIST / MONITORING PARKING ASSIST MONITOR SYSTEM DIAGNOSIS SYSTEM
PARKING ASSIST MONITOR SYSTEM DIAGNOSTIC MODE
In diagnostic mode for the parking assist monitor system, signals received by the radio and display receiver assembly can be checked and the parking assist monitor system can be calibrated, adjusted and checked using the radio and display receiver assembly.
- NOTICE:
-
Depending on the parts that are replaced or operations that are performed during vehicle inspection or maintenance, calibration of other systems as well as the parking assist monitor system may be needed.
- HINT:
-
The displayed items may differ depending on vehicle specifications.
DIAGNOSIS SCREEN TRANSITION (DURING PARKING ASSIST MONITOR SYSTEM INITIALIZATION)
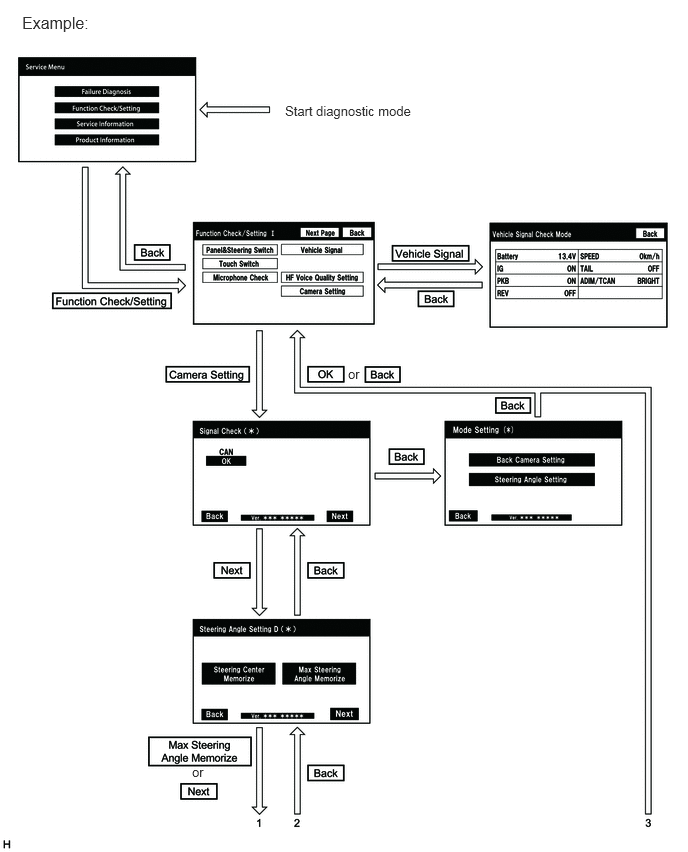
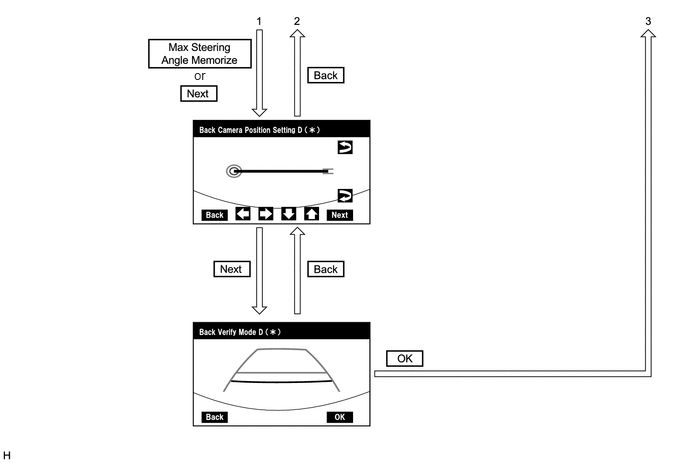
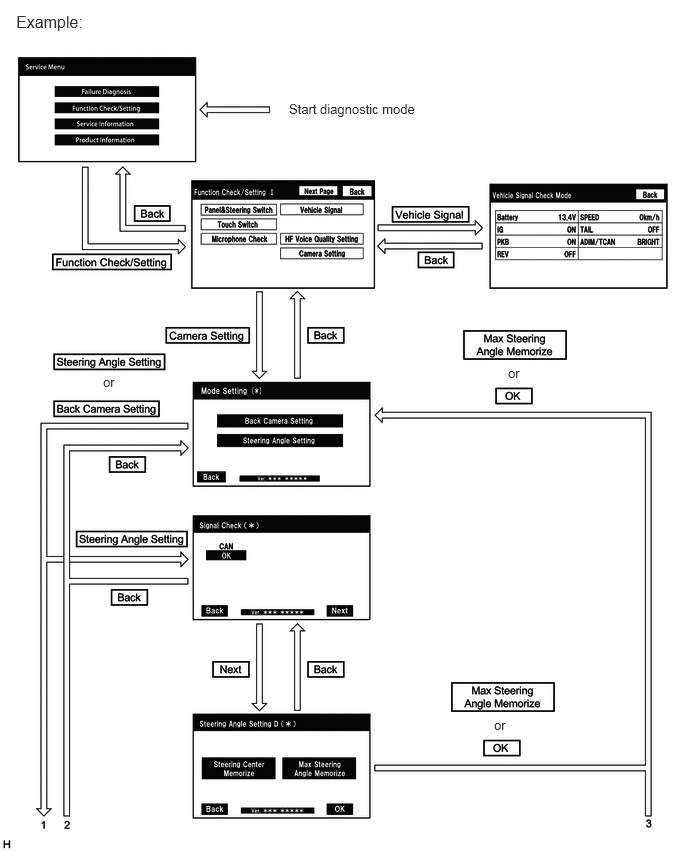
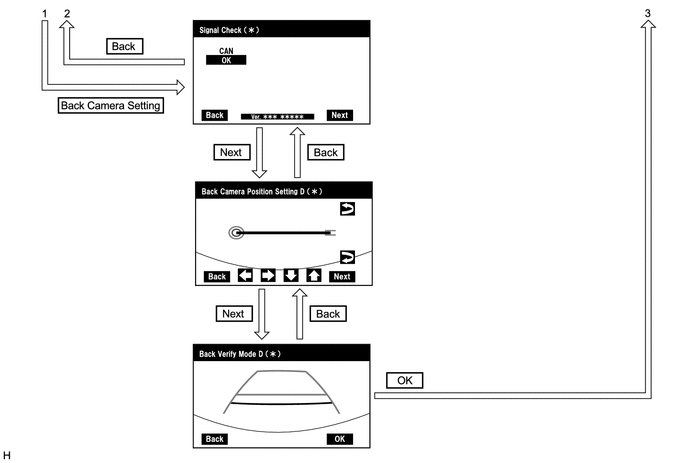
DIAGNOSIS SCREEN TRANSITION (AFTER PARKING ASSIST MONITOR SYSTEM INITIALIZATION)
VEHICLE SIGNAL CHECK
- HINT:
-
Illustrations may differ from the actual vehicle screen depending on the device settings and options. Therefore, some detailed areas may not be shown exactly the same as on the actual vehicle screen.
Start diagnostic mode.
w/ Navigation System:
w/ Audio and Visual System (for Radio and Display Type):
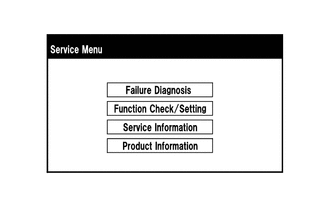
Select "Function Check/Setting" on the "Service Menu" screen to display the "Function Check/Setting I" screen.
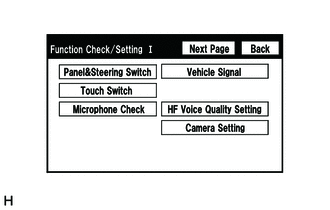
Select "Vehicle Signal" on the "Function Check/Setting I" screen.
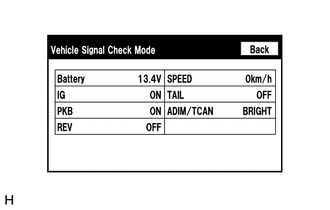
Vehicle Signal Check Mode
When the "Vehicle Signal Check Mode" screen is displayed, check the item displayed for "REV".
w/ Navigation System:
w/ Audio and Visual System (for Radio and Display Type):
- HINT:
- ·
Only conditions having inputs are displayed.
·This screen displays vehicle signals input to the radio and display receiver assembly.
Finish diagnostic mode.
w/ Navigation System:
w/ Audio and Visual System (for Radio and Display Type):
SIGNAL CHECK (PARKING ASSIST MONITOR SYSTEM INPUT SIGNALS)
- HINT:
-
Illustrations may differ from the actual vehicle screen depending on the device settings and options. Therefore, some detailed areas may not be shown exactly the same as on the actual vehicle screen.
Start diagnostic mode.
w/ Navigation System:
w/ Audio and Visual System (for Radio and Display Type):
Select "Function Check/Setting" on the "Service Menu" screen to display the "Function Check/Setting I" screen.
Select "Camera Setting" on the "Function Check/Setting I" screen.
- NOTICE:
-
If the "Camera Setting" selection screen is not displayed, turn the ignition switch off and enter the diagnosis screen after turning the ignition switch to ON once again.
- HINT:
-
After "Camera Setting" is selected, the screen transitions differ depending on whether initialization of the parking assist monitor system was performed after the television camera assembly was replaced.
Parking Assist Monitor System Initialization Screen Transition Not performed Signal Check (*) screen Performed Mode Setting (*) screen
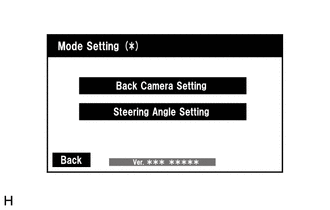
When the screen changes to the "Mode Setting (*)" screen, select "Back Camera Setting" to display the "Signal Check (*)" screen.
- HINT:
-
To select a grayed out item, select and hold the item for 2 seconds or more.
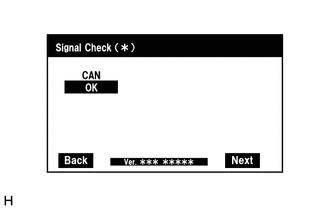
Signal Check
On the "Signal Check (*)" screen, it is possible to inspect the state of signals and check the settings.
| Item | Inspection Detail | Note |
|---|---|---|
| CAN | CAN communication signal input | When "CHK" (red) is displayed, selecting "Next" will not change the screen to the next screen. |
- HINT:
- ·
When "CHK" (red) is displayed, perform inspections based on the result of the following inspections.
·If performing the adjustment after proceeding to the next screen, confirm that all items display "OK" (blue) before selecting "Next".
CAN inspection
- HINT:
-
If "CHK" (red) is displayed for "CAN", check for DTCs and perform troubleshooting based on the output DTCs.
Finish diagnostic mode.
w/ Navigation System:
w/ Audio and Visual System (for Radio and Display Type):
CAMERA SYNCHRONOUS ERROR HISTORY
- HINT:
-
This function is used to check the date and time of occurrence when a camera synchronous error occurs.
Check camera synchronous error history.
Connect the GTS to the DLC3.
Turn the ignition switch to ON.
Turn the GTS on.
Enter the following menus: Body Electrical / Navigation System / Utility / Camera Synchronous Error History.
- Body Electrical > Navigation System > Utility
-
Tester Display Camera Synchronous Error History - 50005 212 4285
When an item is stored for Camera Synchronous Error History, record it before repairing the radio and display receiver assembly and television camera assembly.
- HINT:
-
Camera Synchronous Error History can store up to 5 history data items. If a new camera synchronous error occurs when 5 data items have already been stored, the oldest data is cleared and new data is stored.
Clear camera synchronous error history.
When DTCs are cleared using any of the following operations, Camera Synchronous Error History will be cleared as well.
w/ Navigation System:
w/ Audio and Visual System (for Radio and Display Type):
Cleared using the GTS.
Cleared using the system check mode screen.
Cleared using the unit check mode screen.
VIDEO DEVICE CONNECTION CHECK
w/ Navigation System:
w/ Audio and Visual System (for Radio and Display Type):
CALIBRATION WHEN SERVICING VEHICLE
- NOTICE:
-
Depending on the parts that are replaced or operations that are performed during vehicle inspection or maintenance, calibration of other systems as well as the parking assist monitor system may be needed.