POWER OUTLETS (INT) POWER OUTLET SOCKET(for Front Side) REMOVAL
CAUTION / NOTICE / HINT
- HINT:
- ·
Use the same procedure for RHD and LHD vehicles.
·The procedure listed below is for LHD vehicles.
PROCEDURE

 55524H
1.REMOVE SWITCH BASE HOLE COVER (for Separate Type)
55524H
1.REMOVE SWITCH BASE HOLE COVER (for Separate Type)


|
Place Hand Here |

|
Remove in this Direction |
Place your hand at the position shown in the illustration, pull in the direction indicated by the arrow to detach the clip and remove the switch base hole cover.
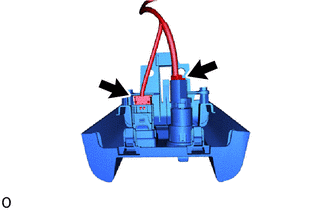
Disconnect each connector.
67912A
2.REMOVE FRONT DOOR OUTSIDE SCUFF PLATE LH (except Separate Type)
67914B
3.REMOVE FRONT DOOR SCUFF PLATE LH (except Separate Type)
62112
4.REMOVE COWL SIDE TRIM BOARD LH (except Separate Type)
55641
5.REMOVE NO. 1 INSTRUMENT PANEL UNDER COVER (except Separate Type)
55642
6.REMOVE NO. 2 INSTRUMENT PANEL UNDER COVER (except Separate Type)
55438A
7.REMOVE NO. 2 INSTRUMENT PANEL FINISH PANEL RETAINER (except Separate Type)
8.REMOVE FRONT CONSOLE BOX (except Separate Type)
58533C
9.REMOVE CENTER FLOOR CARPET COVER RH (except Separate Type)
58534E
10.REMOVE CENTER FLOOR CARPET COVER LH (except Separate Type)
55646
11.REMOVE NO. 3 INSTRUMENT PANEL UNDER COVER (except Separate Type)
85530
12.REMOVE NO. 1 POWER OUTLET SOCKET ASSEMBLY


|
Protective Tape |
|
|
Remove in this Direction |
except Separate Type:
Using a screwdriver with its tip wrapped with protective tape, detach the claw and remove the No. 1 power outlet socket assembly as shown in the illustration.
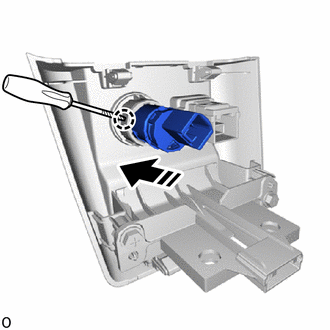
|
|
Protective Tape |
|
|
Remove in this Direction |
for Separate Type:
Using a screwdriver with its tip wrapped with protective tape, detach the claw and remove the No. 1 power outlet socket assembly as shown in the illustration.
85535B
13.REMOVE NO. 1 POWER OUTLET SOCKET COVER
|
|
Remove in this Direction |
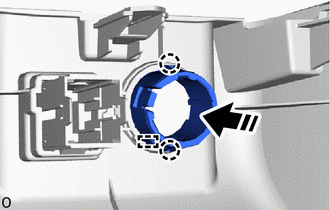
except Separate Type:
Detach the claw and guide to remove the No. 1 power outlet socket cover as shown in the illustration.
|
|
Remove in this Direction |
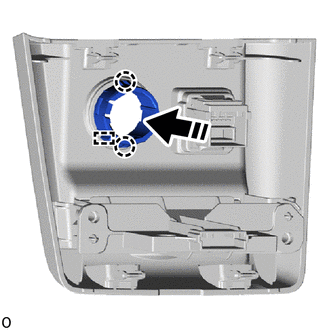
for Separate Type:
Detach the claw and guide to remove the No. 1 power outlet socket cover as shown in the illustration.