M20F-FXS, M20G-FXS ENGINE CONTROL CAMSHAFT OIL CONTROL SOLENOID INSTALLATION
CAUTION / NOTICE / HINT
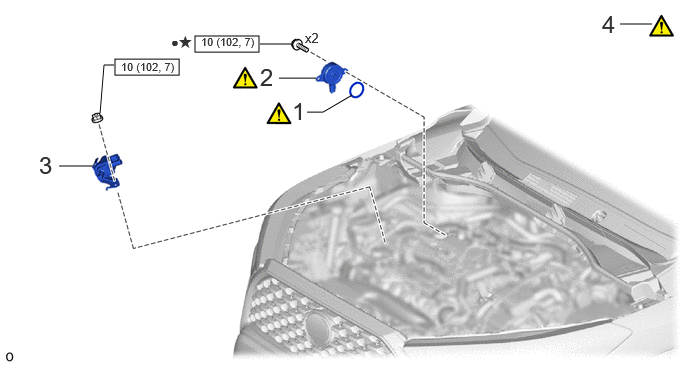
| Procedure | Part Name Code | 
|

|

|
|
|---|---|---|---|---|---|
| 1 | O-RING | - | ( 202307,999999,_51,_144956,_0604217,RM100000002BTI7_01_0011,) 202307,999999,_51,_144956,_0604217,RM100000002BTI7_01_0011,)
|
- | - |
| 2 | CAM TIMING OIL CONTROL SOLENOID ASSEMBLY | 15370 | (202307,999999,_51,_144956,_0604217,RM100000002BTI7_01_0012,)
|
- | - |
| 3 | PURGE VALVE (PURGE VSV) | 25860 | - | - | - |
| 4 | INSPECT FOR ENGINE OIL LEAK | - | (202307,999999,_51,_144956,_0604217,RM100000002BTI7_01_0014,)
|
- | - |

|
N*m (kgf*cm, ft.*lbf): Specified torque | ● | Non-reusable part |
| ★ | Precoated part | - | - |
CAUTION / NOTICE / HINT
- NOTICE:
-
This procedure includes the installation of small-head bolts. Refer to Small-Head Bolts of Basic Repair Hint to identify the small-head bolts.
PROCEDURE

 1.INSTALL O-RING
|
|
|
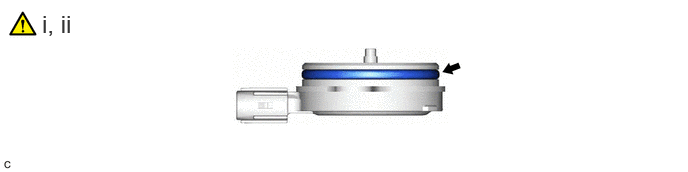
Clean the O-ring groove of the cam timing oil control solenoid assembly.
- NOTICE:
-
Make sure the O-ring groove is free of foreign matter.
Install a new O-ring to the cam timing oil control solenoid assembly.
- NOTICE:
-
Do not damage the O-ring when installing it.
15370
2.INSTALL CAM TIMING OIL CONTROL SOLENOID ASSEMBLY

Apply a light coat of engine oil to the O-ring of the cam timing oil control solenoid assembly.
- NOTICE:
-
If reusing the cam timing oil control solenoid assembly, be sure to inspect the O-ring.
Using an 8 mm socket wrench, install the cam timing oil control solenoid assembly to the No. 2 timing chain cover assembly with 2 new bolts.
- Torque:
- 10 N*m (102 kgf*cm, 7 ft.*lbf)
- NOTICE:
- ·
If the cam timing oil control solenoid assembly has been struck or dropped, replace it.
·Make sure that the O-ring is not cracked or moved out of place when installing the cam timing oil control solenoid assembly.
Connect the cam timing oil control solenoid assembly connector.
25860
3.INSTALL PURGE VALVE (PURGE VSV)
4.INSPECT FOR ENGINE OIL LEAK