INTERIOR PANELS / TRIM INSTRUMENT PANEL SAFETY PAD REMOVAL
CAUTION / NOTICE / HINT
The necessary procedures (adjustment, calibration, initialization or registration) that must be performed after parts are removed, installed or replaced during the instrument panel safety pad assembly removal/installation are shown below.
- HINT:
-
When the cable is disconnected/reconnected to the auxiliary battery terminal, systems temporarily stop operating. However, each system has a function that completes learning the first time the system is used.
- ·
for HV Model:
Learning completes when vehicle is driven Effect/Inoperative Function When Necessary Procedures are not Performed Necessary Procedures Link Lane tracing assist system Drive the vehicle straight ahead at 35 km/h (22 mph) or more for 5 second or more. (  201910,999999,_58,_083101,_0401880,RM100000001JE9I,)
Pre-collision system
Learning completes when vehicle is operated normally Effect/Inoperative Function When Necessary Procedures are not Performed Necessary Procedures Link Power back door function Fully close the back door by hand.
- HINT:
-
Initialization is not necessary if the above procedures are performed while the back door is closed.
( 202304,999999,_59,_083093,_0584672,RM1000000029PGT,)
Power door lock control system If the back door is locked and therefore cannot be opened, it is necessary to unlock the back door using the door control switch, electrical key transmitter sub-assembly switch. ( 202409,999999,_58,_083092,_0403003,RM100000002NS90,)
Air conditioning system After the ignition switch is turned to ON, the servo motor standard position is recognized -
·for Gasoline Model:
Learning completes when vehicle is driven Effect/Inoperative Function When Necessary Procedures are not Performed Necessary Procedures Link Stop and start system Drive the vehicle until stop and start control is permitted (approximately 5 to 60 minutes). ( 202409,999999,_51,_083056,_0402418,RM100000002NSFO,)
Lane tracing assist system Drive the vehicle straight ahead at 15 km/h (10 mph) or more for 1 second or more. ( 201910,999999,_58,_083101,_0401880,RM100000001JE9I,)
Pre-collision system
Learning completes when vehicle is operated normally Effect/Inoperative Function When Necessary Procedures are not Performed Necessary Procedures Link *: w/ Power back door system
Power back door function* Fully close the back door by hand.
- HINT:
-
Initialization is not necessary if the above procedures are performed while the back door is closed.
( 202304,999999,_59,_083093,_0584672,RM1000000029PGT,)
Power door lock control system If the back door is locked and therefore cannot be opened, it is necessary to unlock the back door using the door control switch, electrical key transmitter sub-assembly switch. ( 202409,999999,_58,_083092,_0403003,RM100000002NS90,)
Air conditioning system After the ignition switch is turned to ON, the servo motor standard position is recognized -
PROCEDURE

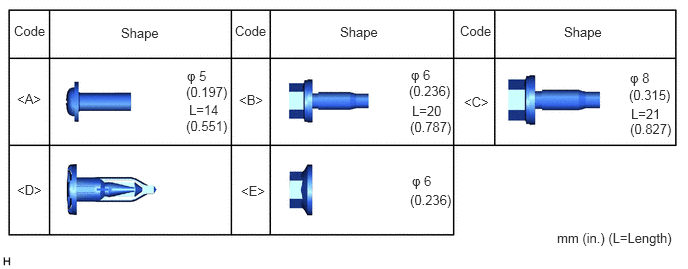
 1. TABLE OF BOLT, SCREW, NUT AND CLIP
- HINT:
-
All bolts, screws and clips relevant to installing and removing the instrument panel are shown along with their alphabetic code in the table below.
2. PRECAUTION
- CAUTION:
-
-
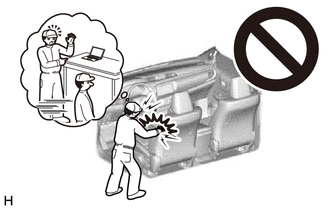
Be sure to read precaution thoroughly before servicing.
- ·
- NOTICE:
-
After turning the ignition switch off, waiting time may be required before disconnecting the cable from the negative (-) auxiliary battery terminal.
45287
3.REMOVE LOWER STEERING COLUMN COVER
4.DISCONNECT CABLE FROM NEGATIVE AUXILIARY BATTERY TERMINAL
- CAUTION:
-
- ·
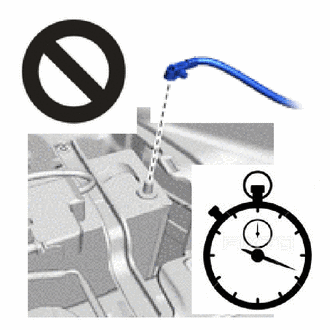
Wait at least 60 seconds after disconnecting the cable from the negative (-) auxiliary battery terminal to disable the SRS system.
·If the airbag deploys for any reason, it may cause a serious accident.
for M20C-FKS:
Click hereGeneral>MAINTENANCE>M20C-FKS BATTERY>REMOVAL202409,999999,_V1,_083136,_0418197,RM100000002NHPI,
for M20D-FKS:
Click hereGeneral>MAINTENANCE>M20D-FKS BATTERY>REMOVAL202409,999999,_V1,_083136,_0403617,RM100000002NHPJ,
5.REMOVE CONSOLE BOX ASSEMBLY
55422C
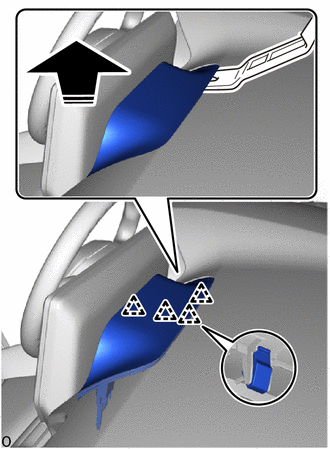
6.REMOVE CENTER UPPER INSTRUMENT CLUSTER FINISH PANEL

|
Remove in this Direction |
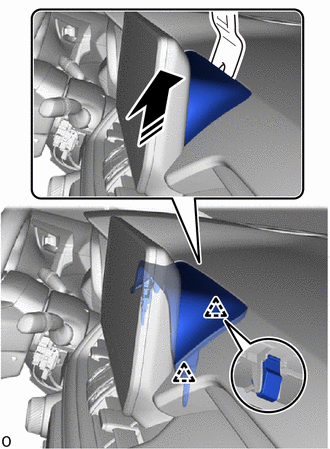
Using moulding remover B, detach the clip.
|
|
Remove in this Direction |
Using moulding remover B, detach the clip as shown in the illustration and remove the center upper instrument cluster finish panel.
7.REMOVE RADIO AND DISPLAY RECEIVER ASSEMBLY WITH BRACKET (for Radio and Display Type)
8.REMOVE NAVIGATION RECEIVER ASSEMBLY WITH BRACKET (for Navigation Receiver Type)
55474B
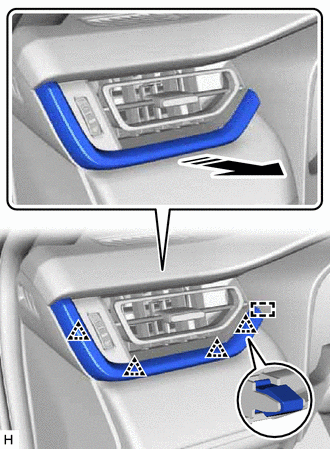
9.REMOVE INSTRUMENT CLUSTER FINISH PANEL GARNISH
|
|
Remove in this Direction |
Detach the clip and guide and remove the instrument cluster finish panel garnish.
55410C
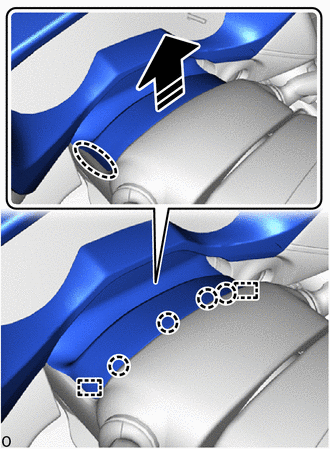
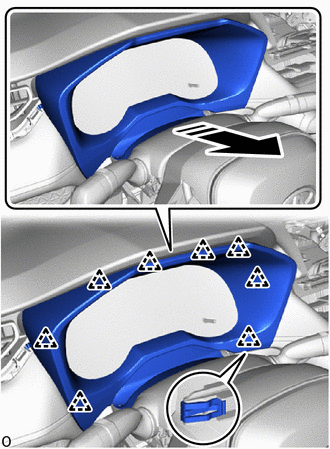
10.REMOVE INSTRUMENT CLUSTER FINISH PANEL ASSEMBLY
except 12.3 Inch Display:

|
Place Hand Here |
|
|
Remove in this Direction |
Place your hand at the position shown in the illustration and detach the claw and guide as shown in the illustration.
|
|
Remove in this Direction |
Pull towards the rear of the vehicle to detach the clip and remove the instrument cluster finish panel assembly.
for 12.3 Inch Display:
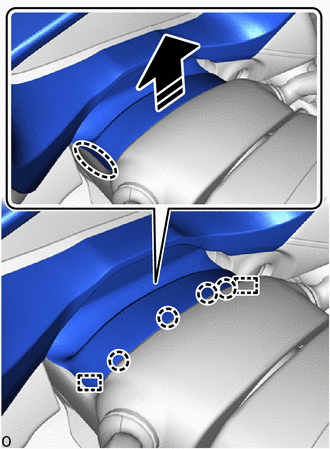
|
|
Place Hand Here |
|
|
Remove in this Direction |
Place your hand at the position shown in the illustration and detach the claw and guide as shown in the illustration.
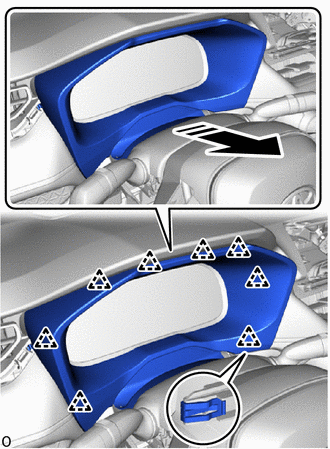
|
|
Remove in this Direction |
Pull towards the rear of the vehicle to detach the clip and remove the instrument cluster finish panel assembly.
83100
11.REMOVE COMBINATION METER ASSEMBLY
55900
12.REMOVE AIR CONDITIONING CONTROL ASSEMBLY
55434B
13.REMOVE LOWER CENTER INSTRUMENT PANEL FINISH PANEL
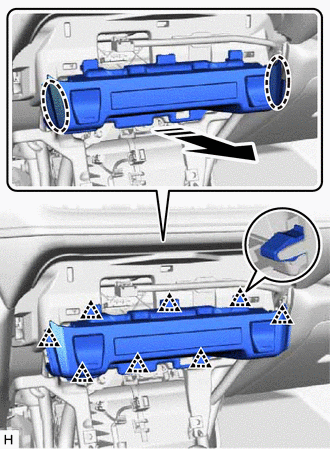
|
|
Place Hands Here |
|
|
Remove in this Direction |
Place both hands at the position shown in the illustration and pull in the direction indicated by the arrow to detach the clip and remove the lower center instrument panel finish panel.
Disconnect each connector.
67914B
14.REMOVE FRONT DOOR SCUFF PLATE LH
62112
15.REMOVE COWL SIDE TRIM BOARD LH
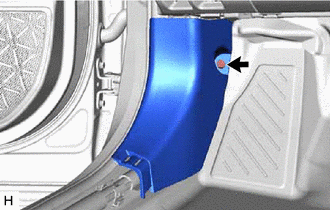
Remove the cap nut.
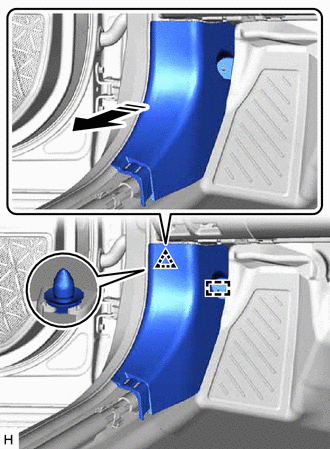
|
|
Remove in this Direction |
Detach the clip and guide and remove the cowl side trim board LH.
55606
16.REMOVE NO. 1 INSTRUMENT PANEL UNDER COVER SUB-ASSEMBLY
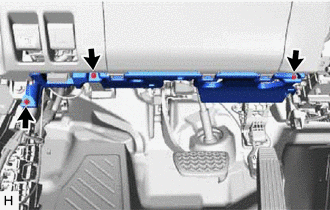

|
Screw <A> |
Remove the 3 screws <A>.
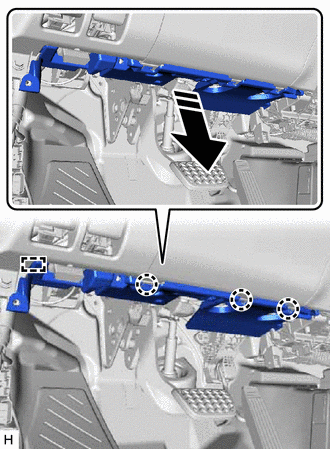
|
|
Remove in this Direction |
Detach the claw and guide and lower the No. 1 instrument panel under cover sub-assembly in the direction of the arrow shown in the illustration.
w/ Foot Light:
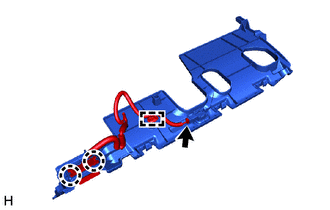
Disconnect the connector and detach the clamp.
Detach the claw and remove the DLC3.
w/o Foot Light:
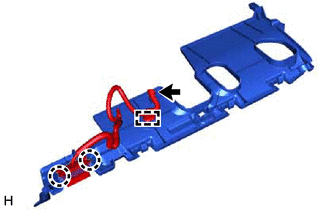
Detach the claw and remove the DLC3.
- HINT:
-
Even if there is no foot light, if there is a connector, disconnect the connector and detach the clamp.
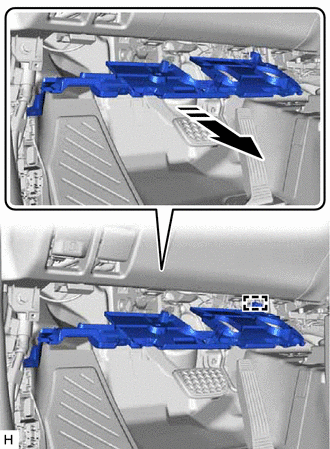
|
|
Remove in this Direction |
Pull in the direction of the arrow shown in the illustration to detach the guide and remove the No. 1 instrument panel under cover sub-assembly.
62312B
17.REMOVE FRONT DOOR OPENING TRIM WEATHERSTRIP LH

Remove the front door opening trim weatherstrip LH from the area shown in the illustration.
55318C
18.REMOVE INSTRUMENT SIDE PANEL LH
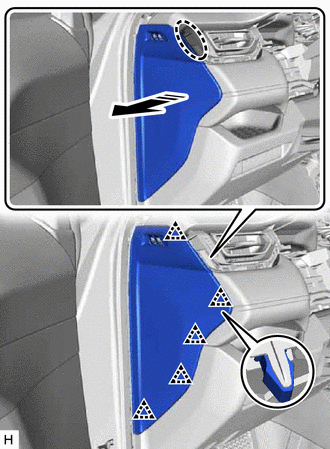
|
|
Place Hand Here |
|
|
Remove in this Direction |
Place your hand at the position shown in the illustration and pull in the direction indicated by the arrow to detach the clip.
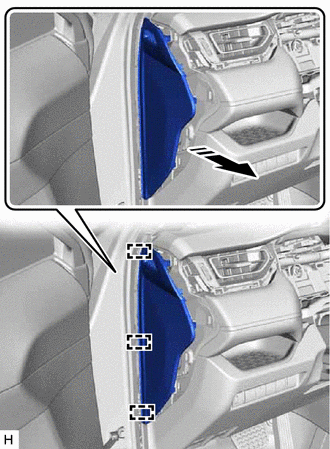
|
|
Remove in this Direction |
Pull in the direction indicated by the arrow shown in the illustration to detach the guide and remove the instrument side panel LH.
53601
19.REMOVE HOOD LOCK CONTROL LEVER SUB-ASSEMBLY
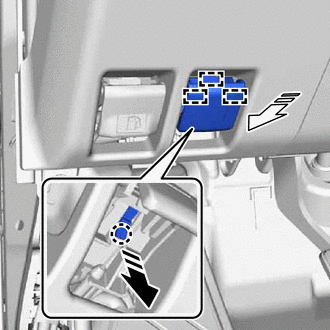
|
|
Remove in this Direction (1) |

|
Remove in this Direction (2) |
Detach the claw in the direction (1) indicated by the arrow shown in the illustration.
Detach the guide in the direction (2) indicated by the arrow shown in the illustration and remove the hood lock control lever sub-assembly.
77306
20.REMOVE FUEL LID LOCK OPEN LEVER SUB-ASSEMBLY (for Gasoline Model)
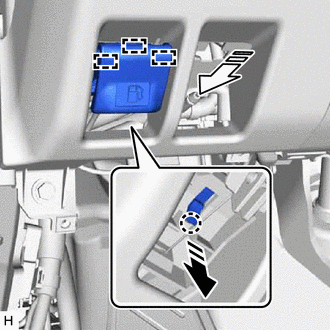
|
|
Remove in this Direction (1) |
|
|
Remove in this Direction (2) |
Detach the claw in the direction (1) indicated by the arrow shown in the illustration.
Detach the guide in the direction (2) indicated by the arrow shown in the illustration and remove the fuel lid lock open lever sub-assembly.
55545
21.REMOVE FUSE BOX OPENING COVER
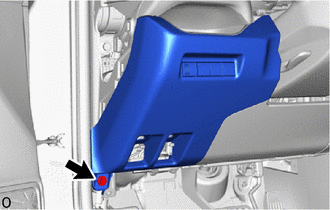
|
|
Bolt <B> |
Remove the bolt <B>.
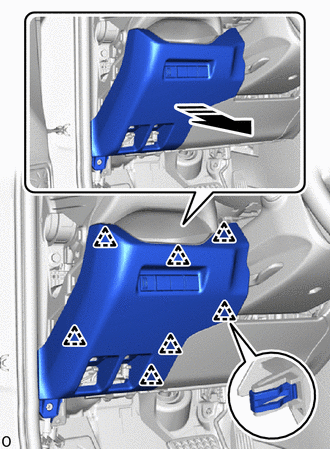
|
|
Remove in this Direction |
Pull in the direction indicated by the arrow to detach the clip.
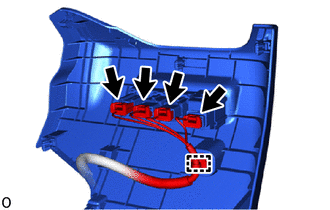
Disconnect each connector.
Detach the clamp and remove the fuse box opening cover.
for HV Model:
Disconnect the connector.
55480D
22.REMOVE LOWER INSTRUMENT PANEL FINISH PANEL ASSEMBLY
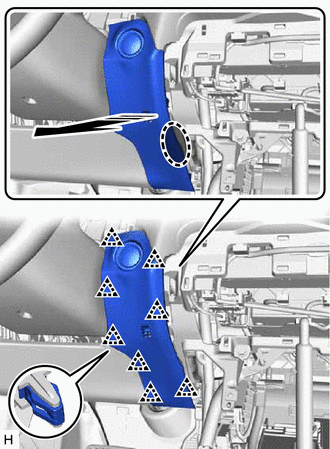
|
|
Place Hand Here |
|
|
Remove in this Direction |
Place your hand at the position shown in the illustration and pull in the direction indicated by the arrow to detach the clip and remove the lower instrument panel finish panel assembly.
w/ Smart Entry and Start System:
Disconnect the connector.
73900
23.REMOVE LOWER NO. 1 INSTRUMENT PANEL AIRBAG ASSEMBLY
62212
24.REMOVE FRONT PILLAR GARNISH LH
55525
25.REMOVE NO. 1 SPEAKER HOLE COVER
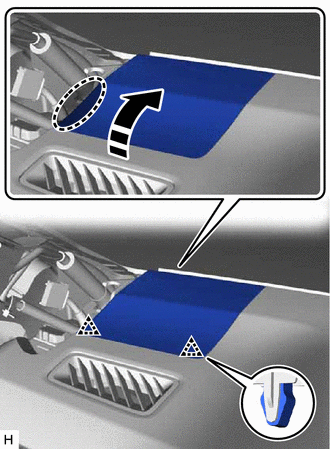
|
|
Place Hand Here |
|
|
Remove in this Direction |
Lift up the part in the removal direction shown in the illustration to detach the clip.
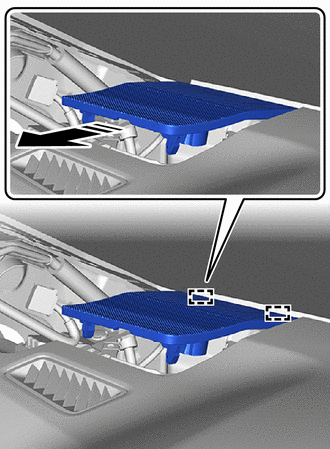
|
|
Remove in this Direction |
Pull in the direction of the arrow shown in the illustration to detach the guide and remove the No. 1 speaker hole cover.
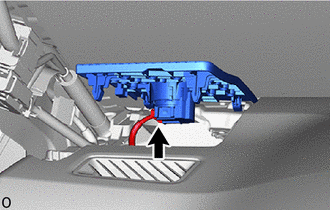
for 6 speakers:
Disconnect the connector.
86160P
26.REMOVE FRONT NO. 2 SPEAKER ASSEMBLY
62311B
27.REMOVE FRONT DOOR OPENING TRIM WEATHERSTRIP RH
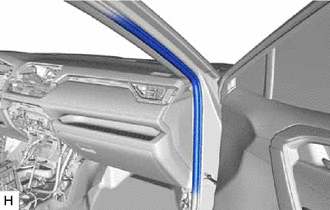
Remove the front door opening trim weatherstrip RH from the area shown in the illustration.
67913B
28.REMOVE FRONT DOOR SCUFF PLATE RH
- HINT:
-
Use the same procedure described for the LH side.
62111C
29.REMOVE COWL SIDE TRIM BOARD RH
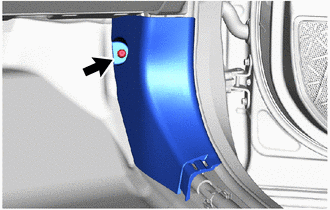
Remove the cap nut.
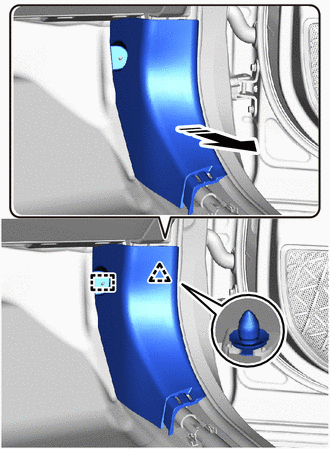
|
|
Remove in this Direction |
Detach the clip and guide and remove the cowl side trim board RH.
55607
30.REMOVE NO. 2 INSTRUMENT PANEL UNDER COVER SUB-ASSEMBLY
|
|
Remove in this Direction |
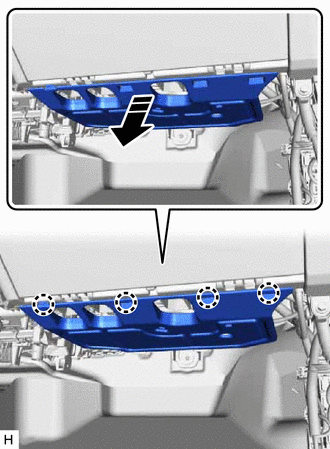
Detach the claw and lower the No. 2 instrument panel under cover sub-assembly in the direction of the arrow shown in the illustration.
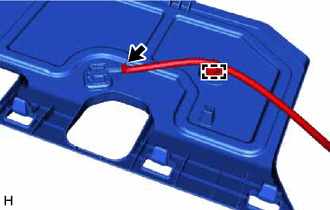
w/ Foot light:
Disconnect the connector and detach the clamp.
- HINT:
-
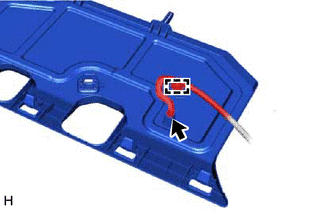
-
Even if there is no foot light, if there is a connector, disconnect the connector and detach the clamp.
|
|
Remove in this Direction |
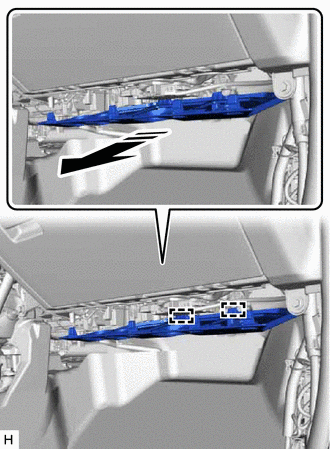
Pull in the direction of the arrow shown in the illustration to detach the guide and remove the No. 2 instrument panel under cover sub-assembly.
55550
31.REMOVE GLOVE COMPARTMENT DOOR ASSEMBLY
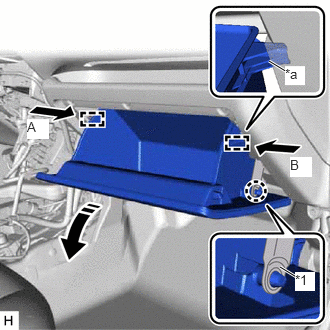
| *1 | Glove Compartment Door Stopper Sub-assembly |
| *a | Stopper |
|
|
Remove in this Direction |
Detach the claw and remove the glove compartment door stopper sub-assembly.
Slightly bend the stoppers (A) and (B) in the directions indicated by the arrows in the illustration and open the glove compartment door assembly until the stoppers are released.
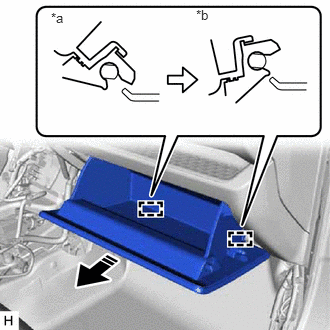
| *a | Closed Position |
| *b | Assembly Position |
|
|
Remove in this Direction |
Assembly position the glove compartment door assembly, pull it horizontally in the direction indicated by the arrow to detach the hinge and remove the glove compartment door assembly.
- NOTICE:
-
Pulling the glove compartment door assembly upward to remove it causes the hinges to deform. Be sure to pull out the glove compartment door assembly horizontally.
55433B
32.REMOVE LOWER NO. 2 INSTRUMENT PANEL FINISH PANEL
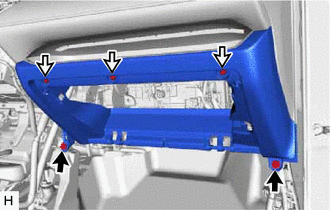
|
|
Bolt <B> |

|
Screw <A> |
Remove the 3 screws <A> and 2 bolts <B>.
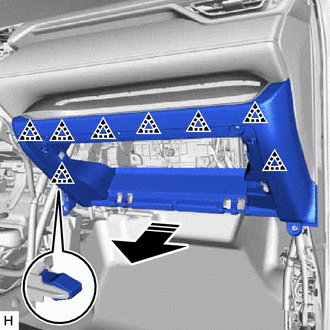
|
|
Remove in this Direction |
Detach the clip and remove the lower No. 2 instrument panel finish panel.
55475A
33.REMOVE NO. 2 INSTRUMENT CLUSTER FINISH PANEL GARNISH
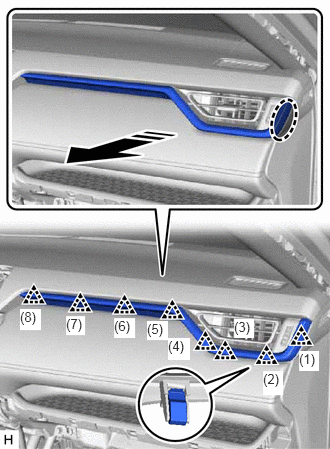
|
|
Place Hand Here |
|
|
Remove in this Direction |
Place your hand in the gap, and then, while pulling in the direction indicated by the arrow shown in the illustration, detach the clip in the order shown in the illustration and remove the No. 2 instrument cluster finish panel garnish.
55317A
34.REMOVE INSTRUMENT SIDE PANEL RH
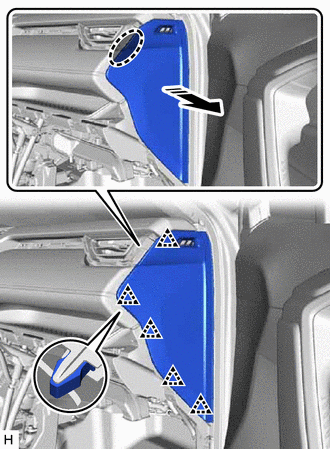
|
|
Place Hand Here |
|
|
Remove in this Direction |
Place your hand at the position shown in the illustration and pull in the direction indicated by the arrow to detach the clip.
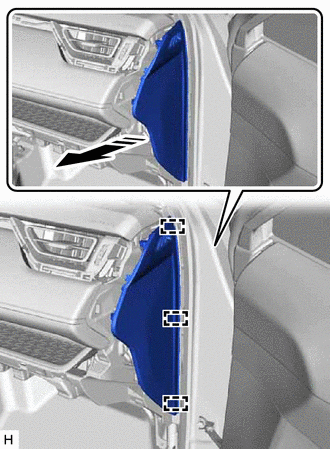
|
|
Remove in this Direction |
Pull in the direction indicated by the arrow shown in the illustration to detach the guide and remove the instrument side panel RH.
62211
35.REMOVE FRONT PILLAR GARNISH RH
- HINT:
-
Use the same procedure described for the LH side.
55535B
36.REMOVE NO. 2 SPEAKER HOLE COVER
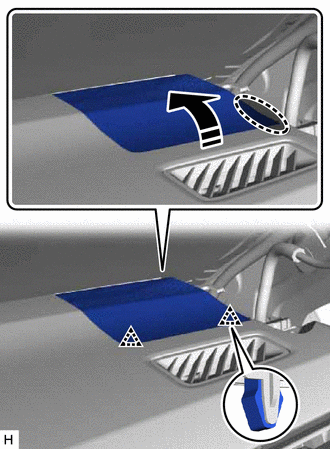
|
|
Place Hand Here |
|
|
Remove in this Direction |
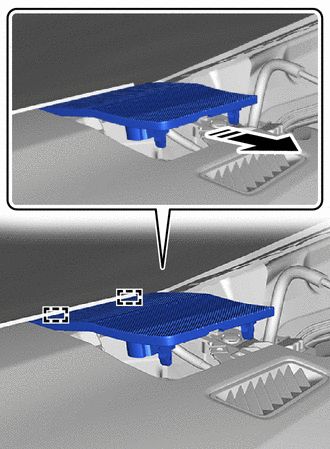
Lift up the part in the removal direction shown in the illustration to detach the clip.
|
|
Remove in this Direction |
Pull in the direction of the arrow shown in the illustration to detach the guide and remove the No. 2 speaker hole cover.
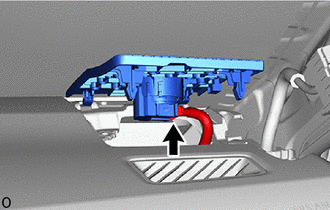
for 6 Speakers:
Disconnect the connector.
86160P
37.REMOVE FRONT NO. 2 SPEAKER ASSEMBLY
- HINT:
-
Use the same procedure described for the other side.
55548A
38.REMOVE INSTRUMENT PANEL HOLE COVER (w/ Headup Display)
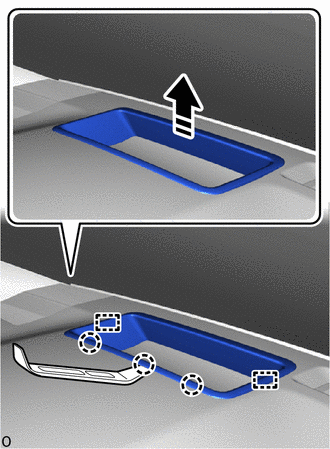
|
|
Remove in this Direction |
Using moulding remover A, detach the claw and guide as shwon in the illustration.
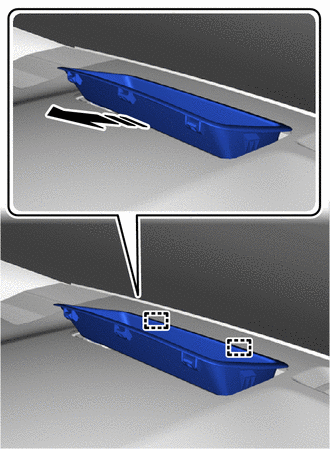
|
|
Remove in this Direction |
Detach the guide and remove the instrument panel hole cover as shown in the illustration.
84330
39.REMOVE HAZARD WARNING SIGNAL SWITCH ASSEMBLY
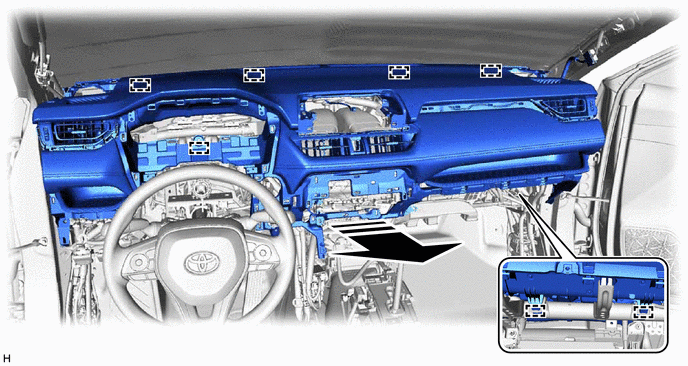
40.REMOVE INSTRUMENT PANEL SAFETY PAD ASSEMBLY
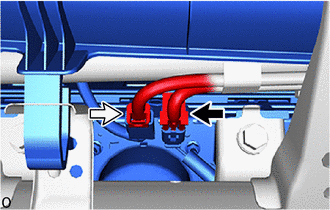
|
|
Airbag Connector |
|
|
Connector |
Disconnect the airbag connector.
- HINT:
-
Refer to How to Connect or Disconnect Airbag Connector:
- ·
w/ Ion Generator:
Disconnect the connector.
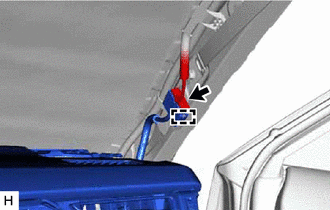
Disconnect the connector and detach the guide.
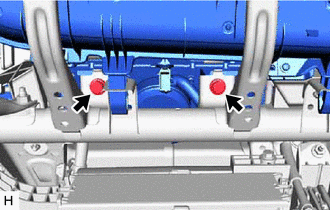
|
|
Bolt <C> |
Remove the 2 bolts <C>.
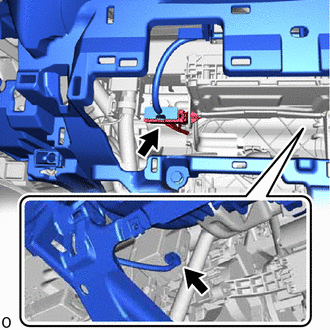
Disconnect each connector.
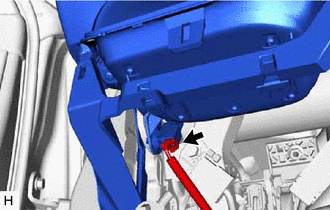
w/ Interior Illumination:
Disconnect the connector.
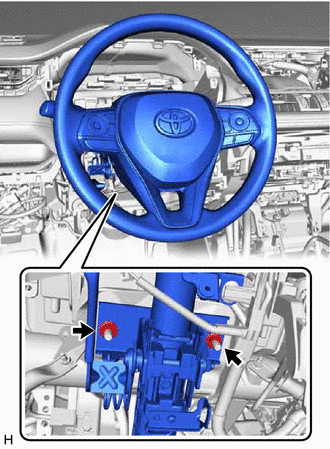
Remove the 2 nuts and steering column assembly from the instrument panel reinforcement assembly.
for Automatic Air Conditioning System:
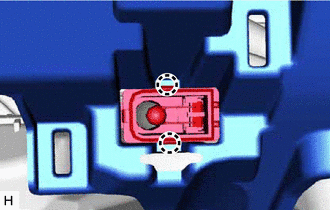
Detach the claw and remove the cooler thermistor (room temperature sensor).
Detach the clamp.
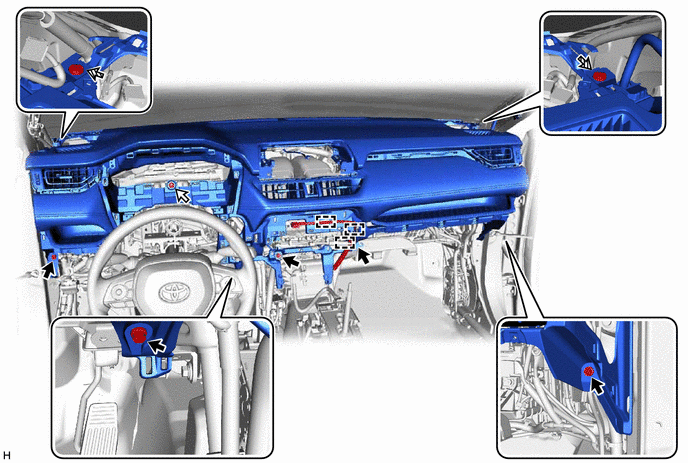
Remove the 2 clips <D>.
Remove the 5 bolts <B> and nut <E>.
|
|
Bolt <B> |
|
Nut <E> |

|
Clip <D> | - | - |
Pull in the direction indicated by the arrow shown in the illustration and detach the guide and remove the instrument panel safety pad assembly.
|
|
Remove in this Direction | - | - |