BRAKE SYSTEM (OTHER) VACUUM PUMP REASSEMBLY
CAUTION / NOTICE / HINT
- HINT:
-
Refer to the following illustration and check which type is installed to the vehicle.
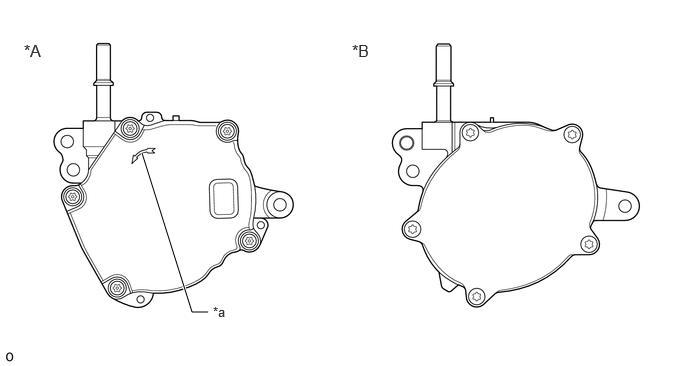 2.167,3.25 2,3.25 2,3.25 1.479,1.594 true 0.25,0.427 0.625,0.667 0.375,0.24 12 false *A 3.667,0.427 4.042,0.667 0.375,0.24 12 false *B 2.219,3.167 2.531,3.365 0.313,0.198 10 false *a
*A for BOSCH Made *B except BOSCH Made *a Mark - -
PROCEDURE

 1.CLEAN VACUUM PUMP HOUSING (except BOSCH Made)
Clean the inside surface of the vacuum pump housing.
2.INSTALL VACUUM PUMP ROTOR (except BOSCH Made)
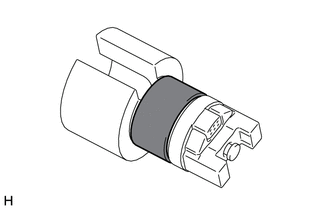
Clean the vacuum pump rotor.

|
Engine Oil |
Apply engine oil to the areas of the vacuum pump rotor shown in the illustration.

|
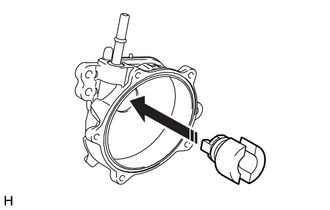
Install in this Direction |
Install the vacuum pump rotor to the vacuum pump housing.
3.INSTALL VACUUM PUMP VANE AND VACUUM PUMP VANE CAP (except BOSCH Made)
Apply engine oil to a new vacuum pump vane and 2 new vacuum pump vane caps and install the vacuum pump vane caps to the vacuum pump vane.
Apply engine oil to the vacuum pump vane with the 2 vacuum pump vane caps and install it to the vacuum pump housing.
29314A
4.INSTALL END COVER (except BOSCH Made)
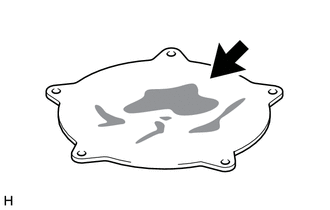
Clean the inside surface of the end cover.
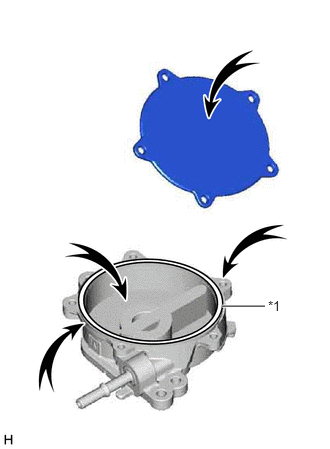
| *1 | Vacuum Pump Cover O-ring |
Install a new vacuum pump cover O-ring to the vacuum pump housing.
- NOTICE:
- ·
Wipe off any oil on the end cover installation surface and end cover.
·Check that no foreign matter is on the vacuum pump cover O-ring or inside the vacuum pump housing.
Using a T30 "TORX" socket wrench, install the end cover with 5 new screws.
- Torque:
- 7.5 N*m (76 kgf*cm, 66 in.*lbf)
- NOTICE:
- ·
Hold the pump so that the pump installation surface and fitting parts will not be damaged.
·As the housing deforms when force is applied, do not secure the housing with a tool such as a vise.
·Securely fit the T30 "TORX" socket wrench to the screws.
·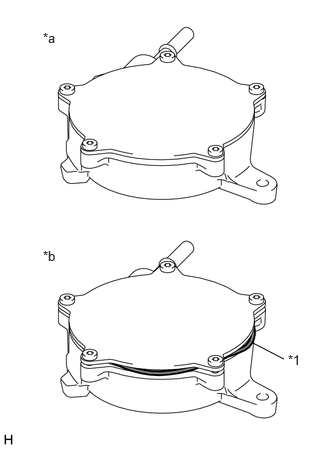 2.958,3.74 2.635,3.573 false 3,3.667 3.24,4 0.24,0.333 10 false *1 0.448,0.313 0.688,0.646 0.24,0.333 10 false *a 0.448,2.583 0.688,2.917 0.24,0.333 10 false *b
*1 Vacuum Pump Cover O-ring *a Correct *b Incorrect
After installing the end cover, check that the vacuum pump cover O-ring is not caught.
5.INSPECT VACUUM PUMP ASSEMBLY (except BOSCH Made)
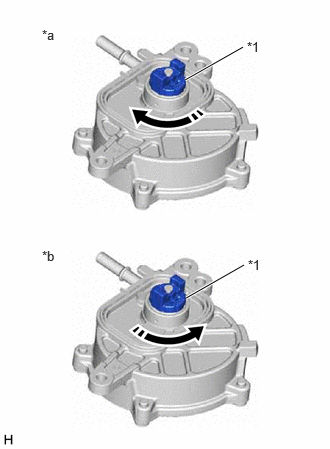
| *1 | Coupling |
| *a | Correct |
| *b | Incorrect |
While looking from the coupling side of the vacuum pump assembly, rotate the coupling clockwise.
- Standard:
Rotates without locking.
- NOTICE:
- ·
As the vacuum pump vane cap may become damaged, do not rotate the coupling counterclockwise.
·Even if rotation fluctuates between heavy and light, it is not a malfunction unless the coupling locks.