GF2A TRANSFER / 4WD / AWD TRANSFER ASSEMBLY DISASSEMBLY
CAUTION / NOTICE / HINT
- NOTICE:
- ·
When replacing the rear drive pinion companion flange and rear transfer case oil seal, be sure to check the preload.
·If the output shaft companion flange sub-assembly and rear transfer case oil seal were replaced without checking the preload, replace the transfer assembly.
·Before installation of each part, thoroughly clean and dry it. Then apply grease or oil as necessary. Do not use alkaline chemicals to clean aluminum parts, rubber parts or precoated bolts. Also, do not use non-residue solvent or other cleaning oils to clean oil seals or rubber parts.
PROCEDURE

 36100A
1.REMOVE TRANSFER AND TRANSAXLE SETTING STUD BOLT
36100A
1.REMOVE TRANSFER AND TRANSAXLE SETTING STUD BOLT
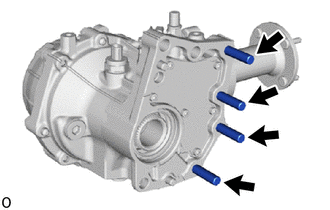
Using 2 nuts, remove the 4 transfer and transaxle setting stud bolts.
36100
2.SECURE TRANSFER ASSEMBLY
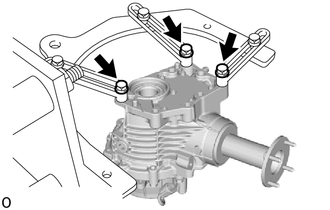
Secure the transfer assembly to the overhaul attachment.
36111G
3.REMOVE TRANSFER CASE STRAIGHT PIN
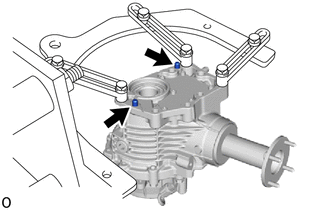
Remove the 2 transfer case straight pins.
36114B
4.REMOVE NO. 1 TRANSFER CASE PLUG
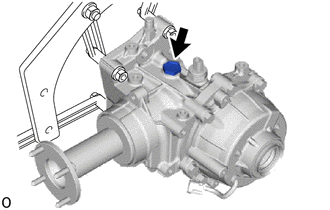
Remove the No. 1 transfer case plug and gasket.
36114F
5.REMOVE TRANSFER DRAIN PLUG
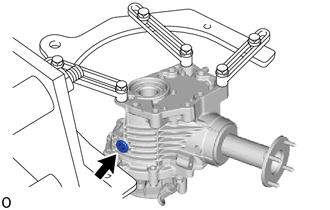
Using a 10 mm socket hexagon wrench, remove the transfer drain plug and gasket.
36114L
6.REMOVE TRANSFER FILLER PLUG
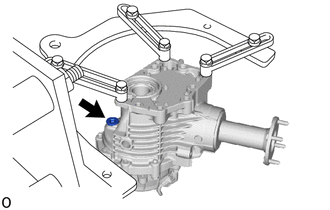
Using a 10 mm socket hexagon wrench, remove the transfer filler plug and gasket.
36114H
7.REMOVE NO. 2 TRANSFER CASE PLUG
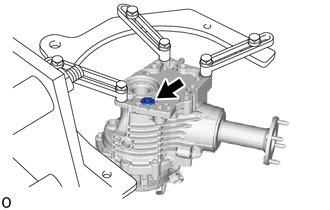
Using a 10 mm socket hexagon wrench, remove the No. 2 transfer case plug and gasket.
84546
8.REMOVE NO. 1 4 WHEEL DRIVE POSITION SWITCH
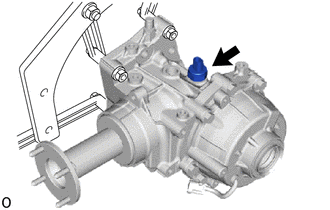
Remove the No. 1 4 wheel drive position switch.
36111H
9.REMOVE TRANSFER CASE BREATHER PLUG
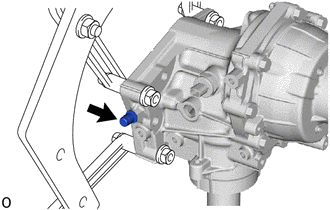
Remove the transfer case breather plug.
36111B
10.REMOVE TRANSFER CASE OIL SEAL
36113D
11.REMOVE TRANSFER CASE OIL SEAL RH

| *1 | Transfer Case Oil Seal RH |
Using SST, remove the transfer case oil seal RH from the electromagnetic control clutch sub-assembly.
- SST
- 09308-00010
- NOTICE:
-
Do not scratch the press-fitting surface of the transfer case oil seal RH.
12.INSPECT TOTAL PRELOAD
- NOTICE:
- ·
When replacing the output shaft companion flange and No. 2 transfer case oil seal, be sure to check the preload.
·If the output shaft companion flange and No. 2 transfer case oil seal were replaced without checking the preload, replace the transfer assembly.
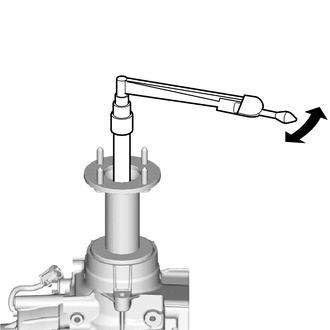
Using a torque wrench, check the starting torque (total preload) with the teeth of the driven pinion and ring gear in contact.
- HINT:
- ·
The torque wrench should be installed as shown in the illustration.
·Record the measured value as it is used during assembly.
13.REMOVE OUTPUT SHAFT COMPANION FLANGE NUT
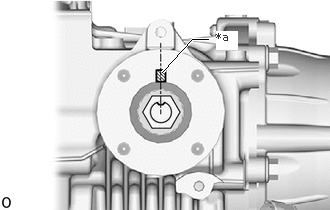
| *a | Matchmark |
Place a matchmark on the output shaft companion flange sub-assembly as shown in the illustration.
- HINT:
-
Place a matchmark aligned with the groove on the transfer gear.
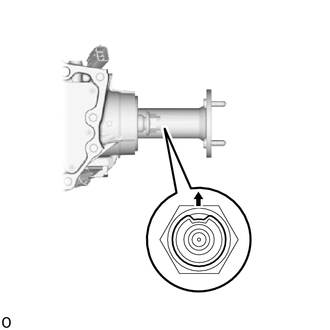
Using a screwdriver and hammer, unstake the output shaft companion flange nut.
- NOTICE:
- ·
Completely unstake the output shaft companion flange nut.
·Do not damage the threads of the transfer gear.
33309B
14.REMOVE OUTPUT SHAFT COMPANION FLANGE SUB-ASSEMBLY
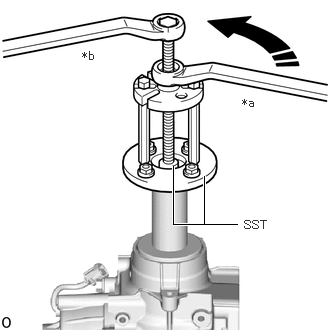
| *a | Turn |
| *b | Hold |
Using SST, remove the output shaft companion flange sub-assembly.
- SST
- 09950-30012 (09951-03010, 09953-03010, 09954-03010, 09955-03030)
09956-03090
36111X
15.REMOVE NO. 2 TRANSFER CASE OIL SEAL