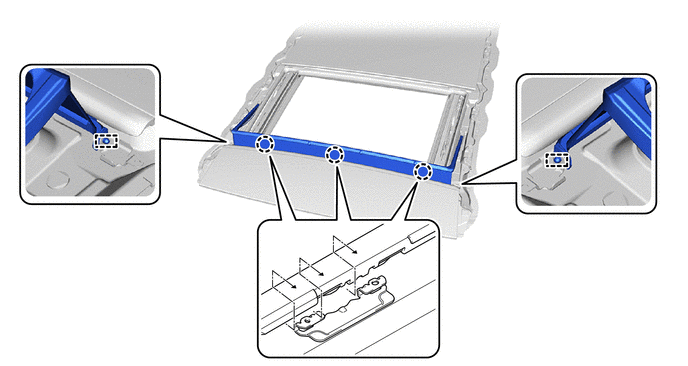
SLIDING ROOF / CONVERTIBLE SLIDING ROOF HOUSING(for Panoramic Moon Roof) REASSEMBLY
PROCEDURE

 63306
1.INSTALL SUNSHADE TRIM SUB-ASSEMBLY
63306
1.INSTALL SUNSHADE TRIM SUB-ASSEMBLY
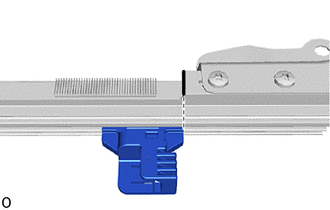
| *1 | No. 1 Sliding Roof Shoe Sub-assembly |
| *a | Cutout |
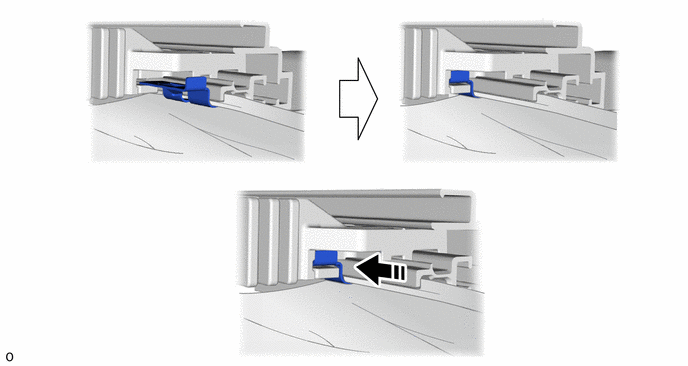
Make sure that the No. 1 sliding roof shoe sub-assembly is positioned as shown in the illustration.
- HINT:
-
Use the same procedure for the other side.
Attach the plug cap and press the retractor cap down in the direction of the arrow (1) shown in the illustration. Then, insert the retractor cap to install the sunshade trim sub-assembly.
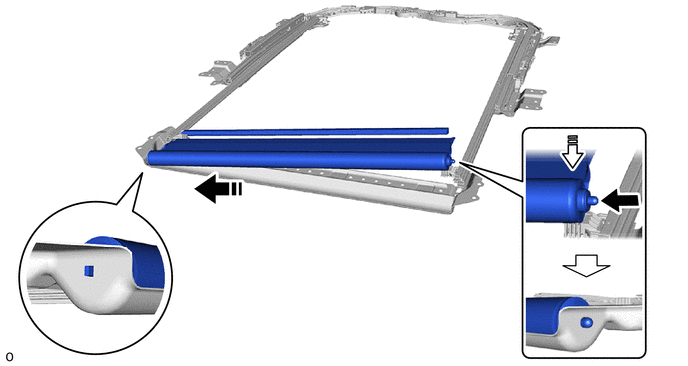
| *a | Plug Cap | *b | Retractor Cap |

|
Push | 
|
Install in this Direction (1) |

|
Install in this Direction (2) | - | - |
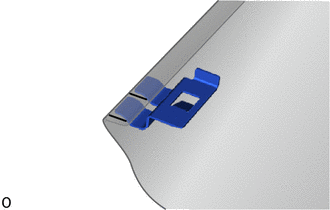
Install the sliding roof sunshade plate.
- HINT:
-
Use the same procedure for the other side.
Install the sliding roof sunshade plate LH to the sunshade trim sub-assembly as shown in the illustration.
| *1 | Sliding Roof Sunshade Plate LH | - | - |
|
|
Install in this Direction | - | - |
- HINT:
-
Use the same procedure for the other side.
Attach the claw and install part A as shown in the illustration.

| *a | Part A | - | - |
|
|
Install in this Direction | - | - |
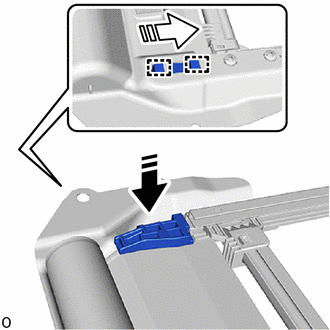
| *1 | Sliding Roof Sunshade Guide LH |
|
|
Install in this Direction (1) |
|
|
Install in this Direction (2) |
Install the sliding roof sunshade guide LH in the direction indicated by the arrow (1) shown in the illustration.
- HINT:
-
Use the same procedure for the other side.
Attach the guide in the direction indicated by the arrow (2) shown in the illustration.
- HINT:
-
Use the same procedure for the other side.
63202H
2.INSTALL SLIDE ROOF RAIL SUB-ASSEMBLY
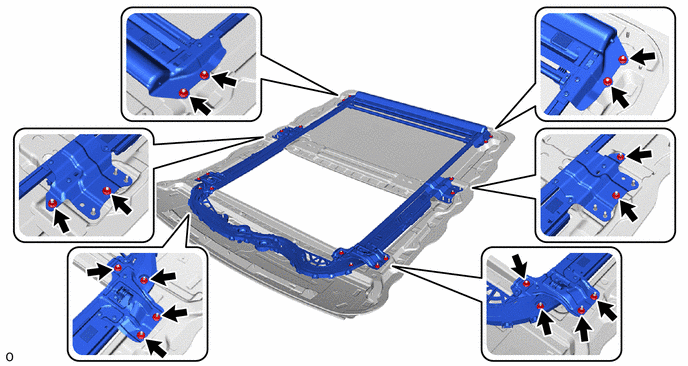
Install the slide roof rail sub-assembly to the sliding roof housing panel with the 16 nuts.
- Torque:
- 6.3 N*m (64 kgf*cm, 56 in.*lbf)
63219A
3.INSTALL REAR SLIDING ROOF GARNISH
- CAUTION:
-
 2.365,2 2.698,2 false 0.5,2.333 0.5,2.667 true 0.427,2.708 0.74,2.865 0.313,0.156 10 false *a 2.76,1.927 3.073,2.083 0.313,0.156 10 false *b
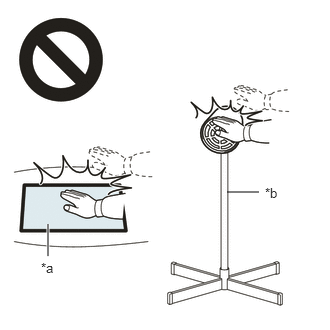
*a Heated Part *b Heat Light
- ·
Do not touch the heat light and heated parts, as touching the heat light may result in burns.
·Touching heated parts for a long time may result in burns.
- HINT:
-
Perform the following procedures if replacing the rear sliding roof garnish.
Clean the sliding roof housing panel.
Using a heat light, heat the sliding roof housing panel.
| Item | Temperature |
|---|---|
| Sliding Roof Housing Panel | 20 to 30°C (68 to 86°F) |
- NOTICE:
-
Do not heat the rear sliding housing panel excessively.
Remove the double-sided tape from the sliding roof housing panel.
Clean off any tape adhesive residue with cleaner.
Coat the installation area of the sliding roof housing panel with primer.
Remove the release paper from a new rear sliding roof garnish.
- HINT:
-
After removing the release paper, keep the exposed adhesive free from foreign matter.
Attach the guide to install the rear sliding roof garnish.
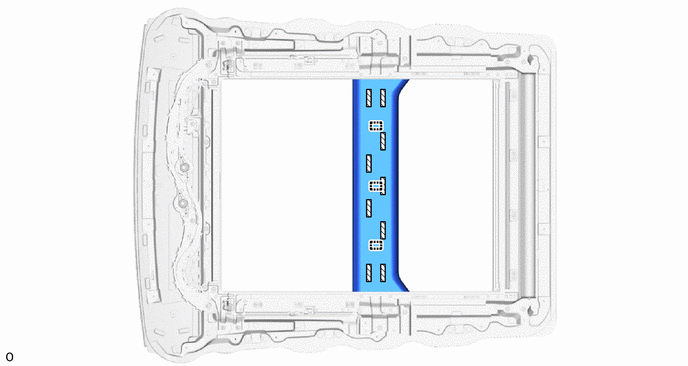

|
Double-sided Tape | - | - |
63260J
4.INSTALL SLIDING ROOF DRIVE GEAR ASSEMBLY (for Roof Sunshade)
Apply MP grease to the gear of the sliding roof drive gear assembly.
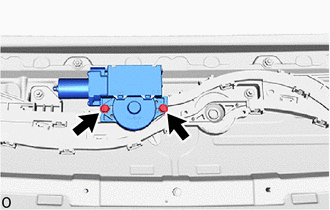
Temporarily install the sliding roof drive gear assembly with the 2 bolts.
Tighten the 2 bolts.
- NOTICE:
-
While balancing the bolt upright, tighten it evenly.
- Torque:
- 5.4 N*m (55 kgf*cm, 48 in.*lbf)
63260K
5.INSTALL SLIDING ROOF DRIVE GEAR ASSEMBLY (for Sliding Roof Glass)
Apply MP grease to the gear of the sliding roof drive gear assembly.
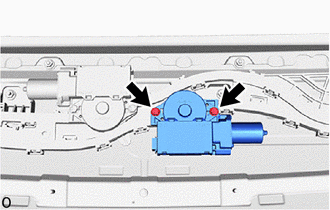
Temporarily install the sliding roof drive gear assembly with the 2 bolts.
Tighten the 2 bolts.
- NOTICE:
-
While balancing the bolt upright, tighten it evenly.
- Torque:
- 5.4 N*m (55 kgf*cm, 48 in.*lbf)
82172
6.INSTALL NO. 2 ROOF WIRE
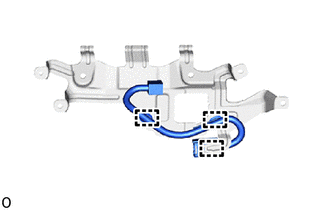
| *a | Wire Harness Clamp |
| *b | Connector Clamp |
Attach the connector clamp and wire harness clamp and install the No. 2 roof wire.
63231C
7.INSTALL ROOM LIGHT BRACKET
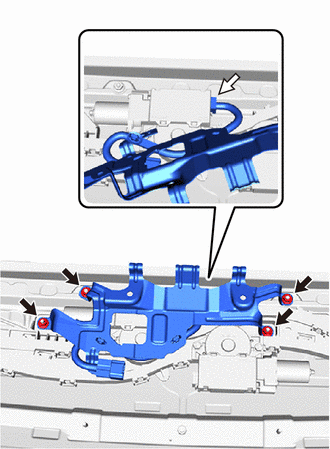
| *a | Backside |
|
|
Nut |

|
Connector |
Connect the connector and install the room light bracket.
Install the room light bracket with the 4 nuts.
- Torque:
- 6.3 N*m (64 kgf*cm, 56 in.*lbf)
63201A
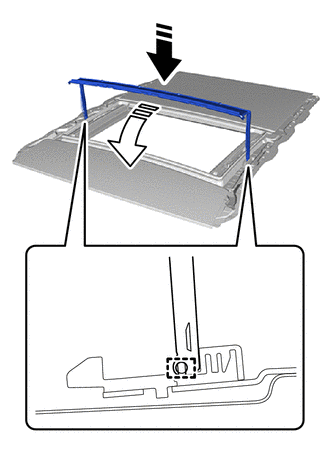
8.INSTALL SLIDING ROOF PANEL SUB-ASSEMBLY
|
|
Install in this Direction (1) |
|
|
Install in this Direction (2) |
Move the sliding roof panel sub-assembly in the direction indicated by the arrow (1) shown in the illustration to attach the 2 guides.
Move the sliding roof panel sub-assembly in the direction indicated by the arrow (2) shown in the illustration.
Attach the guide and claw to install the sliding roof panel sub-assembly.