SLIDING ROOF / CONVERTIBLE SLIDING ROOF HOUSING(for Panoramic Moon Roof) DISASSEMBLY
PROCEDURE

 63201A
1.REMOVE SLIDING ROOF PANEL SUB-ASSEMBLY
63201A
1.REMOVE SLIDING ROOF PANEL SUB-ASSEMBLY
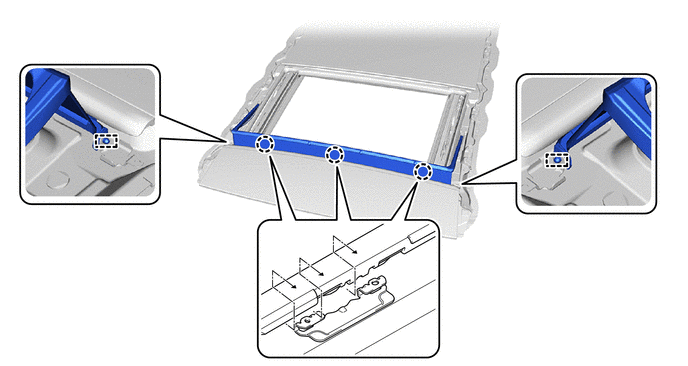
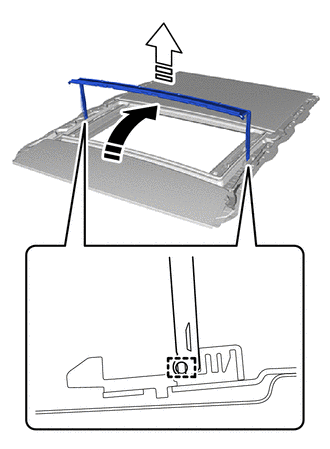
Detach the claw and guide.

|
Remove in this Direction (1) |

|
Remove in this Direction (2) |
Move the sliding roof panel sub-assembly in the direction indicated by the arrow (1) shown in the illustration.
Detach the guide and remove the sliding roof panel sub-assembly in the direction indicated by the arrow (2) shown in the illustration.
63231C
2.REMOVE ROOM LIGHT BRACKET
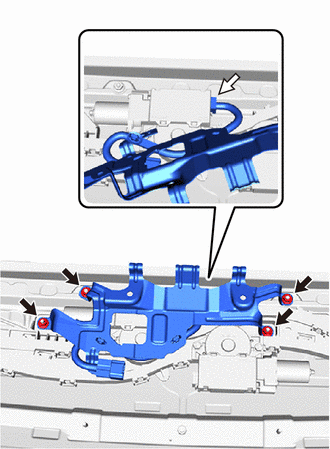
| *a | Backside |

|
Nut |

|
Connector |
Remove the 4 nuts.
Disconnect the connector and remove the room light bracket.
82172
3.REMOVE NO. 2 ROOF WIRE
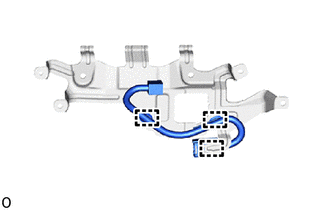
| *a | Wire Harness Clamp |
| *b | Connector Clamp |
Detach the wire harness clamp and connector clamp to remove the No. 2 roof wire.
63260K
4.REMOVE SLIDING ROOF DRIVE GEAR ASSEMBLY (for Sliding Roof Glass)
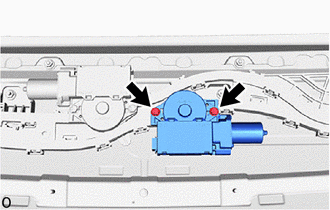
Remove the 2 bolts and sliding roof drive gear assembly.
63260J
5.REMOVE SLIDING ROOF DRIVE GEAR ASSEMBLY (for Roof Sunshade)
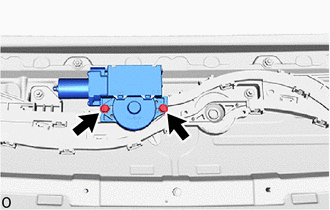
Remove the 2 bolts and sliding roof drive gear sub-assembly.
63219A
6.REMOVE REAR SLIDING ROOF GARNISH
- HINT:
-
Perform the following procedures if replacing the rear sliding roof garnish.
Using a heat light, heat the rear sliding roof garnish.
| Item | Temperature |
|---|---|
| Rear Sliding Roof Garnish | 20 to 30°C (68 to 86°F) |
- CAUTION:
-
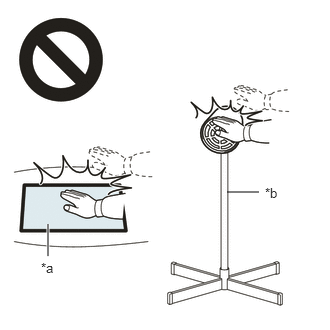 2.365,2 2.698,2 false 0.5,2.333 0.5,2.667 true 0.427,2.708 0.74,2.865 0.313,0.156 10 false *a 2.76,1.927 3.073,2.083 0.313,0.156 10 false *b
*a Heated Part *b Heat Light
- ·
Do not touch the heat light and heated parts, as touching the heat light may result in burns.
·Touching heated parts for a long time may result in burns.
- NOTICE:
-
Do not heat the rear sliding roof garnish excessively.
Detach the double-sided tape and the guide to remove the rear sliding roof garnish.
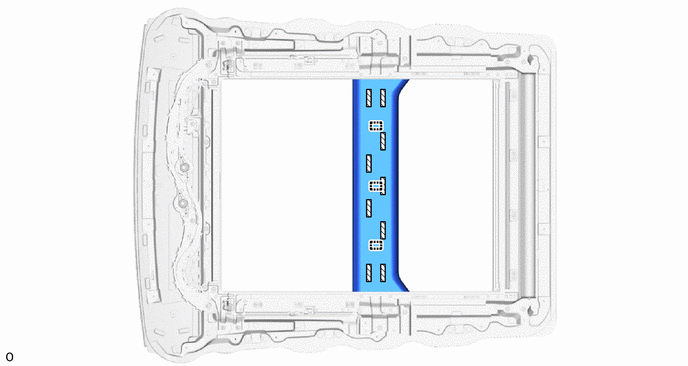

|
Double-sided Tape | - | - |
- NOTICE:
-
Be sure to replace the rear sliding roof garnish with a new one.
63202H
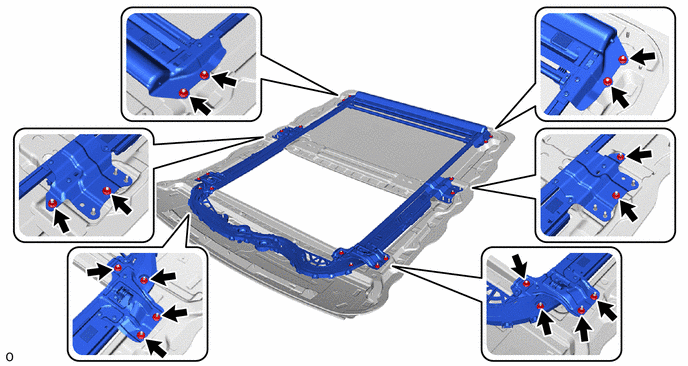
7.REMOVE SLIDE ROOF RAIL SUB-ASSEMBLY
Remove the 16 nuts and slide roof rail sub-assembly from the sliding roof housing panel.
63306
8.REMOVE SUNSHADE TRIM SUB-ASSEMBLY
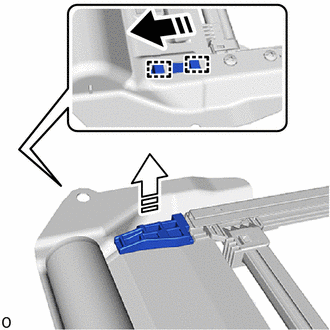
| *1 | Sliding Roof Sunshade Guide LH |
| *a | Backside |
|
|
Remove in this Direction (1) |
|
|
Remove in this Direction (2) |
Detach the guide in the direction indicated by the arrow (1) shown in the illustration.
- HINT:
-
Use the same procedure for the other side.
Remove the sliding roof sunshade guide LH in the direction indicated by the arrow (2) shown in the illustration.
- HINT:
-
Use the same procedure for the other side.
Using a screwdriver, detach the claw and remove part A as shown in the illustration.
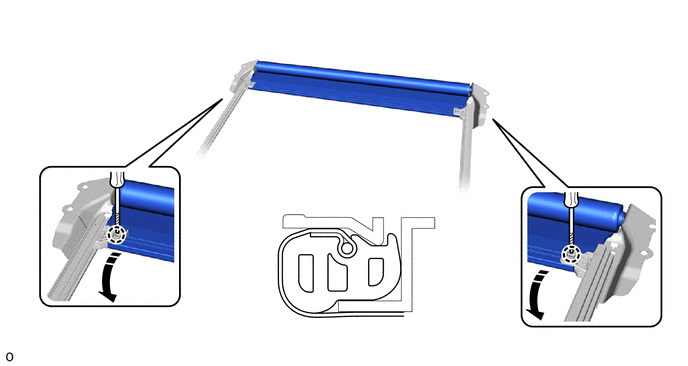
| *a | Part A | - | - |
|
|
Remove in this Direction |
|
Protective Tape |
- HINT:
-
Tape the screwdriver tip before use.
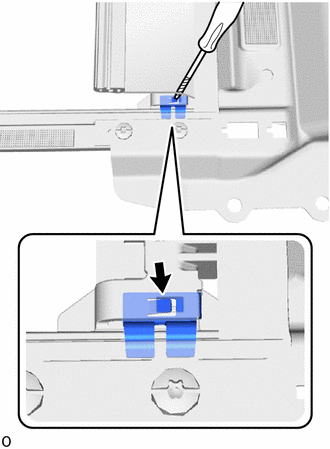
| *1 | Sliding Roof Sunshade Plate LH |
|
|
Claw |
|
|
Protective Tape |
Using a screwdriver, push it in the direction shown in the illustration to detach the claw of the sliding roof sunshade plate LH.
- HINT:
- ·
Tape the screwdriver tip before use.
·Use the same procedure for the other side.
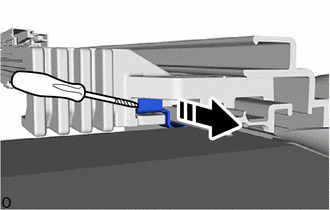
| *1 | Sliding Roof Sunshade Plate LH |
|
|
Remove in this Direction |
|
|
Protective Tape |
Using a screwdriver, remove the sliding roof sunshade plate LH in the direction shown in the illustration.
- HINT:
- ·
Tape the screwdriver tip before use.
·Use the same procedure for the other side.
Push the retractor cap, lift up the sunshade trim sub-assembly in the direction of the arrow (1) and then remove it in the direction of the arrow (2) as shown in the illustration.
- NOTICE:
-
To prevent the sunshade trim sub-assembly from being damaged, fully push in the RH side retractor cap before lifting the sunshade trim sub-assembly to separate it from the slide roof rail sub-assembly.
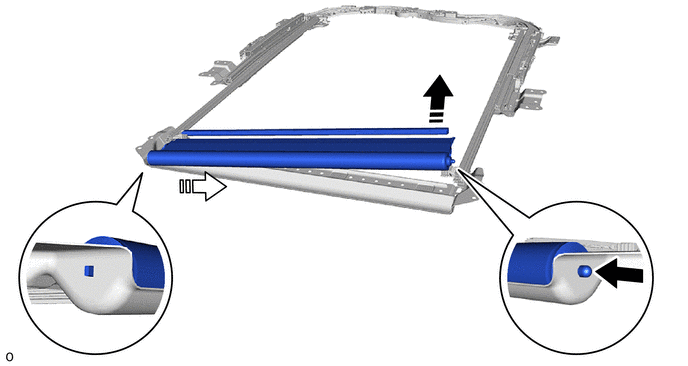
| *a | Retractor Cap | - | - |
|
|
Push |
|
Remove in this Direction (1) |
|
|
Remove in this Direction (2) | - | - |