M20C-FKS, M20D-FKS EMISSION CONTROL EXHAUST GAS TEMPERATURE SENSOR REMOVAL
CAUTION / NOTICE / HINT
The necessary procedures (adjustment, calibration, initialization, or registration) that must be performed after parts are removed and installed, or replaced during exhaust gas temperature sensor removal/installation are shown below.
| Replaced Part or Performed Procedure | Necessary Procedure | Effect/Inoperative Function when Necessary Procedure not Performed | Link |
|---|---|---|---|
| Gas leaks from exhaust system is repaired | Inspection after repair | ·
Poor idle, etc. ·
Engine start function, etc. |
( 202303,999999,_51,_111785,_0504416,RM1000000029BFF,) 202303,999999,_51,_111785,_0504416,RM1000000029BFF,)
|
- CAUTION:
-
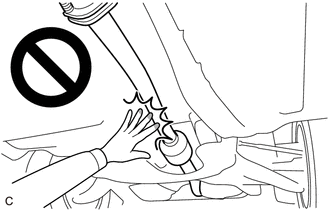
-
To prevent burns, do not touch the engine, exhaust pipe or other high temperature components while the engine is hot.
PROCEDURE

 51420
1.REMOVE NO. 2 ENGINE UNDER COVER ASSEMBLY
51420
1.REMOVE NO. 2 ENGINE UNDER COVER ASSEMBLY
58165C
2.REMOVE FRONT FLOOR COVER RH
3.REMOVE WIRING HARNESS CLAMP BRACKET
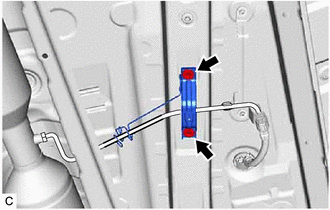
Remove the 2 bolts and remove wiring harness clamp bracket.
89425
4.REMOVE NO. 1 EXHAUST GAS TEMPERATURE SENSOR
- CAUTION:
-
To prevent burns, do not touch the engine, exhaust pipe or other high temperature components while the engine is hot.
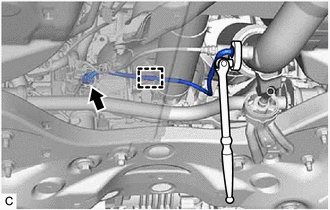
Disconnect the connector.
Detach the clamp.
Using a 14 mm union nut wrench, remove the No. 1 exhaust gas temperature sensor.
- NOTICE:
-
If the No. 1 exhaust gas temperature sensor has been struck or dropped, replace it.
89425A
5.REMOVE NO. 2 EXHAUST GAS TEMPERATURE SENSOR
- CAUTION:
-
To prevent burns, do not touch the engine, exhaust pipe or other high temperature components while the engine is hot.

Disconnect the connector.
Detach the 2clamps.
Using a 14 mm union nut wrench, remove the No. 2 exhaust gas temperature sensor.
- NOTICE:
-
If the No. 2 exhaust gas temperature sensor has been struck or dropped, replace it.