INTERIOR PANELS / TRIM ROOF SUNSHADE(for Long Type Panoramic Fixed Moon Roof) REASSEMBLY
PROCEDURE

 1.INSTALL SUNSHADE TRIM SUB-ASSEMBLY
When replacing with a new part:
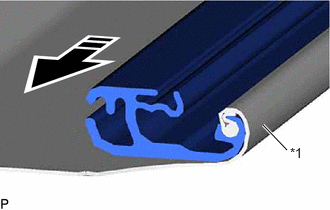
| *1 | Fabric |

|
Remove in this Direction |
Pull out the crossbar from the fabric as shown in the illustration.
Insert the guiding cap in the direction shown by the arrow (1), and install the sunshade trim sub-assembly in the direction shown by the arrow (2).
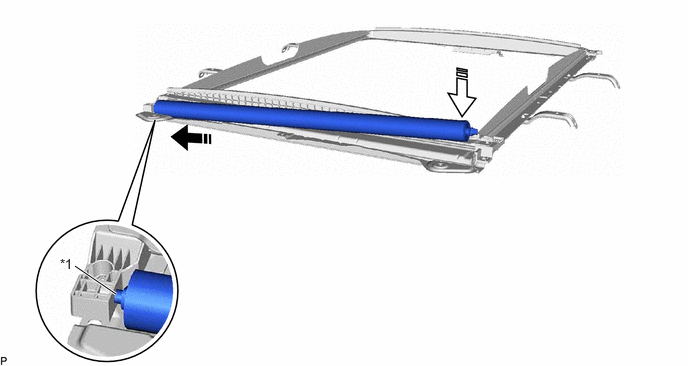
| *1 | Guiding Cap | - | - |
|
|
Install in this Direction (1) | 
|
Install in this Direction (2) |
Rotate the bearing pin to align with the position shown in the illustration.
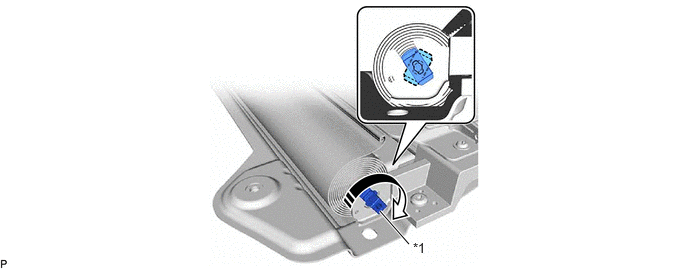
| *1 | Bearing Pin | - | - |
|
|
Rotation Direction | - | - |
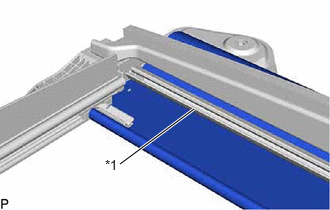
| *1 | Roller Stay |
Pass the fabric through the roller stay.
Insert the side tension guide of the fabric into the shade base RH as shown in the illustration.
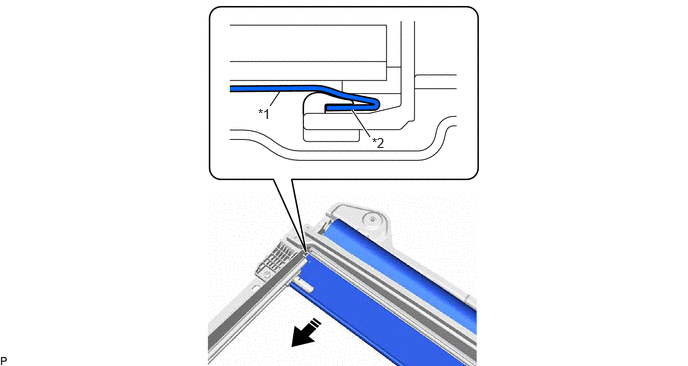
| *1 | Shade Base RH | *2 | Side Tension Guide |
|
|
Install in this Direction | - | - |
- HINT:
-
Use the same procedure for the other side.
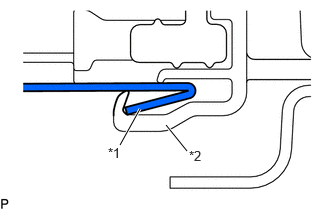
| *1 | Side Tension Guide |
| *2 | Guide Rail RH |
After inserting, check that the side tension guide is inserted between the guide rail RH.
- HINT:
-
Use the same procedure for the other side.
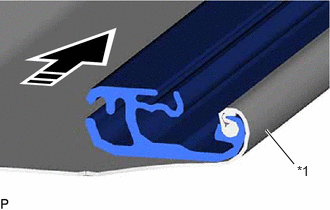
| *1 | Fabric |
|
|
Install in this Direction |
Install the crossbar to the fabric as shown in the illustration.
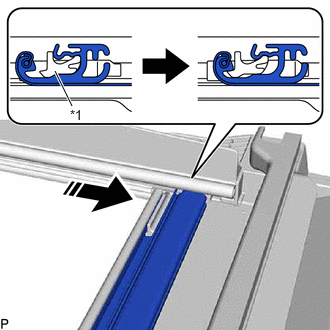
| *1 | Drive Cable RH |
|
|
Pull in this Direction |
Pull the crossbar rearward and install it to the drive cable RH as shown in the illustration.
- HINT:
-
Use the same procedure for the other side.