DOOR / HATCH REAR DOOR REASSEMBLY
CAUTION / NOTICE / HINT
- HINT:
- ·
Use the same procedure for the RH side and LH side.
·The following procedure is for the LH side.
PROCEDURE

 1. PRECAUTION
- NOTICE:
-
After the ignition switch is turned off, there may be a waiting time before disconnecting the negative (-) auxiliary battery terminal.
2. REPAIR INSTRUCTION
67846A
3.INSTALL REAR DOOR FRONT OUTSIDE SEAL
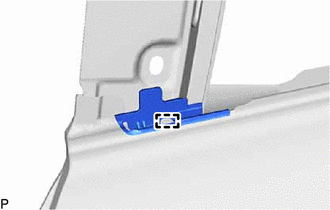
Engage the guide to install a new rear door front outside seal.
75078
4.INSTALL REAR DOOR LOWER OUTSIDE MOULDING SUB-ASSEMBLY
5.INSTALL HOLE PLUG
75764A
6.INSTALL REAR DOOR UPPER WINDOW FRAME MOULDING
75766A
7.INSTALL REAR DOOR REAR WINDOW FRAME MOULDING
75762B
8.INSTALL REAR DOOR WINDOW FRAME MOULDING (CENTER PILLAR SIDE)
75954A
9.INSTALL REAR INNER BLACK OUT TAPE
75988E
10.INSTALL REAR DOOR OUTSIDE STRIPE
75978H
11.INSTALL REAR DOOR LOWER OUTSIDE STRIPE
67003C
12.INSTALL REAR DOOR PANEL CUSHION
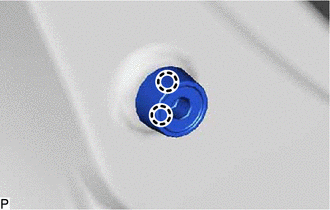
Engage the 2 claws to install the rear door panel cushion.
67836D
13.INSTALL REAR DOOR LOCK CHILD PROTECTION COVER
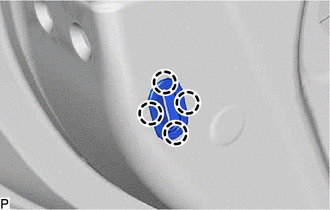
Engage the 4 claws to install the rear door lock child protection cover.
75792
14.INSTALL DOOR WINDOW FRAME MOULDING CLIP
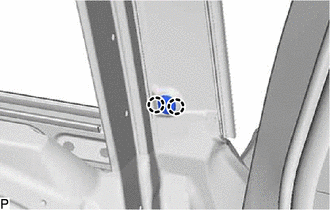
Engage the 2 claws to install the door window frame moulding clip.
67874C
15.INSTALL REAR DOOR NO. 5 WEATHERSTRIP
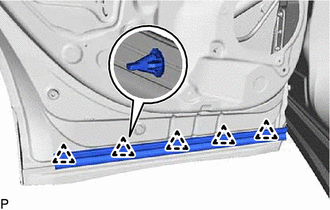
Engage the 5 clips.
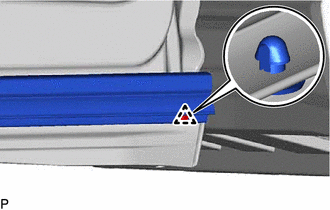
Engage the clip to install the rear door No. 5 weatherstrip.
67872
16.INSTALL REAR DOOR WEATHERSTRIP
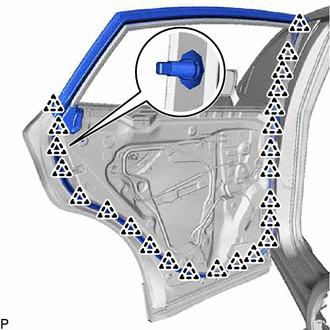
Engage the 24 clips and install the rear door weatherstrip.
68630
17.INSTALL REAR DOOR CHECK ASSEMBLY
Clean the bolt (A) hole in the vehicle body.
Clean the threads of the bolt (A).
Apply adhesive to the threads of the bolt (A).
- Adhesive:
Toyota Genuine Adhesive 1324, Three Bond 1324 or equivalent
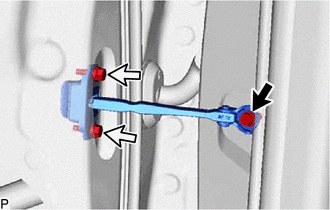

|
Bolt (A) |

|
Bolt (B) |
Install the rear door check assembly with the bolt (A) and 2 bolts (B).
- Torque:
- Bolt (A) : 30 N*m (306 kgf*cm, 22 ft.*lbf)
- Bolt (B) : 5.5 N*m (56 kgf*cm, 49 in.*lbf)
69204A
18.INSTALL REAR DOOR OUTSIDE HANDLE FRAME SUB-ASSEMBLY
Apply MP grease to the sliding parts on the rear door outside handle frame sub-assembly.
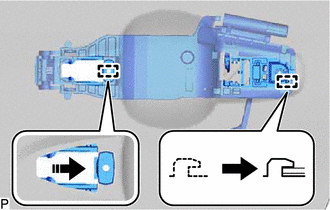

|
Install in this Direction |
Engage the 2 guides as shown in the illustration.
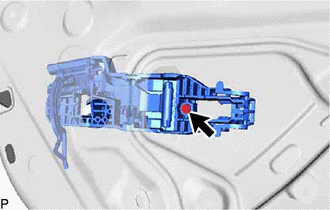
Using a T30 "TORX" socket wrench, install the rear door outside handle frame sub-assembly with the screw.
- Torque:
- 4.0 N*m (41 kgf*cm, 35 in.*lbf)
69242G
19.INSTALL REAR DOOR REAR OUTSIDE HANDLE PAD

Engage the 4 guides to install the rear door rear outside handle pad.
69241G
20.INSTALL REAR DOOR FRONT OUTSIDE HANDLE PAD
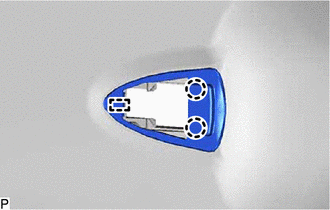
Engage the 2 claws and guide to install the rear door front outside handle pad.
69227M
21.INSTALL REAR DOOR OUTSIDE HANDLE COVER

Engage the 2 claws.
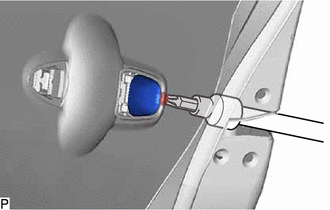
Using a T30 "TORX" socket wrench, install the rear door outside handle cover with the screw.
- Torque:
- 4.0 N*m (41 kgf*cm, 35 in.*lbf)
69240
22.INSTALL REAR DOOR OUTSIDE HANDLE ASSEMBLY
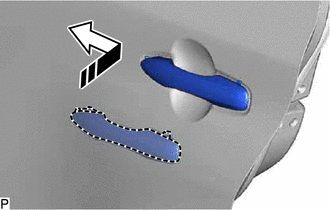
|
|
Install in this Direction |
Insert the front end of the rear door outside handle assembly into the rear door outside handle frame sub-assembly as shown in the illustration.
Insert the rear end of the rear door outside handle assembly into the rear door outside handle frame sub-assembly, then slide the rear door outside handle assembly toward the front of the vehicle to install it.
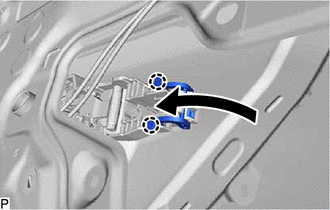
Move the lever as shown in the illustration and engage the 2 claws to lock the rear door outside handle assembly.
69060A
23.INSTALL REAR DOOR LOCK WITH MOTOR ASSEMBLY
24.INSTALL REAR DOOR WINDOW REGULATOR ASSEMBLY
Apply MP grease to the sliding parts of the rear door window regulator assembly.
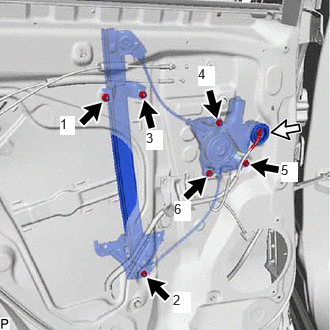
Temporarily install the rear door window regulator assembly with the 6 nuts.
Fully tighten the 6 nuts to install the rear door window regulator assembly.
- HINT:
-
Tighten the nuts in the order shown in the illustration.
- Torque:
- 8.0 N*m (82 kgf*cm, 71 in.*lbf)
Connect the connector.
68104
25.INSTALL REAR DOOR GLASS SUB-ASSEMBLY
Connect the rear power window regulator switch assembly.
Connect the cable to the negative (-) auxiliary battery terminal.
Turn the ignition switch to ON.
Move the rear door window regulator assembly so that the door glass bolt holes can be seen.
Turn the ignition switch off.
Disconnect the cable from the negative (-) auxiliary battery terminal.
Disconnect the rear power window regulator switch assembly.
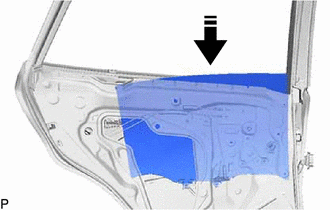
|
|
Install in this Direction |
Insert the rear door glass sub-assembly into the rear door panel as shown in the illustration.
- NOTICE:
-
Do not damage the rear door glass sub-assembly.
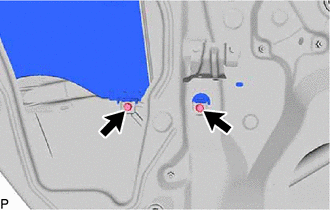
Install the rear door glass sub-assembly with the 2 bolts.
- Torque:
- 8.0 N*m (82 kgf*cm, 71 in.*lbf)
26.INSTALL HOLE PLUG
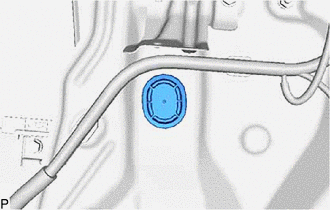
Install the hole plug.
68189
27.INSTALL REAR DOOR QUARTER WINDOW WEATHERSTRIP
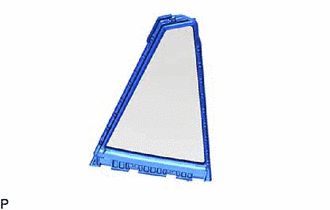
Install the rear door quarter window weatherstrip from the rear door quarter window glass.
68124B
28.INSTALL REAR DOOR QUARTER WINDOW GLASS
|
|
Install in this Direction |
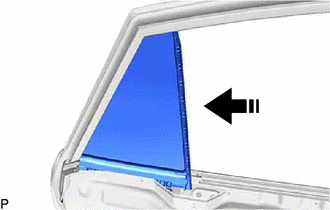
Install the rear door quarter window glass as shown in the illustration.
67408E
29.INSTALL REAR DOOR WINDOW DIVISION BAR SUB-ASSEMBLY
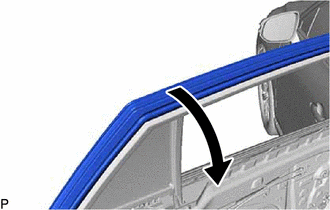
Lift up the rear door weatherstrip as shown in the illustration.
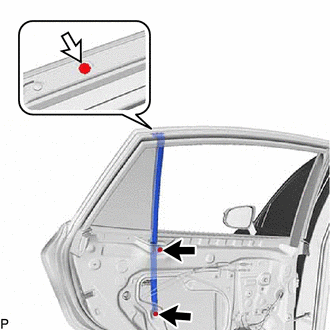
Install the rear door window division bar sub-assembly with the screw and 2 bolts.
- Torque:
- Bolt : 8.5 N*m (87 kgf*cm, 75 in.*lbf)
- Screw : 3.1 N*m (32 kgf*cm, 27 in.*lbf)
Install the rear door weatherstrip to the original position.
68152C
30.INSTALL REAR DOOR GLASS RUN
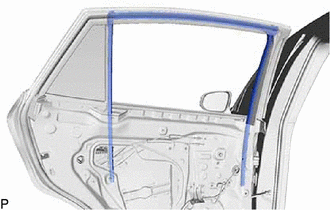
Install the rear door glass run.
75740
31.INSTALL REAR DOOR BELT MOULDING ASSEMBLY
67674A
32.INSTALL REAR DOOR FRAME GARNISH
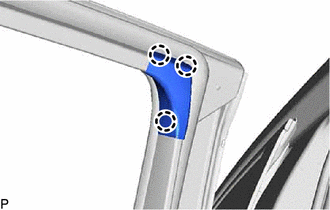
Engage the 3 claws to install the rear door frame garnish.
67842E
33.INSTALL REAR DOOR SERVICE HOLE COVER
Apply new butyl tape to the rear door panel.
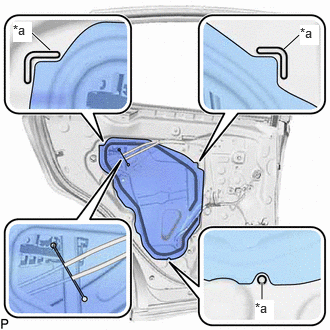
| *a | Reference Point |
Pass the rear door lock remote control cable assembly and rear door inside locking cable assembly through a new rear door service hole cover.
Attach the rear door service hole cover according to the reference points on the rear door panel.
- NOTICE:
-
Securely install the rear door service hole cover preventing wrinkles and air bubbles.
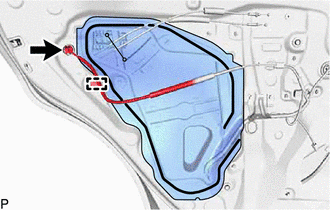
Engage the clamp.
Connect the connector.
86160B
34.INSTALL REAR SPEAKER ASSEMBLY
68199
35.INSTALL REAR DOOR REAR BELT SEAL
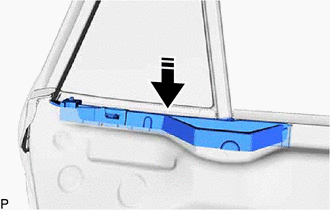
|
|
Install in this Direction |
Install the rear door rear belt seal as shown in the illustration.
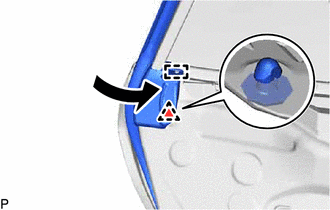
Engage the guide and clip to connect the rear door weatherstrip as shown in the illustration.
68197A
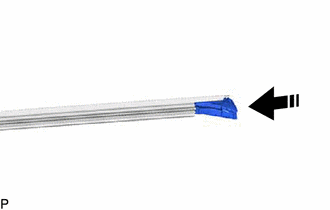
36.INSTALL REAR DOOR FRONT BELT SEAL
|
|
Install in this Direction |
Install the rear door front belt seal to the rear door inner glass weatherstrip as shown in the illustration.
68174A
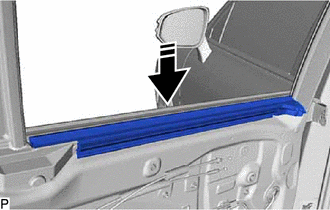
37.INSTALL REAR DOOR INNER GLASS WEATHERSTRIP
|
|
Install in this Direction |
Install the rear door inner glass weatherstrip with rear door front belt seal as shown in the illustration.
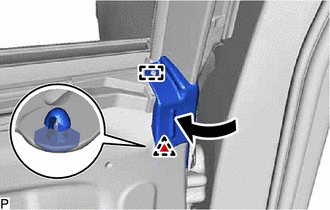
Engage the guide and clip to connect the rear door weatherstrip as shown in the illustration.
69206C
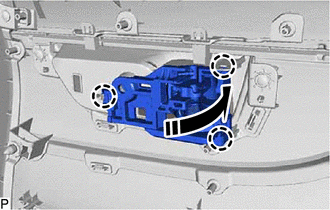
38.INSTALL REAR DOOR INSIDE HANDLE SUB-ASSEMBLY
|
|
Install in this Direction |
Engage the 3 claws to install the rear door inside handle sub-assembly as shown in the illustration.
39.INSTALL REAR POWER WINDOW REGULATOR SWITCH ASSEMBLY WITH REAR DOOR ARMREST BASE PANEL

Engage the 2 claws.
Install the rear power window regulator switch assembly with rear door armrest base panel with the 10 screws.
67604
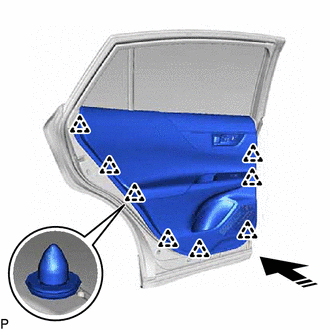
40.INSTALL REAR DOOR TRIM BOARD SUB-ASSEMBLY
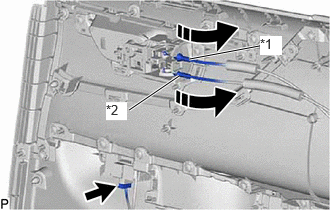
| *1 | Rear Door Inside Locking Cable Assembly |
| *2 | Rear Door Lock Remote Control Cable Assembly |
|
|
Install in this Direction |
Connect the connector.
Connect the rear door lock remote control cable assembly and rear door inside locking cable assembly to the rear door inside handle sub-assembly as shown in the illustration.
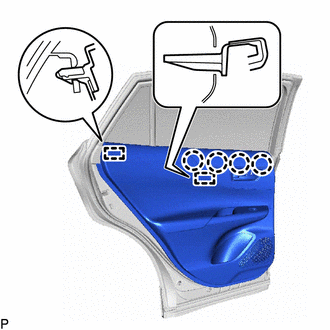
Engage the 2 guides and 4 claws.
|
|
Install in this Direction |
Engage the 8 clips as shown in the illustration.
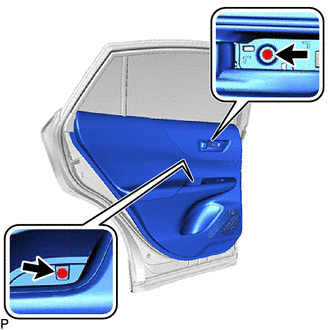
Install the rear door trim board sub-assembly with the 2 screws.
Remove the protective tape.
74222C
41.INSTALL REAR DOOR ARMREST COVER
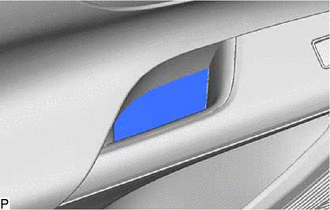
Install the rear door armrest cover.
69278C
42.INSTALL REAR DOOR INSIDE HANDLE BEZEL
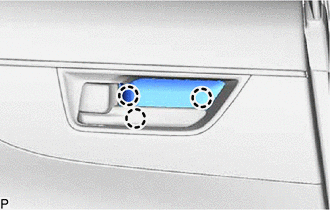
Engage the 3 claws to install the rear door inside handle bezel.
43.CONNECT CABLE TO NEGATIVE AUXILIARY BATTERY TERMINAL
for M20C-FKS, M20D-FKS:
for A25D-FXS, A25F-FXS:
44. INITIALIZATION AFTER RECONNECTING AUXILIARY BATTERY TERMINAL
- HINT:
-
When disconnecting and reconnecting the battery, there is an automatic learning function that completes learning when the respective system is used.
65351A
45.INSTALL BATTERY HOLE COVER (for HV Model)
58416K
46.INSTALL REAR NO. 2 FLOOR BOARD (for HV Model)
47.INITIALIZE POWER WINDOW CONTROL SYSTEM
48.INSPECT POWER WINDOW OPERATION