INTERIOR PANELS / TRIM FRONT CONSOLE BOX REMOVAL
PROCEDURE

 62311B
1.DISCONNECT FRONT DOOR OPENING TRIM WEATHERSTRIP RH
62311B
1.DISCONNECT FRONT DOOR OPENING TRIM WEATHERSTRIP RH
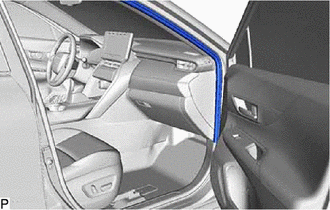
Disconnect the front door opening trim weatherstrip RH.
55317E
2.REMOVE NO. 1 INSTRUMENT SIDE PANEL
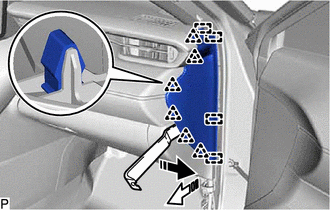

|
Remove in this Direction (1) |

|
Remove in this Direction (2) |
Using a moulding remover, pull the No. 1 instrument side panel in the direction indicated by the arrow (1) shown in the illustration to disengage the 6 clips.
Pull the No. 1 instrument side panel in the direction indicated by the arrow (2) shown in the illustration to disengage the 4 guides and remove it.
55475A
3.REMOVE NO. 2 INSTRUMENT CLUSTER FINISH PANEL GARNISH
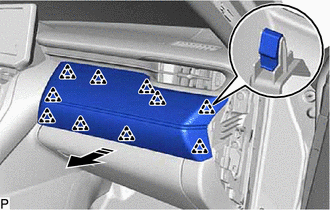
|
|
Remove in this Direction |
Disengage the 10 clips as shown in the illustration to remove the No. 2 instrument cluster finish panel garnish.
58834B
4.REMOVE UPPER NO. 2 CONSOLE PANEL GARNISH
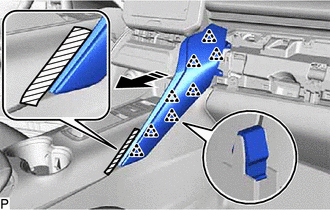

|
Protective Tape |
|
|
Remove in this Direction |
Apply protective tape to the area shown in the illustration.
Disengage the 8 clips as shown in the illustration to remove the upper No. 2 console panel garnish.
58833B
5.REMOVE UPPER NO. 1 CONSOLE PANEL GARNISH
|
|
Protective Tape |
|
|
Remove in this Direction |
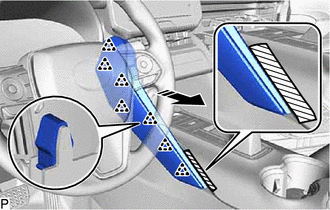
Apply protective tape to the area shown in the illustration.
Disengage the 7 clips as shown in the illustration to remove the upper No. 1 console panel garnish.
58835C
6.REMOVE CONSOLE BOX ORNAMENT (w/o Seat Heater System)
|
|
Remove in this Direction |
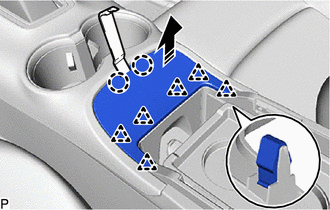
Using a moulding remover, disengage the 2 claws and 6 clips as shown in the illustration to remove the console box ornament.
58835C
7.REMOVE CONSOLE BOX ORNAMENT (w/ Seat Heater System)
|
|
Remove in this Direction |
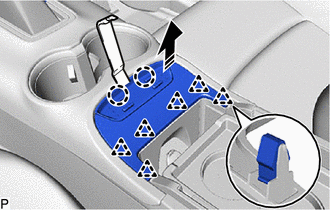
Using a moulding remover, disengage the 2 claws and 6 clips as shown in the illustration.
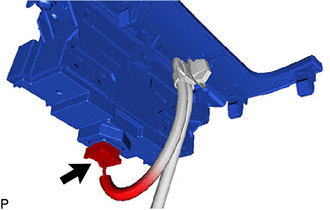
Disconnect the connector to remove the console box ornament.
33504F
8.REMOVE SHIFT LEVER KNOB SUB-ASSEMBLY
58804A
9.REMOVE UPPER CONSOLE PANEL SUB-ASSEMBLY
Move the shift lever to N.
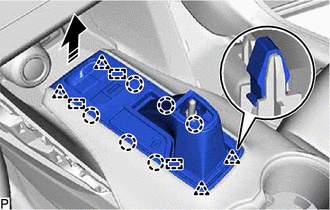
|
|
Remove in this Direction |
Disengage the 4 clips, 6 claws and 3 guides as shown in the illustration.
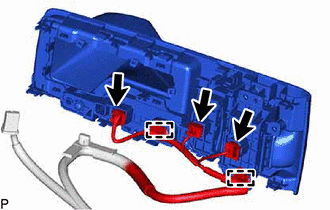
Disconnect the 3 connectors and disengage the 2 clamps to remove the upper console panel sub-assembly.
58803C
10.REMOVE CONSOLE CUP HOLDER BOX SUB-ASSEMBLY
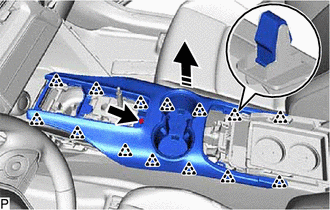
|
|
Remove in this Direction |
Remove the bolt.
Disengage the 14 clips as shown in the illustration.
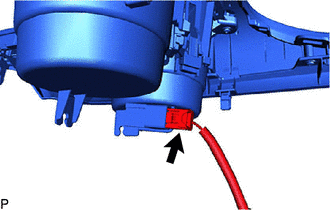
Disconnect the connector to remove the console cup holder box sub-assembly.
11.REMOVE CONSOLE REAR END PANEL SUB-ASSEMBLY
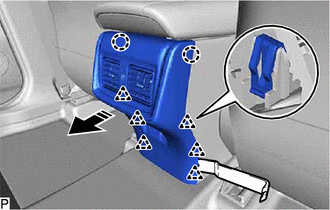
|
|
Remove in this Direction |
Using a moulding remover, disengage the 2 claws and 6 clips as shown in the illustration.
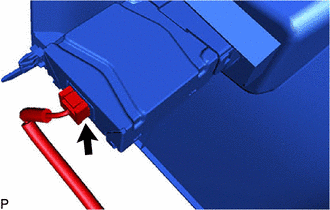
Disconnect the connector to remove the console rear end panel sub-assembly.
58817A
12.REMOVE FRONT NO. 2 CONSOLE BOX INSERT
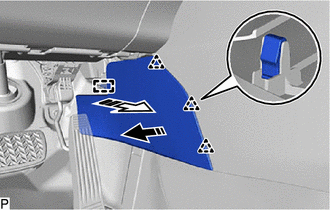
|
|
Remove in this Direction (1) |
|
|
Remove in this Direction (2) |
Pull the front No. 2 console box insert in the direction indicated by the arrow (1) shown in the illustration to disengage the 3 clips.
Pull the front No. 2 console box insert in the direction indicated by the arrow (2) shown in the illustration to disengage the guide and remove it.
58816D
13.REMOVE FRONT NO. 1 CONSOLE BOX INSERT
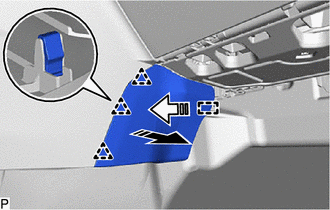
|
|
Remove in this Direction (1) |
|
|
Remove in this Direction (2) |
Pull the front No. 1 console box insert in the direction indicated by the arrow (1) shown in the illustration to disengage the 3 clips.
Pull the front No. 1 console box insert in the direction indicated by the arrow (2) shown in the illustration to disengage the guide and remove it.
58825A
14.REMOVE CONSOLE BOX POCKET
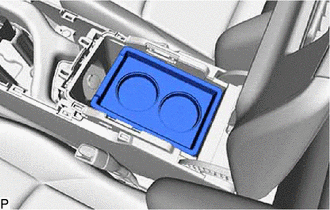
Remove the console box pocket.
58815F
15.REMOVE CONSOLE BOX CARPET
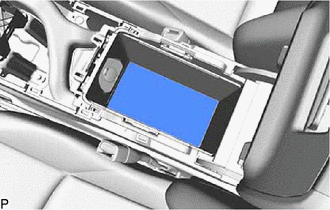
Remove the console box carpet.
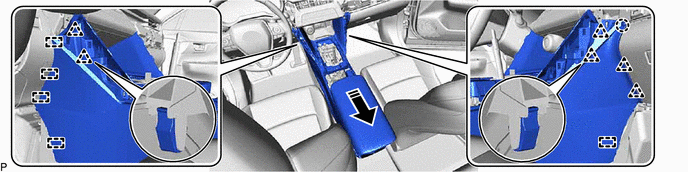
16.REMOVE CONSOLE BOX ASSEMBLY
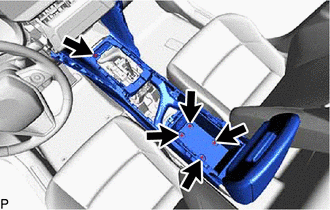
Remove the 5 bolts.
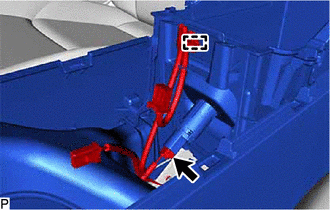
Disconnect the connector and disengage the clamp.
Pull the console box assembly to disengage the claw, 6 clips and 5 guides and remove the console box assembly as shown in the illustration.
|
|
Remove in this Direction | - | - |