BRAKE SYSTEM (OTHER) VACUUM PUMP(for M20 Series Engine, BOSCH Made) REMOVAL
CAUTION / NOTICE / HINT
- NOTICE:
-
This procedure includes the removal of small-head bolts. Refer to Small-head Bolts of Basic Repair Hint to identify the small-head bolts.
- HINT:
-
Refer to the following illustration and check which type is installed to the vehicle.
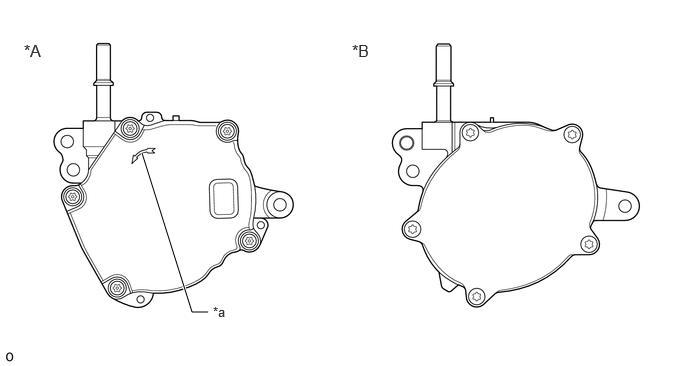 2.167,3.25 2,3.25 2,3.25 1.479,1.594 true 0.25,0.427 0.625,0.667 0.375,0.24 12 false *A 3.667,0.427 4.042,0.667 0.375,0.24 12 false *B 2.219,3.167 2.531,3.365 0.313,0.198 10 false *a
*A for BOSCH Made *B except BOSCH Made *a Mark - -
PROCEDURE

 12601B
1.REMOVE NO. 1 ENGINE COVER SUB-ASSEMBLY
12601B
1.REMOVE NO. 1 ENGINE COVER SUB-ASSEMBLY
44777
2.DISCONNECT NO.1 VACUUM HOSE CONNECTOR
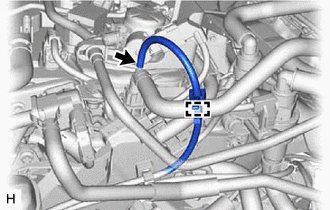
Disconnect the vacuum hose from No. 1 vacuum hose connector and disengage the clamp to separate the vacuum hose.
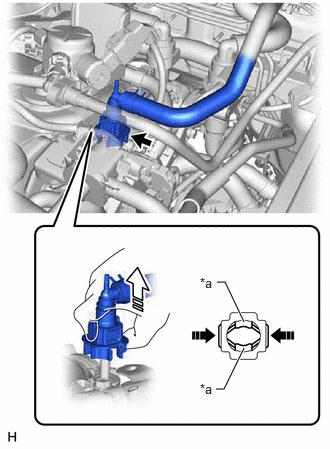
| *a | Retainer |

|
Pinch |

|
Pull off |
Pinch the retainer of the No. 1 vacuum hose connector, and then pull the No. 1 vacuum hose connector off of the vacuum pump assembly.
- NOTICE:
-
Be sure to disconnect the No. 1 vacuum hose connector by hand.
82121
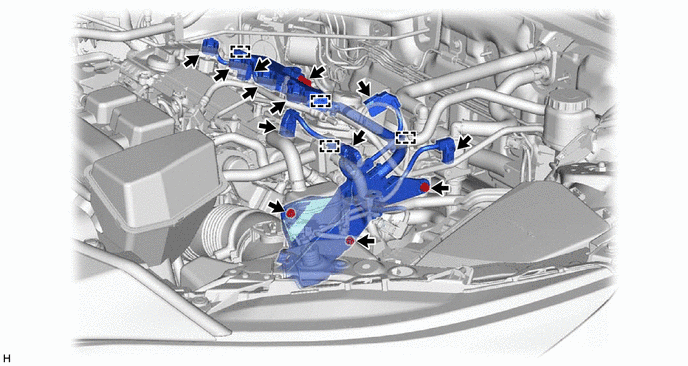
3.SEPARATE ENGINE WIRE
Remove the bolt and 2 nuts, disconnect the 10 connectors and disengage the 4 clamps.
29300
4.REMOVE VACUUM PUMP ASSEMBLY
Move aside the engine wire.
- NOTICE:
-
Do not apply excessive force to the engine wire.
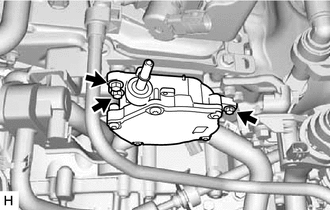
Using an 8 mm socket wrench, remove the 3 bolts and vacuum pump assembly from the engine assembly.

Remove the No. 1 vacuum pump O-ring from the vacuum pump assembly.