LIGHTING (INT) FOOTWELL LIGHT INSPECTION
PROCEDURE

 81080N
1.INSPECT NO. 1 INTERIOR ILLUMINATION LIGHT ASSEMBLY
81080N
1.INSPECT NO. 1 INTERIOR ILLUMINATION LIGHT ASSEMBLY
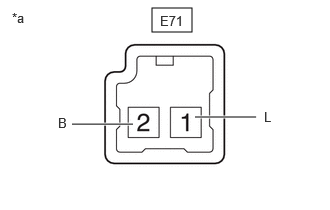
| *a | Component without harness connected
(No. 1 Interior Illumination Light Assembly) |
Apply auxiliary battery voltage to the No. 1 interior illumination light assembly and check that the light illuminates.
- OK:
Tester Connection Specified Condition Click Location & Routing(E71)Location & Routingewd_type=routing;type=c;code=E71
Click Connector(E71)Instrument Panel>Instrument Panel Wire / Radio Wiring Sub-Assy / Telephone Computer Wire>No. 2 Interior Illumination Light Assembly LHewd_type=component;type=c;code=E71;pinno=2,1
E71-2 (B) - Auxiliary battery positive (+)
E71-1 (L) - Auxiliary battery negative (-)Front footwell light illuminates
If the result is not as specified, replace the No. 1 interior illumination light assembly.
81080V
2.INSPECT NO. 2 INTERIOR ILLUMINATION LIGHT ASSEMBLY
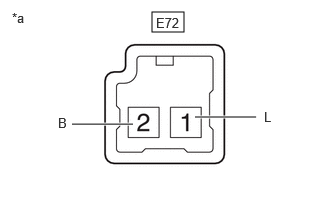
| *a | Component without harness connected
(No. 2 Interior Illumination Light Assembly) |
Apply auxiliary battery voltage to the No. 2 interior illumination light assembly and check that the light illuminates.
- OK:
Tester Connection Specified Condition Click Location & Routing(E72)Location & Routingewd_type=routing;type=c;code=E72
Click Connector(E72)Instrument Panel>Instrument Panel Wire / Radio Wiring Sub-Assy / Telephone Computer Wire>No. 2 Interior Illumination Light Assembly RHewd_type=component;type=c;code=E72;pinno=2,1
E72-2 (B) - Auxiliary battery positive (+)
E72-1 (L) - Auxiliary battery negative (-)Front footwell light illuminates
If the result is not as specified, replace the No. 2 interior illumination light assembly.