AUDIO / VIDEO RADIO RECEIVER REMOVAL
CAUTION / NOTICE / HINT
The necessary procedures (adjustment, calibration, initialization or registration) that must be performed after parts are removed, installed or replaced during the radio and display receiver assembly removal/installation are shown below.
| Replacement Part or Procedure | Necessary Procedures | Effect/Inoperative Function When Necessary Procedures are not Performed | Link |
|---|---|---|---|
| Radio and display receiver assembly | Software update | - | See the Service Bulletin for the registration method. |
| Navigation receiver assembly |
| Replacement Part or Procedure | Necessary Procedures | Effect/Inoperative Function When Necessary Procedures are not Performed | Link |
|---|---|---|---|
| Radio and display receiver assembly | Software update | - | See the Service Bulletin for the registration method. |
| Navigation receiver assembly |
PROCEDURE

 55422C
1.REMOVE CENTER UPPER INSTRUMENT CLUSTER FINISH PANEL
55422C
1.REMOVE CENTER UPPER INSTRUMENT CLUSTER FINISH PANEL
2.REMOVE RADIO AND DISPLAY RECEIVER ASSEMBLY WITH BRACKET (for Radio and Display Type)
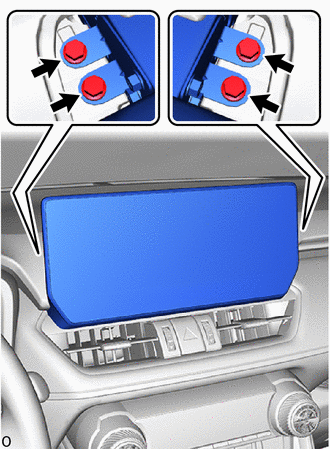
Remove the 4 bolts.
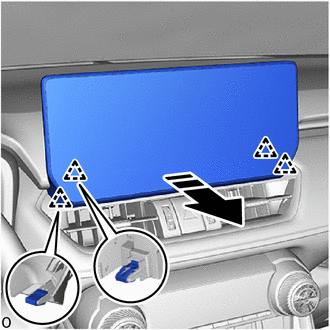

|
Remove in this Direction |
Detach the clip and remove the radio and display receiver assembly with bracket as shown in the illustration.
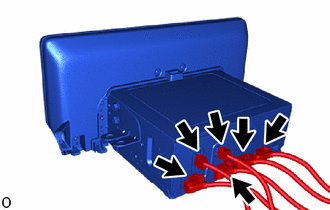
Disconnect the 6 connectors.
3.REMOVE NAVIGATION RECEIVER ASSEMBLY WITH BRACKET (for Navigation Receiver Type)
86212
4.REMOVE NO. 2 RADIO BRACKET
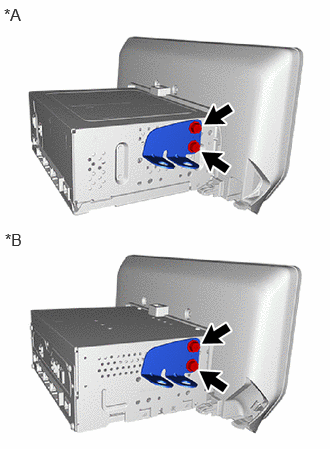
| *A | for Radio and Display Type |
| *B | for Navigation Receiver Type |
Remove the 2 screws and No. 2 radio bracket.
86211
5.REMOVE NO. 1 RADIO BRACKET
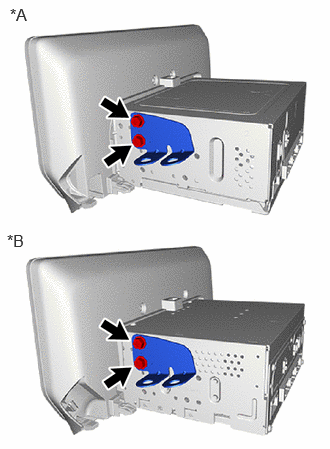
| *A | for Radio and Display Type |
| *B | for Navigation Receiver Type |
Remove the 2 screws and No. 1 radio bracket.
86140A
6.REMOVE RADIO AND DISPLAY RECEIVER ASSEMBLY (for Radio and Display Type)
86120L
7.REMOVE NAVIGATION RECEIVER ASSEMBLY (for Navigation Receiver Type)