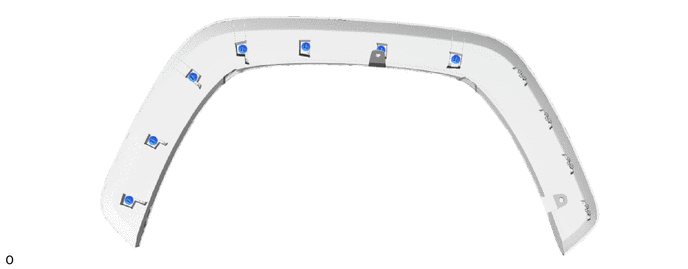
EXTERIOR PANELS / TRIM WHEEL OPENING MOULDING(for Front) REMOVAL
CAUTION / NOTICE / HINT
- HINT:
- ·
Use the same procedure for the RH and LH sides.
·The procedure listed below is for the LH side.
PROCEDURE

 75602A
1.REMOVE FRONT FENDER MOULDING SUB-ASSEMBLY LH (except Off Road Package)
75602A
1.REMOVE FRONT FENDER MOULDING SUB-ASSEMBLY LH (except Off Road Package)
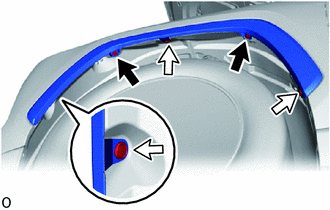

|
Screw |

|
Clip |
Remove the 2 screws and 3 clips.
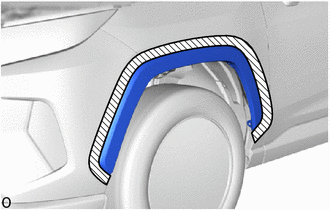

|
Protective Tape |
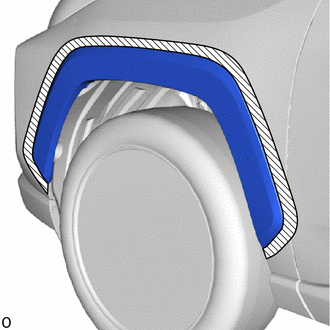
Put protective tape around the front fender moulding sub-assembly LH.
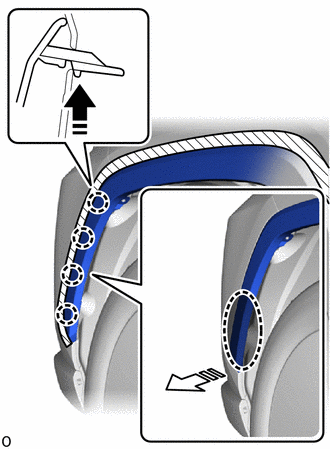

|
Place Hand Here |

|
Remove in this Direction (1) |

|
Remove in this Direction (2) |
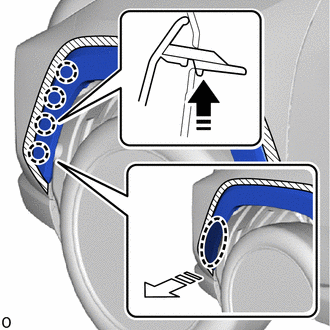
Pull back the edge of the front fender liner LH and detach the claw by pushing the area indicated by the arrow in the illustration with a finger.
- NOTICE:
- ·
Do not apply excessive force when pulling back the front fender liner LH.
·To avoid damaging the claws, do not forcibly pull the front fender moulding sub-assembly LH.
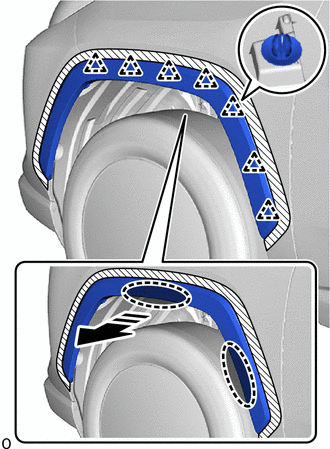
|
|
Place Hand Here |
|
|
Remove in this Direction |
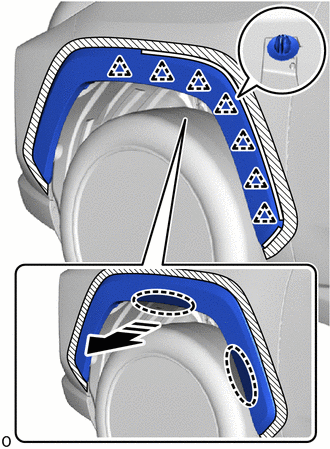
Place your hand at the position shown in the illustration and detach the clip to remove the front fender moulding sub-assembly LH as shown in the illustration.
When reusing the front fender moulding sub-assembly LH:
Remove the 7 clips.
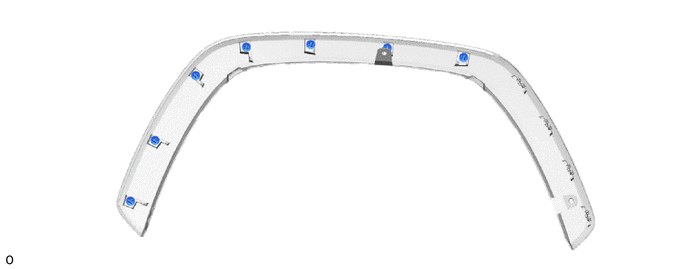
75602A
2.REMOVE FRONT FENDER MOULDING SUB-ASSEMBLY LH (for Off Road Package)
- HINT:
-
When removing the front fender moulding sub-assembly LH, if the double-sided tape is difficult to remove, heat the fender panel and front fender moulding sub-assembly LH using a heat light.
- Standard:
Item Temperature Fender Panel 20 to 30°C (68 to 86°F) Front Fender Moulding Sub-assembly LH
- CAUTION:
-
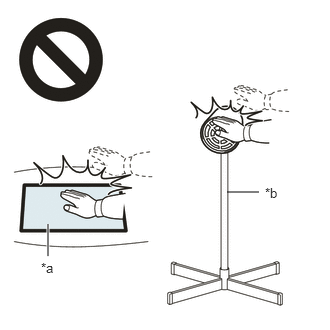 2.365,2 2.698,2 false 0.5,2.333 0.5,2.667 true 0.427,2.708 0.74,2.865 0.313,0.156 10 false *a 2.76,1.927 3.073,2.083 0.313,0.156 10 false *b
*a Heated Part *b Heat Light
- ·
Do not touch the heat light and heated parts.
·Touching the heat light may result in burns.
·Touching heated parts for a long time may result in burns.
- NOTICE:
-
Do not heat the fender panel and front fender moulding sub-assembly LH excessively.
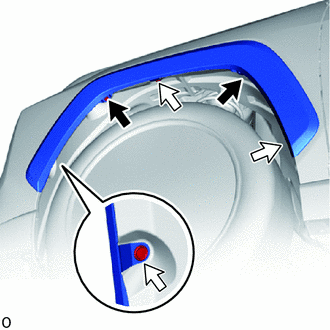
|
|
Screw |
|
|
Clip |
Remove the 2 screws and 3 clips.
|
|
Protective Tape |
Put protective tape around the front fender moulding sub-assembly LH.
|
|
Place Hand Here |
|
|
Remove in this Direction (1) |
|
|
Remove in this Direction (2) |
Pull back the edge of the front fender liner LH and detach the claw by pushing the area indicated by the arrow in the illustration with a finger.
- NOTICE:
- ·
Do not apply excessive force when pulling back the front fender liner LH.
·To avoid damaging the claws, do not forcibly pull the front fender moulding sub-assembly LH.
Using a heat light, heat the front fender panel and front fender moulding sub-assembly LH.
| *a | Double-sided Tape |
|
|
Place Hand Here |
|
|
Remove in this Direction |
Place your hand at the position shown in the illustration and detach the clip and double-sided tape to remove the front fender moulding sub-assembly LH as shown in the illustration.
When reusing the front fender moulding sub-assembly LH:
Remove the 7 clips.