SLIDING ROOF / CONVERTIBLE SLIDING ROOF HOUSING(for Moon Roof) DISASSEMBLY
PROCEDURE

 63231C
1.REMOVE ROOM LIGHT BRACKET
63231C
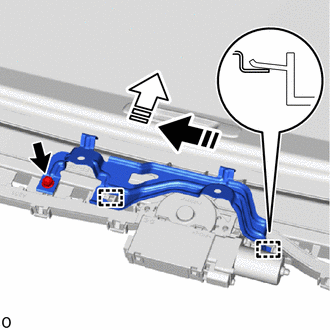
1.REMOVE ROOM LIGHT BRACKET

|
Remove in this Direction (1) |

|
Remove in this Direction (2) |
Remove the bolt.
Detach the guide in the direction indicated by the arrow (1) shown in the illustration.
Remove the room light bracket in the direction indicated by the arrow (2) shown in the illustration.
63260H
2.REMOVE SLIDING ROOF DRIVE GEAR ASSEMBLY
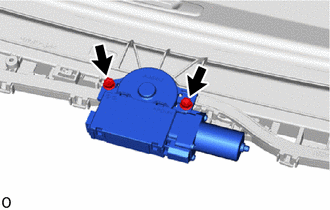
Remove the 2 bolts and sliding roof drive gear assembly.
63306
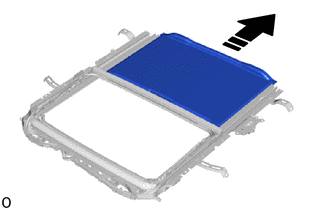
3.REMOVE SUNSHADE TRIM SUB-ASSEMBLY
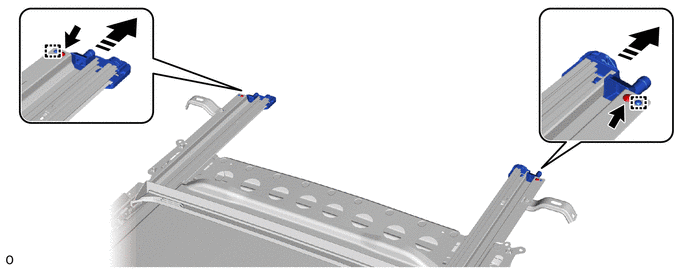
Remove the No. 1 sliding roof piece sub-assembly LH and No. 1 sliding roof piece sub-assembly RH.
Remove the screw.
|
|
Remove in this Direction | - | - |
Detach the guide and remove the No. 1 sliding roof piece sub-assembly LH and the No. 1 sliding roof piece sub-assembly RH in the direction indicated by the arrow shown in the illustration.
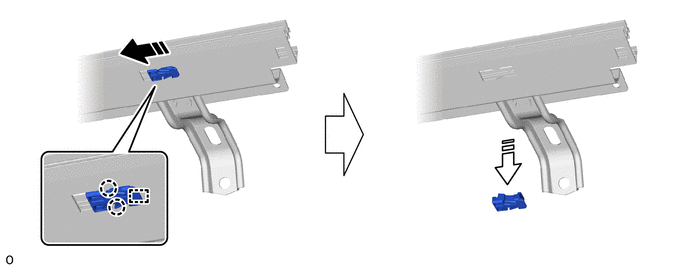
Remove the rear No. 1 sliding roof guide stopper.
- HINT:
-
Use the same procedure for the RH and LH sides.
Detach the claw and guide in the direction indicated by the arrow (1) shown in the illustration.
|
|
Remove in this Direction (1) |
|
Remove in this Direction (2) |
Remove the rear No. 1 sliding roof guide stopper in the direction indicated by the arrow (2) shown in the illustration.
|
|
Remove in this Direction |
Slide and remove the sunshade trim sub-assembly as shown in the illustration.
63214F
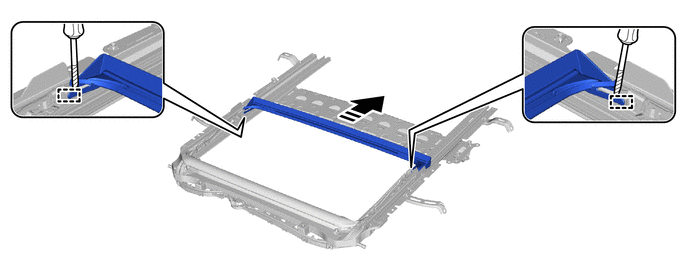
4.REMOVE REAR ROOF DRIP CHANNEL
Using a screwdriver, detach the guide as shown in the illustration.
- HINT:
-
Tape the screwdriver tip before use.
|
|
Remove in this Direction | 
|
Protective Tape |
Slide and remove the rear roof drip channel as shown in the illustration.
63205A
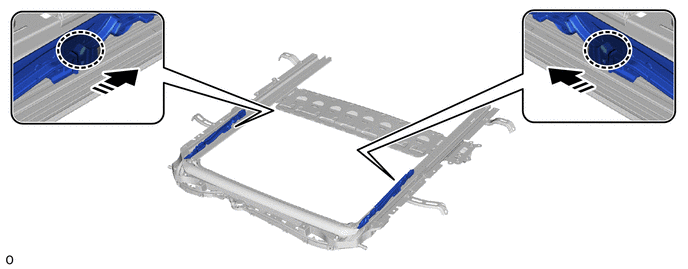
5.REMOVE SLIDING ROOF DRIVE CABLE SUB-ASSEMBLY
- NOTICE:
-
Perform this procedure only when replacement of the sliding roof drive cable sub-assembly is necessary.
Wearing protective gloves, place your hand at the position shown in the illustration, slide the sliding roof drive cable sub-assembly in the direction indicated by the arrow, and then remove the sliding roof drive cable sub-assembly.

|
Place Hand Here |
|
Slide in this Direction |
63209
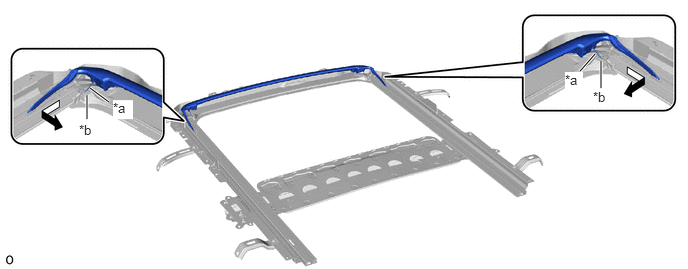
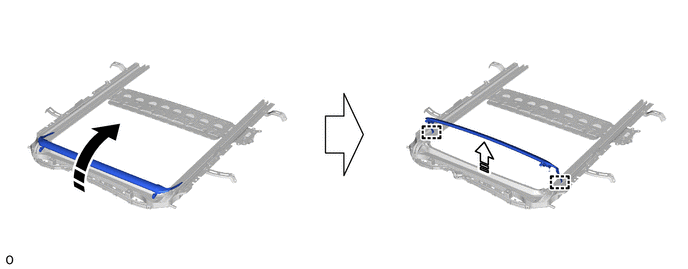
6.REMOVE ROOF WIND DEFLECTOR PANEL SUB-ASSEMBLY
Pull each spring in the direction indicated by the arrow (1) shown in the illustration to detach the 2 springs from the 2 guides.
| *a | Spring | *b | Guide |
Pull the roof wind deflector panel sub-assembly in the direction indicated by the arrow (1) shown in the illustration.
|
|
Remove in this Direction (1) |
|
Remove in this Direction (2) |
Detach the guide and remove the roof wind deflector panel sub-assembly in the direction indicated by the arrow (2) shown in the illustration.