WIPER / WASHER FRONT WIPER MOTOR INSTALLATION
CAUTION / NOTICE / HINT
- NOTICE:
-
Make sure to hold the front wiper arm while lifting it, as lifting the front wiper arm by the front wiper blade may damage or deform the front wiper blade.
PROCEDURE

 85110
1.INSTALL WINDSHIELD WIPER MOTOR ASSEMBLY
85110
1.INSTALL WINDSHIELD WIPER MOTOR ASSEMBLY
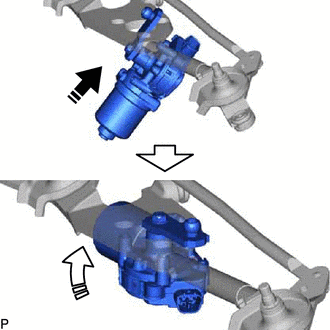

|
Install in this Direction (1) |

|
Install in this Direction (2) |
Push the windshield wiper motor assembly in the direction indicated by the arrow (1), then move the windshield wiper motor assembly in the direction indicated by the arrow (2) shown in the illustration to temporarily install it to the wiper link assembly.
Install the windshield wiper motor assembly with the 3 bolts.
- Torque:
- 5.4 N*m (55 kgf*cm, 48 in.*lbf)
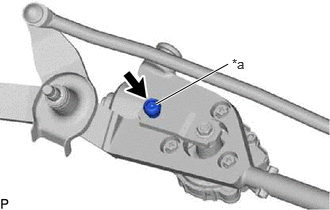
| *a | Pivot of Windshield Wiper Motor Assembly |
Apply MP grease to the pivot of the windshield wiper motor assembly.
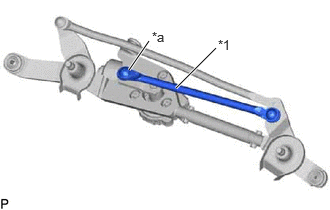
| *1 | No. 1 Windshield Wiper Link Rod |
| *a | Pivot of Windshield Wiper Motor Assembly |
Connect the No. 1 windshield wiper link rod to the pivot of the windshield wiper motor assembly.
2.INSTALL WINDSHIELD WIPER MOTOR AND LINK ASSEMBLY
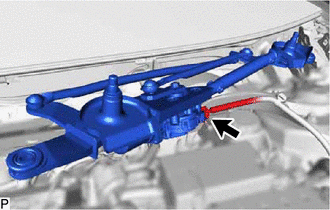
Connect the connector.
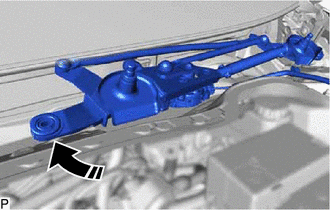
|
|
Install in this Direction |
Install the windshield wiper motor and link assembly as shown in the illustration.
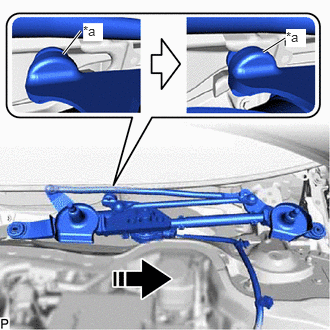
| *a | Motor Grommet |
|
|
Install in this Direction |
Engage the motor grommet as shown in the illustration.
- NOTICE:
-
Be careful not to damage the windshield glass when installing the windshield wiper motor and link assembly.
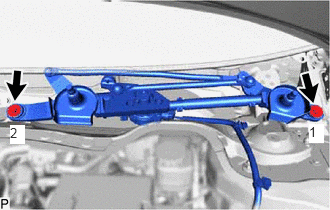
Install the windshield wiper motor and link assembly with the 2 bolts.
- Torque:
- 5.5 N*m (56 kgf*cm, 49 in.*lbf)
- HINT:
-
Tighten the bolts in the order shown in the illustration.
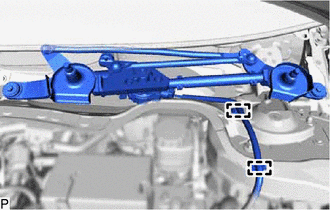
Engage the 2 clamps.
55708
3.INSTALL COWL TOP VENTILATOR LOUVER SUB-ASSEMBLY
Engage the 11 guides as shown in the illustration.
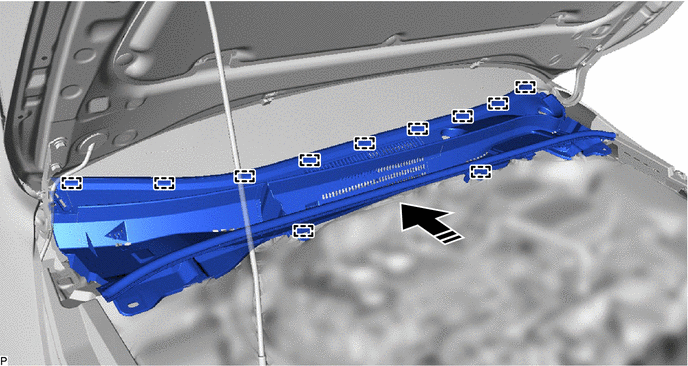
|
|
Install in this Direction | - | - |
- NOTICE:
-
Make sure to engage the guide securely, otherwise the cowl top ventilator louver sub-assembly may pop up when engaging it to the windshield glass.
Engage the 4 clips to install the cowl top ventilator louver sub-assembly as shown in the illustration.
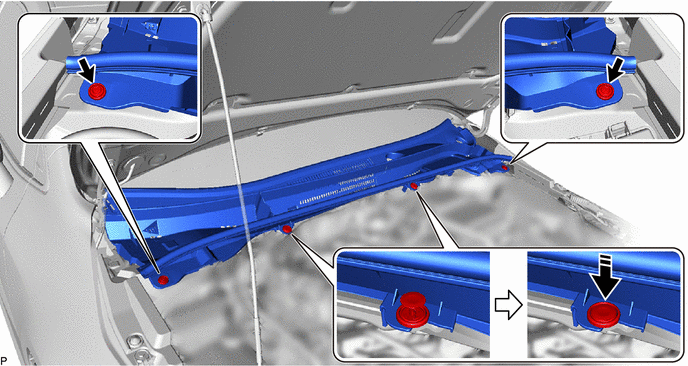
|
|
Install in this Direction | - | - |
55754F
4.INSTALL COWL WATER EXTRACT SHIELD LH

|
|
Install in this Direction |
Engage the guide as shown in the illustration.
Engage the guide and 2 claws to install the cowl water extract shield LH.
55753D
5.INSTALL COWL WATER EXTRACT SHIELD RH
- HINT:
-
Use the same procedure as for the LH side.
6.INSTALL FRONT WIPER ARM AND BLADE ASSEMBLY RH
When reusing the front wiper arm and blade assembly RH:
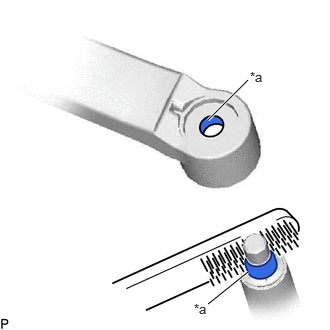
| *a | Serration |
Clean the wiper arm serrations to remove any burrs, dirt, etc.
- NOTICE:
-
Do not grind down the wiper arm serrations.
When reusing the windshield wiper motor and link assembly:
Clean the wiper pivot serrations with a wire brush.
Turn the ignition switch (for Gasoline Model) to ON (IG) or power switch (for HV Model) ON (IG).
Operate the windshield wiper motor assembly and stop the windshield wiper motor and link assembly at the automatic stop position.
Turn the ignition switch (for Gasoline Model) or power switch (for HV Model) off.
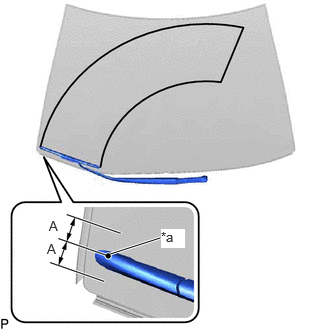
| *a | Alignment Mark |
Install the front wiper arm and blade assembly RH with the nut to the position shown in the illustration.
- Torque:
- 23 N*m (235 kgf*cm, 17 ft.*lbf)
- HINT:
-
Hold the wiper arm by hand while tightening the nut.
- Reference Measurement:
Area Measurement A 10 mm (0.394 in.)
7.INSTALL FRONT WIPER ARM AND BLADE ASSEMBLY LH
When reusing the front wiper arm and blade assembly LH:
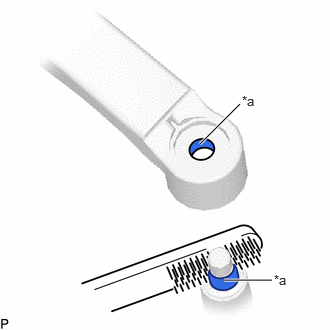
| *a | Serration |
Clean the wiper arm serrations to remove any burrs, dirt, etc.
- NOTICE:
-
Do not grind down the wiper arm serrations.
When reusing the windshield wiper motor and link assembly:
Clean the wiper pivot serrations with a wire brush.
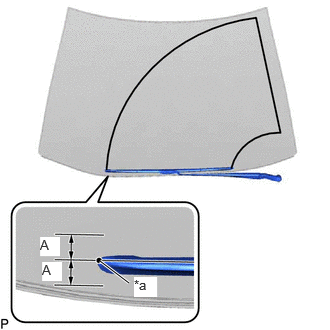
| *a | Alignment Mark |
Install the front wiper arm and blade assembly LH with the nut to the position shown in the illustration.
- Torque:
- 23 N*m (235 kgf*cm, 17 ft.*lbf)
- HINT:
-
Hold the wiper arm by hand while tightening the nut.
- Reference Measurement:
Area Measurement A 10 mm (0.394 in.)
Turn the ignition switch (for Gasoline Model) to ON (IG) or power switch (for HV Model) ON (IG).
Operate the windshield wipers while spraying washer fluid onto the windshield glass. Make sure that the windshield wipers function properly and the wipers do not contact the vehicle body.
Turn the ignition switch (for Gasoline Model) or power switch (for HV Model) off.
Lift each wiper arm twice after the wipers stop and check the wiper set position.
85292B
8.INSTALL FRONT WIPER ARM HEAD CAP
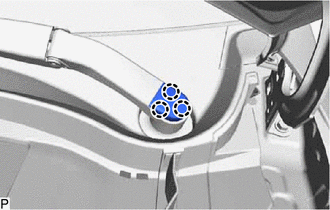
Engage the 3 claws to install the front wiper arm head cap.
- HINT:
-
Use the same procedure for the RH side and LH side.