EXTERIOR PANELS / TRIM FRONT BUMPER(for GTMC Made) REMOVAL
CAUTION / NOTICE / HINT
- HINT:
- except NR Series Engine:
-
When the front bumper is damaged or deformed due to an accident or contact with other objects, etc., or the bumper installation area on the body is repaired, it is necessary to perform millimeter wave radar sensor adjustment.
-
for Target Adjustment (Triangle Target):
-
for Target Adjustment (Flat Surface Target):
-
for Driving Adjustment:
- HINT:
- for NR Series Engine:
-
When the front bumper is damaged or deformed due to an accident or contact with other objects, etc., or the bumper installation area on the body is repaired, it is necessary to perform millimeter wave radar sensor adjustment.
PROCEDURE

 53289A
1.REMOVE RADIATOR SUPPORT OPENING COVER (for Gasoline Model)
53289A
1.REMOVE RADIATOR SUPPORT OPENING COVER (for Gasoline Model)
for NR Series Engine:
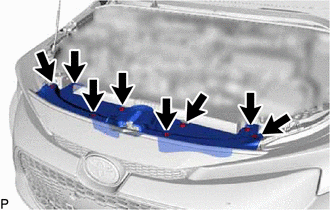
Remove the 8 clips.
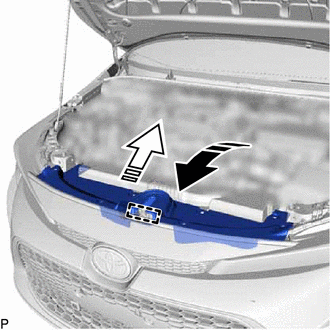

|
Remove in this Direction (1) |

|
Remove in this Direction (2) |
Disengage the guide as shown in the illustration to remove the radiator support opening cover.
except NR Series Engine:
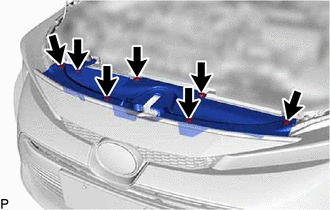
Disengage the 7 clips and remove the radiator support opening cover.
53289A
2.REMOVE RADIATOR SUPPORT OPENING COVER (for HV Model)
for LEVIN:
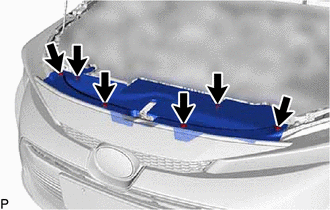
Disengage the 6 clips and remove the radiator support opening cover.
for LEVIN GT:
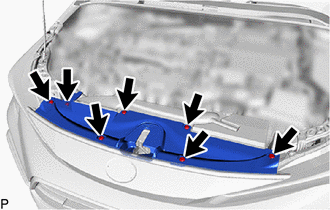
Disengage the 7 clips and remove the radiator support opening cover.
3.REMOVE FRONT BUMPER ASSEMBLY (except Sport Package)
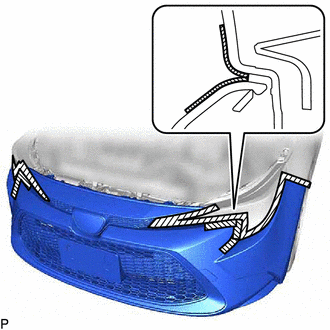

|
Protective Tape |
Apply protective tape around the front bumper assembly as shown in the illustration.
As shown in the illustration, pull the front bumper assembly horizontally to release each claw and disengage the front fender liner retainer.
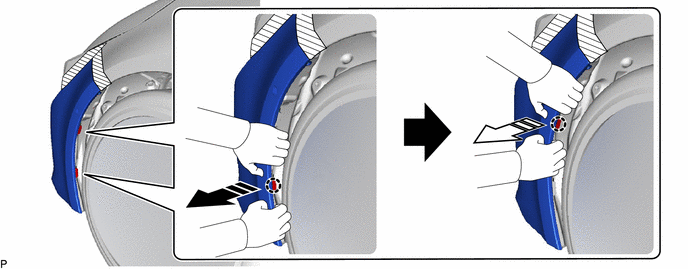
|
|
Remove in this Direction (1) |
|
Remove in this Direction (2) |
- HINT:
-
Use the same procedure for the RH side and LH side.
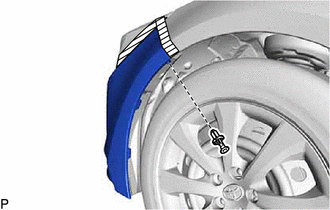
Remove the clip.
- HINT:
-
Use the same procedure for the RH side and LH side.
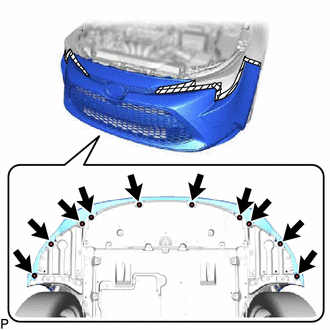
Remove the 10 screws.
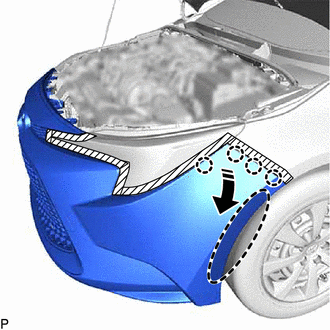

|
Place Hand Here |
|
|
Remove in this Direction |
Disengage the 4 claws as shown in the illustration.
- HINT:
-
Use the same procedure for the RH side and LH side.
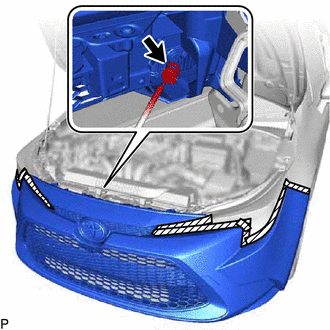
Disconnect the connector.
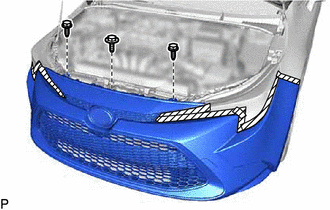
Remove the bolt and 2 screws.
Disengage the claw of the front bumper assembly as shown in the illustration.
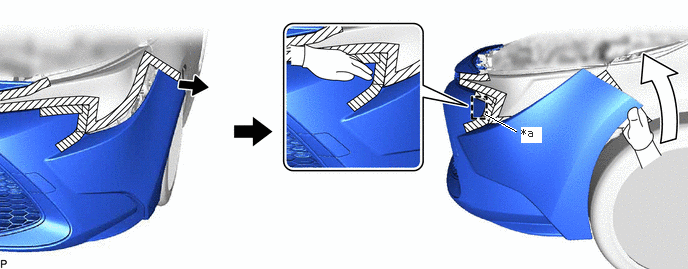
| *a | Press location | - | - |
- NOTICE:
-
If the front bumper assembly is moved in the direction forward of the vehicle, the claw may be damaged.
- HINT:
-
Use the same procedure for the RH side and LH side.
Pull the end portion of the front bumper assembly away from the vehicle.
While pressing the location shown in the illustration, move the end portion of the front bumper assembly in the direction indicated by the arrow.
Using your hand, strike the location shown in the illustration to disengage the claw.
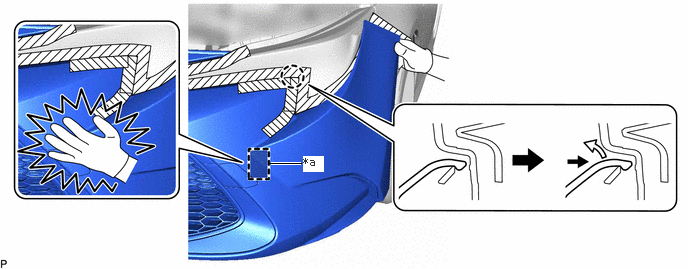
| *a | Location to strike with hand | - | - |
- NOTICE:
-
Be careful not to damage the front bumper assembly when striking it with your hand.
|
|
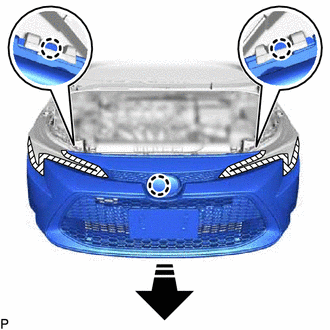
Remove in this Direction |
Disengage the 3 claws as shown in the illustration to remove the front bumper assembly.
4.REMOVE FRONT BUMPER ASSEMBLY (for Sport Package)
|
|
Protective Tape |
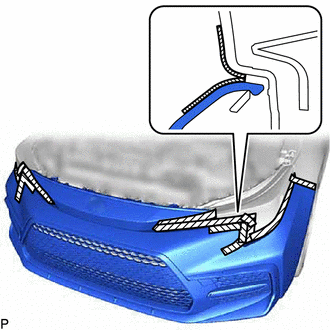
Apply protective tape around the front bumper assembly as shown in the illustration.
As shown in the illustration, pull the front bumper assembly horizontally to release each claw and disengage the front fender liner retainer.
|
|
Remove in this Direction (1) |
|
Remove in this Direction (2) |
- HINT:
-
Use the same procedure for the RH side and LH side.
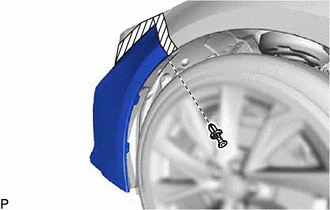
Remove the clip.
- HINT:
-
Use the same procedure for the RH side and LH side.
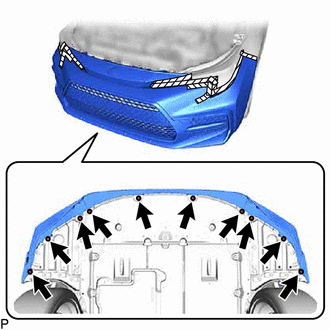
Remove the 10 screws.
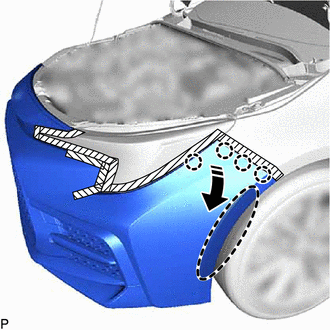
|
|
Place Hand Here |
|
|
Remove in this Direction |
Disengage the 4 claws as shown in the illustration.
- HINT:
-
Use the same procedure for the RH side and LH side.
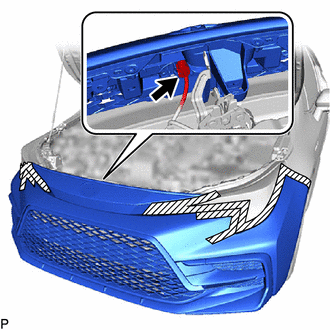
Disconnect the connector.
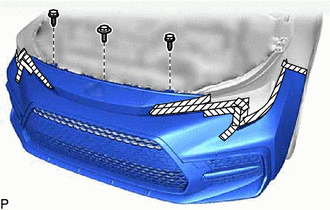
Remove the bolt and 2 screws.
Disengage the claw of the front bumper assembly as shown in the illustration.
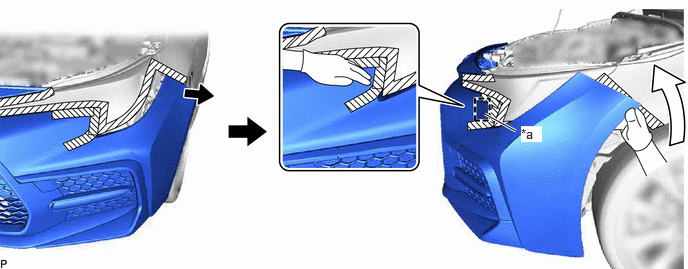
| *a | Press location | - | - |
- NOTICE:
-
If the front bumper assembly is moved in the direction forward of the vehicle, the claw may be damaged.
- HINT:
-
Use the same procedure for the RH side and LH side.
Pull the end portion of the front bumper assembly away from the vehicle.
While pressing the location shown in the illustration, move the end portion of the front bumper assembly in the direction indicated by the arrow.
Using your hand, strike the location shown in the illustration to disengage the claw.
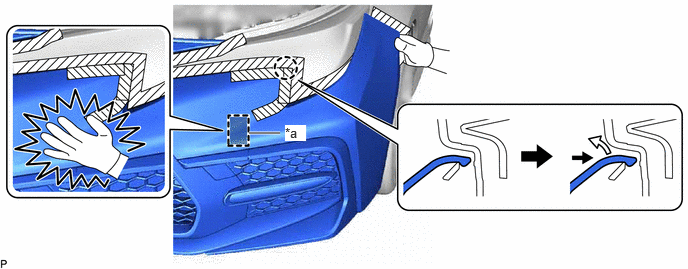
| *a | Location to strike with hand | - | - |
- NOTICE:
-
Be careful not to damage the front bumper assembly when striking it with your hand.
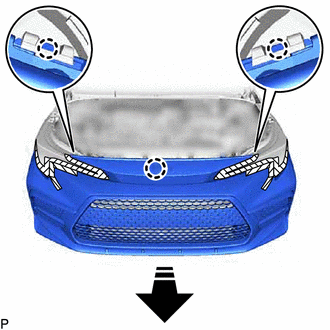
|
|
Remove in this Direction |
Disengage the 3 claws as shown in the illustration to remove the front bumper assembly.