NR Series FUEL FUEL TANK REMOVAL
CAUTION / NOTICE / HINT
The necessary procedures (adjustment, calibration, initialization or registration) that must be performed after parts are removed and installed, or replaced during fuel tank assembly removal/installation are shown below.
| Replaced Part or Performed Procedure | Necessary Procedure | Effect/Inoperative Function when Necessary Procedure not Performed | Link |
|---|---|---|---|
| Gas leak from exhaust system is repaired | Inspection after repair | ·
Poor idle, etc. ·
Engine start function, etc. |
( 201906,999999,_51,_080777,_0393969,RM100000001I1RE,) 201906,999999,_51,_080777,_0393969,RM100000001I1RE,)
|
- CAUTION:
- ·
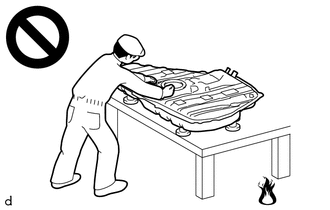
Never perform work on fuel system components near any possible ignition sources.
·Vaporized fuel could ignite, resulting in a serious accident.
·
Do not perform work on fuel system components without first disconnecting the cable from the negative (-) battery terminal.
·Sparks could cause vaporized fuel to ignite, resulting in a serious accident.
·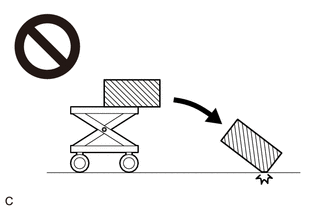
The fuel tank assembly is very heavy. Be sure to follow the procedure described in the repair manual, or the fuel tank assembly may fall off the engine lifter.
- NOTICE:
-
After the ignition switch is turned off, there may be a waiting time before disconnecting the negative (-) battery terminal.
- HINT:
-
When the cable is disconnected / reconnected to the battery terminal, systems temporarily stop operating. However, each system has a function that completes learning the first time the system is used.
Learning completes when vehicle is driven Effect/Inoperative Function when Necessary Procedure not Performed Necessary Procedure Link Stop and Start System Idle the engine for approximately 5 to 60 minutes or drive the vehicle until stop and start control is permitted ( 201906,999999,_51,_080774,_0393362,RM100000001HXHC,)
Pre-collision System Perform steering sensor zero point calibration ( 202304,999999,_95,_139716,_0601175,RM100000002BFOE,)
Lane Tracing Assist System
PROCEDURE

 77020A
1.REMOVE FUEL SUCTION TUBE WITH PUMP AND GAUGE ASSEMBLY
77020A
1.REMOVE FUEL SUCTION TUBE WITH PUMP AND GAUGE ASSEMBLY
2.DRAIN FUEL
17430
3.REMOVE TAIL EXHAUST PIPE ASSEMBLY
57628E
4.REMOVE REAR FLOOR SIDE MEMBER COVER LH
57627G
5.REMOVE REAR FLOOR SIDE MEMBER COVER RH
77606
6.REMOVE NO. 1 FUEL TANK PROTECTOR SUB-ASSEMBLY
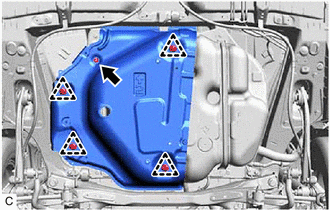
Remove the nut, 4 clips and No. 1 fuel tank protector sub-assembly from the fuel tank assembly.
77404
7.DISCONNECT FUEL TANK VENT HOSE SUB-ASSEMBLY
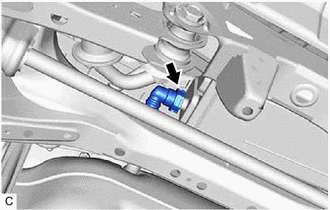
Disconnect the fuel tank vent hose sub-assembly from the canister (charcoal canister assembly).
77210
8.DISCONNECT FUEL TANK FILLER PIPE ASSEMBLY
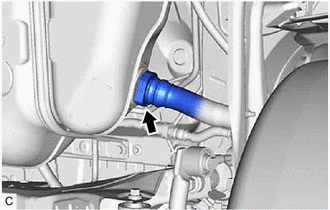
Disconnect the fuel tank filler pipe assembly from the fuel tank assembly.
77209F
9.DISCONNECT FUEL TANK MAIN TUBE SUB-ASSEMBLY
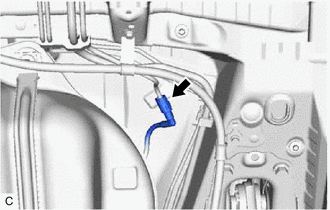
Disconnect the fuel tank main tube sub-assembly from the fuel pipe.
77100
10.REMOVE FUEL TANK ASSEMBLY
- CAUTION:
-
The fuel tank assembly is very heavy. Be sure to follow the procedure described in the repair manual, or the fuel tank assembly may fall off the engine lifter.
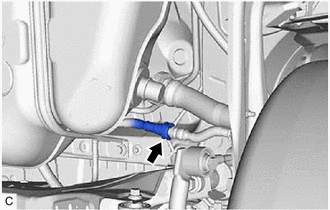
Disconnect the No. 1 fuel tank breather tube sub-assembly from the fuel tank filler pipe assembly.
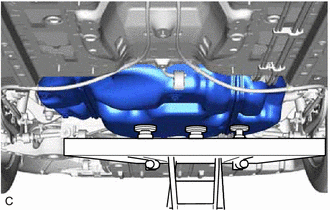
Support the fuel tank assembly using an engine lifter.
- HINT:
-
Using height adjustment attachments and plate lift attachments, keep the fuel tank assembly horizontal.
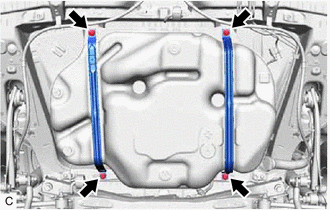
Remove the 4 bolts, No. 1 fuel tank band sub-assembly LH and No. 1 fuel tank band sub-assembly RH.
Lower the engine lifter to remove the fuel tank assembly.
- NOTICE:
- ·
Be careful not to drop the fuel tank assembly.
·When removing the fuel tank assembly, tilt it slightly to prevent it from interfering with the surrounding parts.
77209F
11.REMOVE FUEL TANK MAIN TUBE SUB-ASSEMBLY
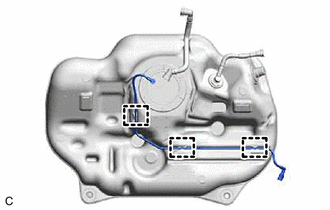
Disengage the 3 clamps to remove the fuel tank main tube sub-assembly from the fuel tank assembly.
77404
12.REMOVE FUEL TANK VENT HOSE SUB-ASSEMBLY
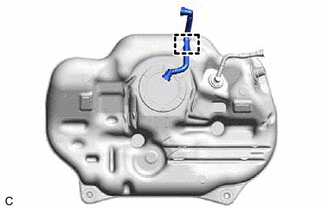
Disengage the clamp to remove the fuel tank vent hose sub-assembly from the fuel tank assembly.
77651A
13.REMOVE NO. 1 FUEL TANK CUSHION
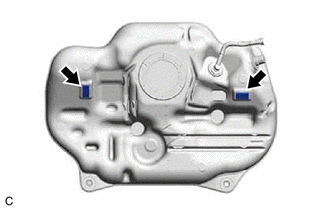
Remove the 2 No. 1 fuel tank cushions from the fuel tank assembly.