NAVIGATION / MULTI INFO DISPLAY NAVIGATION RECEIVER REMOVAL
CAUTION / NOTICE / HINT
The necessary procedures (adjustment, calibration, initialization, or registration) that must be performed after parts are removed and installed, or replaced during navigation receiver assembly removal/installation are shown below.
| Replaced Part or Performed Procedure | Necessary Procedure | Effect/Inoperative Function when Necessary Procedure not Performed | Link |
|---|---|---|---|
|
*: w/o RST Switch (except 10.25 Inch Display) |
|||
| Navigation receiver assembly* | Software update | - | See Service Bulletin for the software update method |
PROCEDURE

 1. PRECAUTION (for 9 Inch Display without RST Switch)
55405B
2.REMOVE CENTER INSTRUMENT CLUSTER FINISH PANEL SUB-ASSEMBLY (except 10.25 Inch Display)
55405B
3.REMOVE CENTER INSTRUMENT CLUSTER FINISH PANEL SUB-ASSEMBLY (for 10.25 Inch Display)
55900
4.REMOVE AIR CONDITIONING CONTROL ASSEMBLY
55670A
5.REMOVE CENTER INSTRUMENT PANEL REGISTER ASSEMBLY
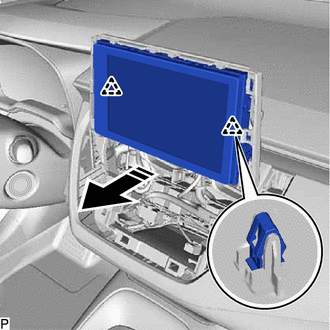
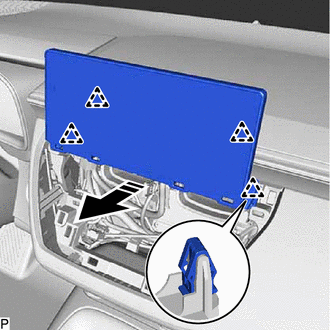
6.REMOVE NAVIGATION RECEIVER ASSEMBLY WITH BRACKET
except 10.25 Inch Display:
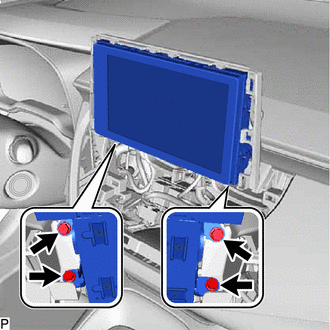
Remove the 4 bolts.

|
Remove in this Direction |
Pull the navigation receiver assembly with bracket to disengage the 2 clips.
Disconnect each connector and remove the navigation receiver assembly with bracket.
for 10.25 Inch Display:
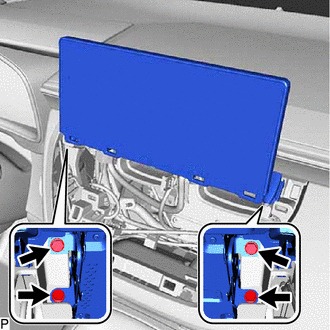
Remove the 4 bolts.
|
|
Remove in this Direction |
Pull the navigation receiver assembly with bracket to disengage the 4 clips.
Disconnect each connector and remove the navigation receiver assembly with bracket.
86211
7.REMOVE NO. 1 RADIO BRACKET
except 10.25 Inch Display:
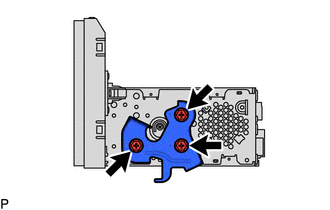
Remove the 3 screws and No. 1 radio bracket.
for 10.25 Inch Display:
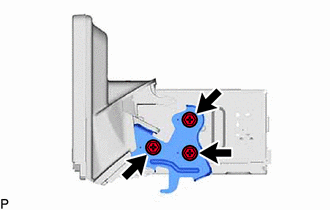
Remove the 3 screws and No. 1 radio bracket.
86212
8.REMOVE NO. 2 RADIO BRACKET
except 10.25 Inch Display:
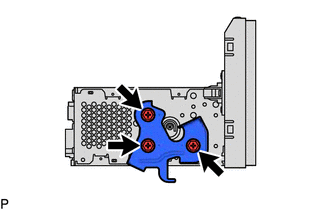
Remove the 3 screws and No. 2 radio bracket.
for 10.25 Inch Display:
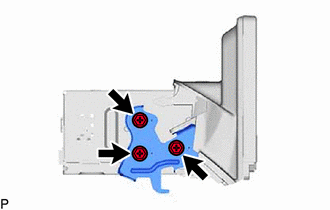
Remove the 3 screws and No. 2 radio bracket.
86140A
9.REMOVE NAVIGATION RECEIVER ASSEMBLY