LIGHTING (INT) ROOM LIGHT REMOVAL
PROCEDURE

 81240
1.REMOVE NO. 1 ROOM LIGHT ASSEMBLY (for Bulb Type)
81240
1.REMOVE NO. 1 ROOM LIGHT ASSEMBLY (for Bulb Type)
for Type A:
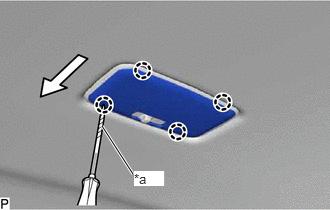
| *a | Protective Tape |

|
Front |
Using a screwdriver with its tip wrapped with protective tape, disengage the 4 claws to remove the room light lens.
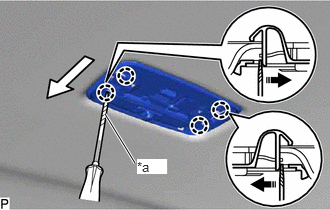
| *a | Protective Tape |
|
|
Front |

|
Remove in this Direction |
Using a screwdriver with its tip wrapped with protective tape, disengage the 4 claws as shown in the illustration to separate the room light housing.
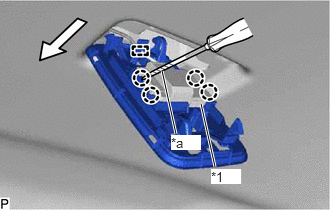
| *1 | Room Light Switch Base |
| *a | Protective Tape |
|
|
Front |
Disengage the clamp.
Using a screwdriver with its tip wrapped with protective tape, disengage the 4 claws to remove the room light housing from the room light switch base.
81240B
2.REMOVE NO. 1 ROOM LIGHT BULB (for Bulb Type)
for Type A:
Remove the No. 1 room light bulb from the room light switch base.
81360T
3.REMOVE SPOT LIGHT ASSEMBLY (for Bulb Type)
for Type B:
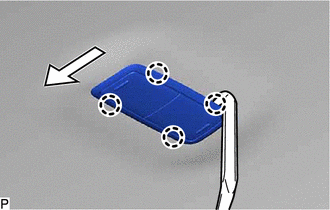
|
|
Front |
Using a moulding remover, disengage the 4 claws.
Disconnect the connector to remove the spot light assembly.
4.REMOVE SPOT LIGHT LENS RH (for Bulb Type)
for Type B:
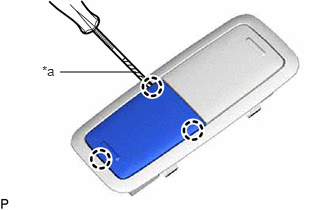
| *a | Protective Tape |
Using a screwdriver with its tip wrapped with protective tape, disengage the 3 claws to remove the spot light lens RH.
5.REMOVE SPOT LIGHT LENS LH (for Bulb Type)
for Type B:
- HINT:
-
Use the same procedure as for the RH side.
81360U
6.REMOVE SPOT LIGHT BULB (for Bulb Type)
for Type B:
Remove the 2 spot light bulbs from the room light housing.
81360T
7.REMOVE SPOT LIGHT ASSEMBLY (for LED Type)
for Type A:
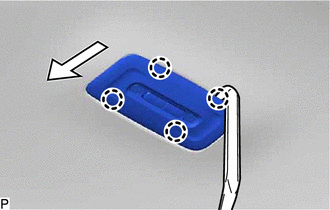
|
|
Front |
Using a moulding remover, disengage the 4 claws.
Disconnect the connector to remove the spot light assembly.
81240
8.REMOVE NO. 1 ROOM LIGHT ASSEMBLY (for LED Type)
for Type B:
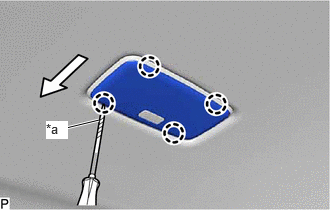
| *a | Protective Tape |
|
|
Front |
Using a screwdriver with its tip wrapped with protective tape, disengage the 4 claws to remove the room light lens.

| *a | Protective Tape |
|
|
Front |
Using a screwdriver with its tip wrapped in protective tape, disengage the 2 claws and 2 guides and remove the 2 inner covers.
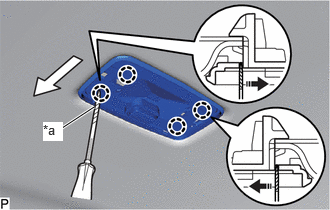
| *a | Protective Tape |
|
|
Front |
|
|
Remove in this Direction |
Using a screwdriver with its tip wrapped in protective tape, disengage the 4 claws as shown in the illustration to separate the room light housing.
|
|
Front |
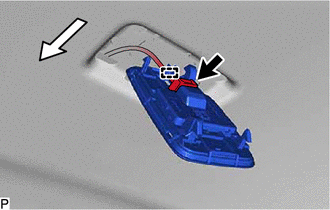
Disengage the clamp.
Disconnect the connector and remove the room light housing.