NR Series INTAKE / EXHAUST TURBOCHARGER REMOVAL
CAUTION / NOTICE / HINT
The necessary procedures (adjustment, calibration, initialization or registration) that must be performed after parts are removed and installed, or replaced during turbocharger sub-assembly removal/installation are shown below.
| Replaced Part or Performed Procedure | Necessary Procedure | Effect/Inoperative Function when Necessary Procedure not Performed | Link |
|---|---|---|---|
·
Replacement of air fuel ratio sensor (sensor 1) ·
Gas leak from exhaust system is repaired |
Inspection after repair | ·
Poor idle, etc. ·
Engine start function, etc. |
( 201906,999999,_51,_080777,_0393969,RM100000001I1RE,) 201906,999999,_51,_080777,_0393969,RM100000001I1RE,)
|
PROCEDURE

 1.DRAIN ENGINE OIL
25051
2.REMOVE EXHAUST MANIFOLD CONVERTER SUB-ASSEMBLY
15407
3.DISCONNECT INLET TURBO OIL PIPE SUB-ASSEMBLY
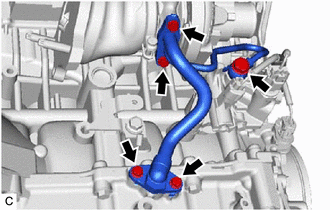
Remove the 4 bolts and union bolt and disconnect the inlet turbo oil pipe sub-assembly.
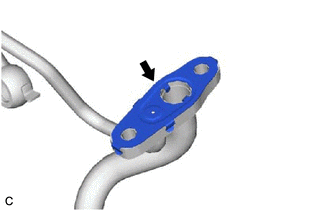
Remove the inlet turbo oil gasket from the inlet turbo oil pipe sub-assembly.
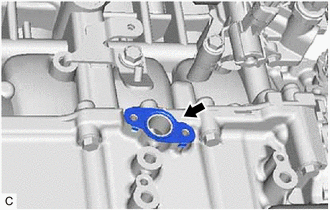
Remove the outlet No. 1 turbo oil gasket from the stiffening crankcase assembly.
Remove the gasket from the inlet turbo oil pipe sub-assembly.
16027
4.DISCONNECT NO. 1 TURBO WATER PIPE SUB-ASSEMBLY
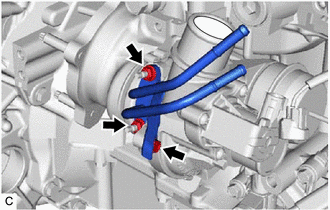
Remove the bolt, 2 nuts and No. 1 turbo water pipe sub-assembly from the turbocharger sub-assembly.
Remove the water by-pass gasket from the No. 1 turbo water pipe sub-assembly.
17201
5.REMOVE TURBOCHARGER SUB-ASSEMBLY
- NOTICE:
-
Before removing the turbocharger sub-assembly, be sure to read Maintenance Precaution.
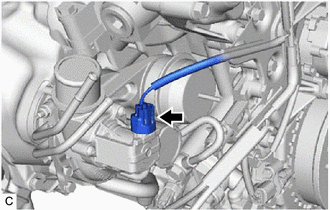
Disconnect the intake air control valve (air by-pass valve assembly) connector.
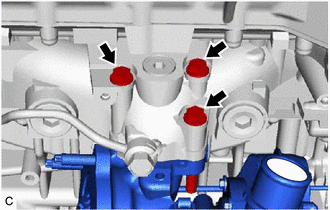
Remove the 3 bolts and turbocharger sub-assembly from the cylinder head sub-assembly.
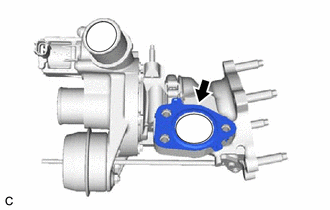
Remove the turbocharger gasket from the turbocharger sub-assembly.
6.REMOVE STUD BOLT
- HINT:
-
If a stud bolt is deformed or the threads are damaged, replace it.
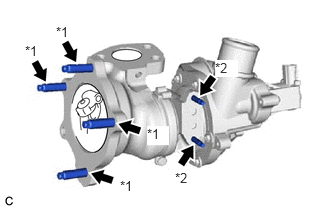
| *1 | Stud Bolt (A) |
| *2 | Stud Bolt (B) |
Using an E10 "TORX" socket wrench, remove the 4 stud bolts (A) from the turbocharger sub-assembly.
Using an E6 "TORX" socket wrench, remove the 2 stud bolts (B) from the turbocharger sub-assembly.