PA10/PB10 HYBRID TRANSMISSION / TRANSAXLE TRANSMISSION CONTROL CABLE REMOVAL
CAUTION / NOTICE / HINT
The necessary procedures (adjustment, calibration, initialization or registration) that must be performed after parts are removed and installed, or replaced during transmission control cable assembly removal/installation are shown below.
| Replaced Part or Performed Procedure | Necessary Procedure | Effect/Inoperative Function when Necessary Procedure not Performed | Link |
|---|---|---|---|
| Gas leak from exhaust system is repaired | Inspection after repair | ·
Poor idle, etc. ·
Engine start function, etc. |
for 8ZR-FXE:( 202304,999999,_51,_080778,_0393982,RM100000002BDLI,) 202304,999999,_51,_080778,_0393982,RM100000002BDLI,)
for M20F-FXS, M20G-FXS:( 202307,999999,_51,_146896,_0611112,RM100000002CI3Y,)
|
- CAUTION:
-
-
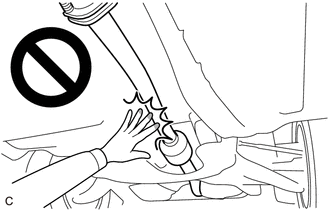
To prevent burns, do not touch the engine, exhaust pipe or other high temperature components while the engine is hot.
PROCEDURE

 1.SECURE VEHICLE
Fully apply the parking brake and chock a wheel.
- CAUTION:
-
- ·
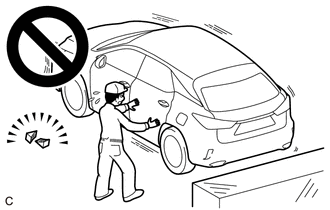
Make sure to apply the parking brake and chock a wheel before performing this procedure.
·If the vehicle is not secure and the shift lever is moved to N, the vehicle may suddenly move, possibly resulting in an accident or serious injury.
2.REMOVE CONSOLE BOX ASSEMBLY
58862B
3.REMOVE NO. 2 CONSOLE BOX DUCT
58861B
4.REMOVE NO. 1 CONSOLE BOX DUCT
51410
5.REMOVE NO. 1 ENGINE UNDER COVER ASSEMBLY
58166A
6.REMOVE FRONT FLOOR COVER LH
58165C
7.REMOVE FRONT FLOOR COVER RH
- HINT:
-
Use the same procedure as for the LH side.
57533B
8.REMOVE FRONT FLOOR CENTER BRACE
17410
9.REMOVE FRONT EXHAUST PIPE ASSEMBLY
58151
10.REMOVE FRONT NO. 1 FLOOR HEAT INSULATOR

Remove 3 nuts and front No. 1 floor heat insulator from the vehicle body.
33820B
11.REMOVE TRANSMISSION CONTROL CABLE ASSEMBLY
Move the shift lever to N.
for PA10, PB10 TFTM Made:
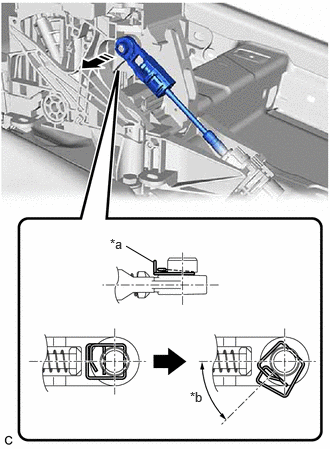
| *a | Clip |
| *b | 45° to 60° |

|
Disconnect in this Direction |
While disengaging the clip as shown in the illustration, disconnect the transmission control cable assembly from the transmission floor shift assembly together with the clip.
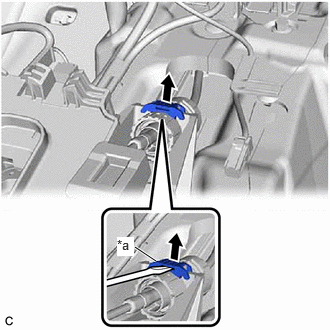
| *a | Stopper |
Using a screwdriver, pull out the stopper of the transmission control cable assembly.
- NOTICE:
-
Do not remove the stopper. If it is removed, reinstall it to its original position.
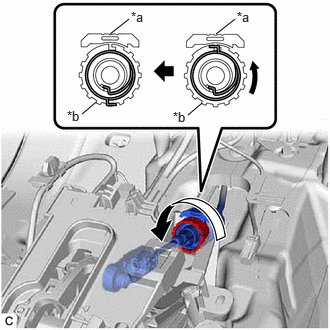
| *a | Stopper |
| *b | Nut |
Rotate the nut counterclockwise approximately 180° and, while holding the nut in that position, disconnect the transmission control cable assembly from the transmission floor shift assembly.
- NOTICE:
- ·
Do not rotate the nut excessively as the interior spring may come off and the transmission control cable assembly will not be reusable.
·Do not forcibly pull the transmission control cable assembly into the cabin.
for PB10 GTMC Made:
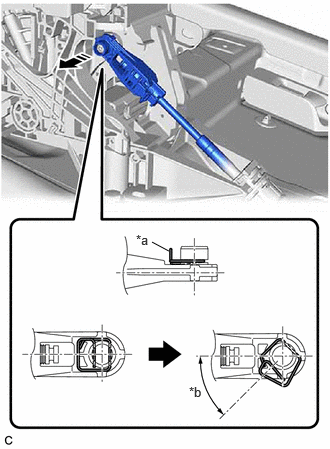
| *a | Clip |
| *b | 45° to 60° |
|
|
Disconnect in this Direction |
While disengaging the clip as shown in the illustration, disconnect the transmission control cable assembly from the transmission floor shift assembly together with the clip.
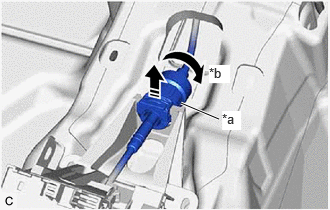
| *a | Lock Nut |
| *b | Clockwise |
|
|
Disconnect in this Direction |
Rotate the lock nut clockwise approximately 180° and, while holding the lock nut in that position, disconnect the transmission control cable assembly from the transmission floor shift assembly.
- NOTICE:
-
Do not forcibly pull the transmission control cable assembly into the cabin.
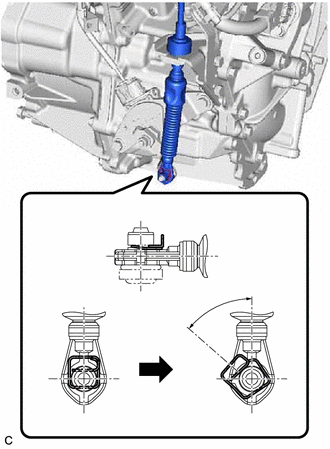
| *a | Clip |
| *b | 45° to 60° |
While disengaging the clip as shown in the illustration, disconnect the transmission control cable assembly from the transmission control shaft lever together with the clip.
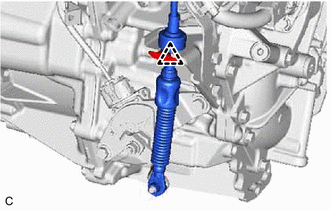
Remove the clip and disconnect the transmission control cable assembly from the No. 1 transmission control cable bracket.
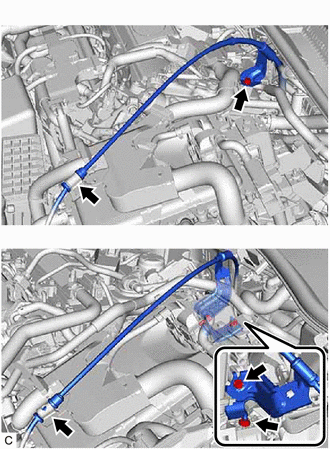
| *A | for PA10 |
| *B | for PB10 |
| *a | Bolt |
| *b | Nut |
Disconnect the transmission control cable assembly from the transmission control cable support.
for PA10:
Remove the bolt and disconnect the transmission control cable assembly from the engine assembly.
for PB10:
Remove the nut and disconnect the floor under wire from the wire harness clamp bracket.
Remove the bolt and disconnect the transmission control cable assembly from the inverter with converter assembly.
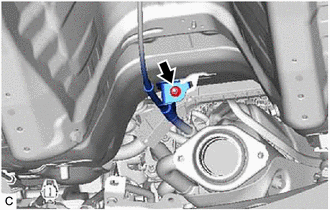
Remove the nut and disconnect the transmission control cable assembly from the vehicle body.
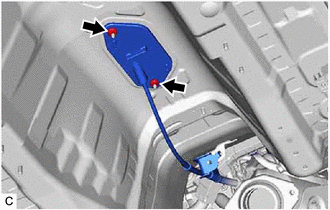
Remove the 2 nuts and transmission control cable assembly from the vehicle body.