HEATING / AIR CONDITIONING AIR CONDITIONING UNIT(for HV Model) REASSEMBLY
PROCEDURE

 88625
1.INSTALL NO. 1 COOLER THERMISTOR
88625
1.INSTALL NO. 1 COOLER THERMISTOR
88501
2.INSTALL NO. 1 COOLER EVAPORATOR SUB-ASSEMBLY
88515
3.INSTALL COOLER EXPANSION VALVE
Sufficiently apply compressor oil to 2 new O-rings and the fitting surfaces of the No. 1 cooler evaporator sub-assembly.
- Compressor Oil:
ND-OIL 11 or equivalent
Install the 2 O-rings to the No. 1 cooler evaporator sub-assembly.
- NOTICE:
-
Keep the O-rings and O-ring fitting surfaces free of foreign matter.
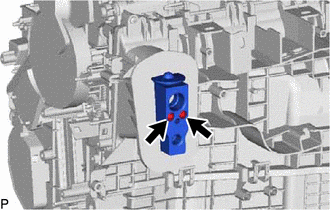
Using a 4 mm hexagon socket wrench, install the cooler expansion valve with the 2 hexagon bolts.
- Torque:
- 3.5 N*m (36 kgf*cm, 31 in.*lbf)
88899L
4.INSTALL COOLING UNIT PARTS
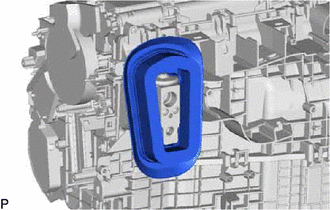
Install the cooling unit parts.
87107A
5.INSTALL HEATER RADIATOR UNIT SUB-ASSEMBLY
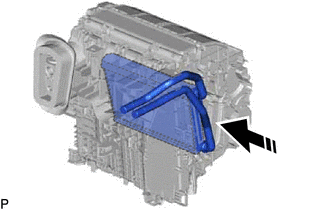

|
Install in this Direction |
Install the heater radiator unit sub-assembly as shown in the illustration.
87124B
6.INSTALL HEATER CLAMP
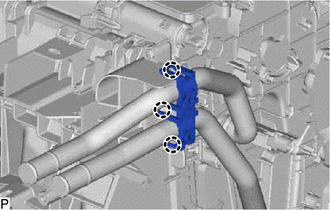
Engage the 3 claws to install the heater clamp.
87128
7.INSTALL HEATER GROMMET
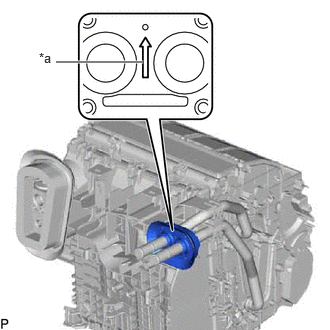
| *a | Reference Point |
Install the heater grommet as shown in the illustration.
- NOTICE:
-
Install the heater grommet with the arrow facing up.
87050E
8.INSTALL NO. 3 AIR CONDITIONING RADIATOR DAMPER SERVO SUB-ASSEMBLY (for 8ZR-FXE)
Align each gear on the air conditioning radiator assembly as shown in the illustration, and then check that the gears of the No. 3 air conditioning radiator damper servo sub-assembly are aligned as shown in the illustration.
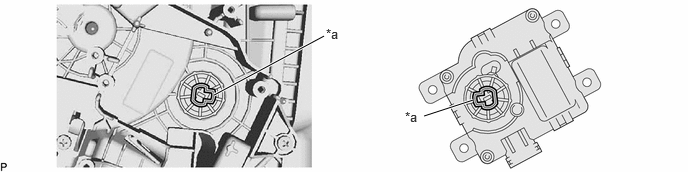
| *a | Reference Point | - | - |
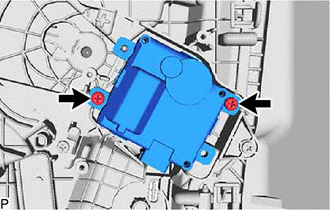
Install the No. 3 air conditioning radiator damper servo sub-assembly with the 2 screws.
87050D
9.INSTALL NO. 2 AIR CONDITIONING RADIATOR DAMPER SERVO SUB-ASSEMBLY
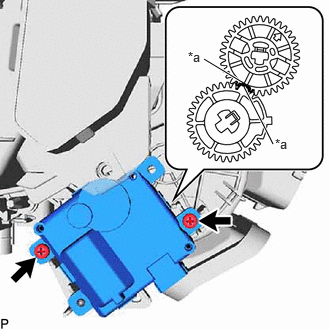
| *a | Reference Point |
Using the reference points, install the No. 2 air conditioning radiator damper servo sub-assembly with the 2 screws.
87050C
10.INSTALL NO. 1 AIR CONDITIONING RADIATOR DAMPER SERVO SUB-ASSEMBLY
for 8ZR-FXE:
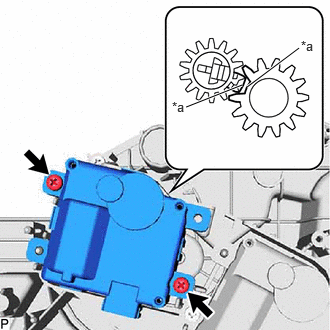
| *a | Reference Point |
Using the reference points, install the No. 1 air conditioning radiator damper servo sub-assembly with the 2 screws.
except 8ZR-FXE:
Align each gear on the air conditioning radiator assembly as shown in the illustration, and then check that the gears of the No. 1 air conditioning radiator damper servo sub-assembly are aligned as shown in the illustration.
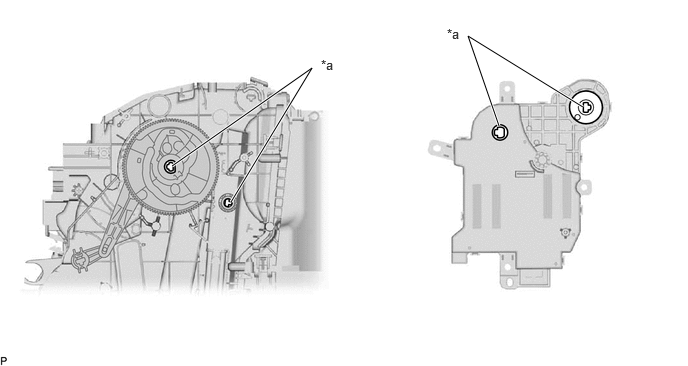
| *a | Reference Point | - | - |
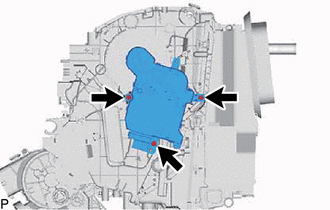
Install the No. 1 air conditioning radiator damper servo sub-assembly with the 3 screws.
88539J
11.INSTALL DRAIN COOLER HOSE
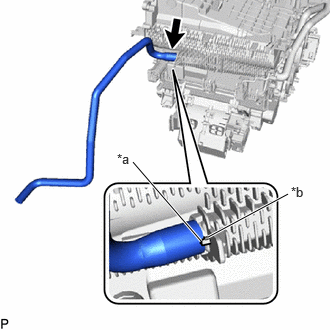
| *a | Hose Notch |
| *b | Rib |
Align the hose notch with the rib as shown in the illustration and install the drain cooler hose.
87114B
12.INSTALL HEATER COVER
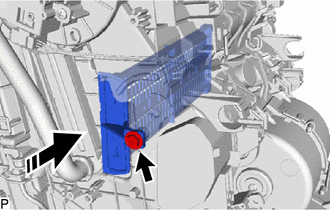
|
|
Install in this Direction |
Install the heater cover as shown in the illustration.
Install the screw.
82210K
13.INSTALL AIR CONDITIONING HARNESS ASSEMBLY
for 8ZR-FXE:
Engage each clamp.
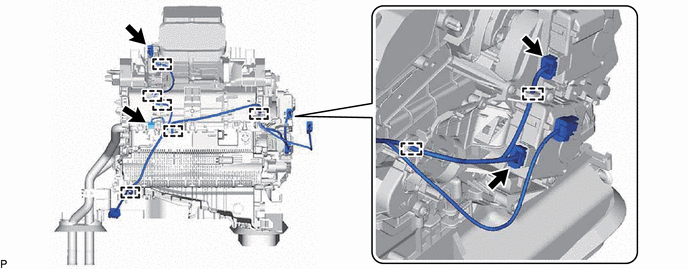
Connect each connector to install the air conditioning harness assembly.
except 8ZR-FXE:
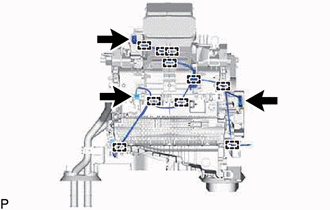
Engage each clamp.
Connect each connector to install the air conditioning harness assembly.
88650N
14.INSTALL AIR CONDITIONING AMPLIFIER ASSEMBLY
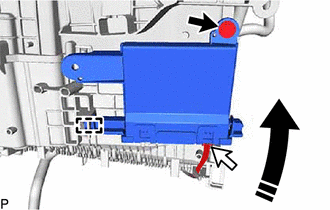
|
|
Install in this Direction |
Engage the guide to temporarily install the air conditioning amplifier assembly as shown in the illustration.
Install the air conditioning amplifier assembly with the screw.
Connect the connector.
88897P
15.INSTALL ASPIRATOR
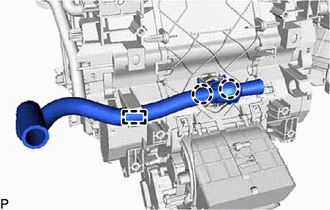
Engage the 2 claws and guide to install the aspirator.
87130D
16.INSTALL BLOWER ASSEMBLY
87211A
17.INSTALL NO. 2 AIR DUCT
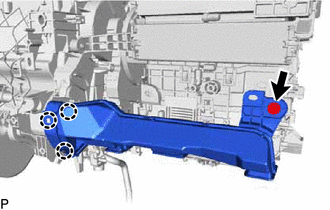
Engage the 3 claws to install a new No. 2 air duct.
Install the screw.