HYBRID / BATTERY CONTROL INVERTER WITH CONVERTER DISASSEMBLY
PROCEDURE

 G9214
1.REMOVE NO. 1 INVERTER BRACKET
G9214
1.REMOVE NO. 1 INVERTER BRACKET
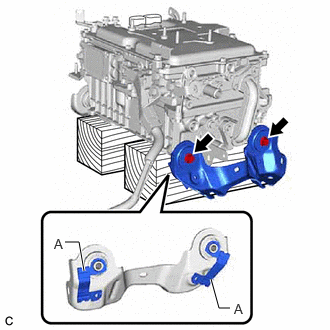
Set the inverter with converter assembly on wooden blocks.
- NOTICE:
-
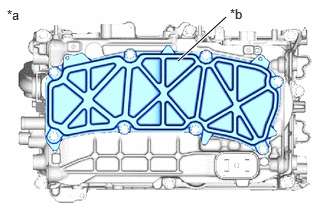 1.854,0.635 2.354,0.177 true 0.073,0.073 0.385,0.271 0.313,0.198 10 false *a 2.396,0.063 2.708,0.26 0.313,0.198 10 false *b
*a Bottom of Inverter with Converter Assembly *b Support
-
Make sure to support the inverter with converter assembly at the positions shown in the illustration, otherwise it may be damaged.
Remove the 2 bolts and No. 1 inverter bracket from the inverter with converter assembly.
- NOTICE:
-
Do not touch portion (A) of the No. 1 inverter bracket.
G9215
2.REMOVE NO. 2 INVERTER BRACKET
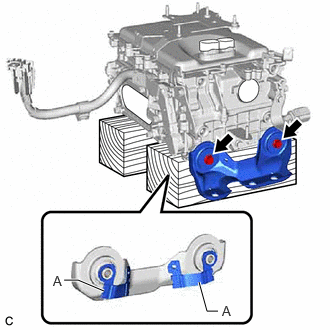
Remove the 2 bolts and No. 2 inverter bracket from the inverter with converter assembly.
- NOTICE:
-
Do not touch portion (A) of the No. 2 inverter bracket.
82123
3.REMOVE NO. 3 ENGINE WIRE
- CAUTION:
-
Be sure to wear insulated gloves.
- NOTICE:
- ·
Do not allow any foreign matter or water to enter the inverter with converter assembly.
·Perform this procedure when it is necessary to replace the inverter with converter assembly or the No. 3 engine wire.
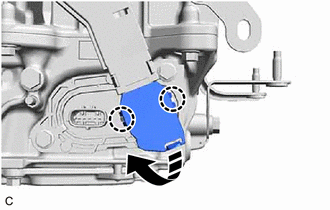
Disengage the 2 claws and open the cover.
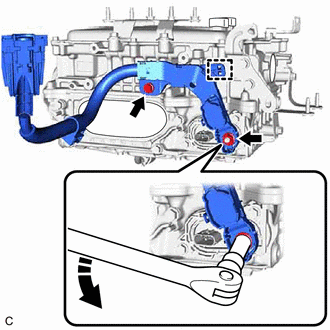
Remove the bolt, nut, clamp and disconnect the no. 3 engine wire from the inverter with converter assembly.
- NOTICE:
-
Move the tool in the downward direction to loosen the nut as shown in the illustration.
821H2
4.REMOVE HV AIR CONDITIONING WIRE
- CAUTION:
-
Be sure to wear insulated gloves.
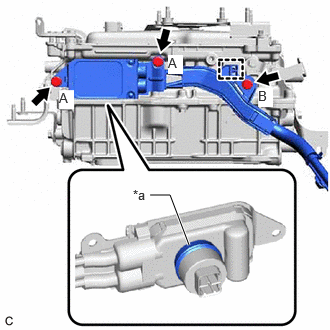
| *a | Waterproof Seal |
Remove the 3 bolts and disconnect the HV air conditioning wire from the inverter with converter assembly.
- NOTICE:
- ·
Do not touch the waterproof seal or terminals of the connector.
·Do not damage the terminals, connector housing or inverter with converter assembly during disconnection.
·Cover the hole where the cable was connected with tape (non-residue type) or equivalent to prevent entry of foreign matter.
·Do not allow any foreign matter or water to enter the inverter with converter assembly.
·Insulate the disconnected terminals with insulating tape.
Disengage the clamp.
5.REMOVE WIRE HARNESS CLAMP BRACKET
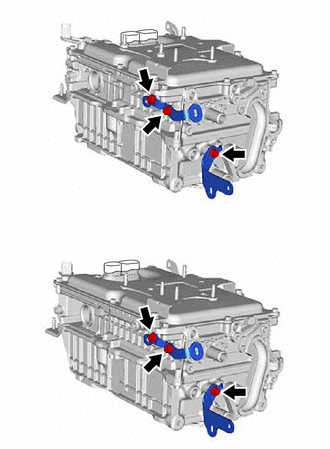
| *A | for 2WD |
| *B | for 4WD |
Remove the bolt and wire harness clamp bracket from the inverter with converter assembly.
Remove the 2 bolts and wire harness clamp bracket from the inverter with converter assembly.
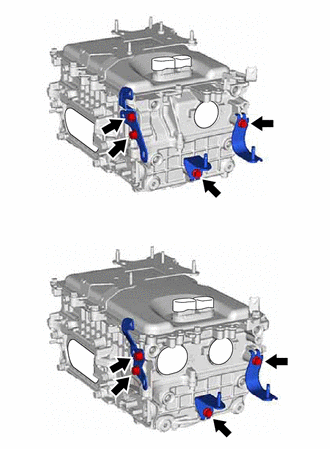
| *A | for 2WD |
| *B | for 4WD |
Remove the bolt and wire harness clamp bracket from the inverter with converter assembly.
Remove the bolt and wire harness clamp bracket from the inverter with converter assembly.
Remove the 2 bolts and wire harness clamp bracket from the inverter with converter assembly.
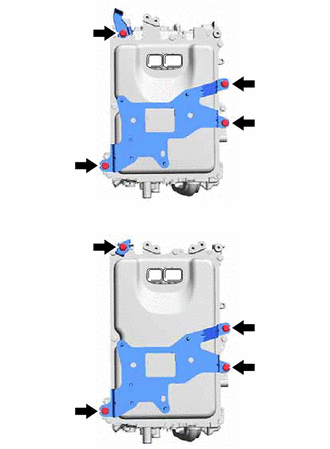
| *A | for 2WD |
| *B | for 4WD |
Remove the bolt and wire harness clamp bracket from the inverter with converter assembly.
Remove the 3 bolts and wire harness clamp bracket from the inverter with converter assembly.