8ZR-FXE EMISSION CONTROL EXHAUST GAS TEMPERATURE SENSOR REMOVAL
CAUTION / NOTICE / HINT
The necessary procedures (adjustment, calibration, initialization, or registration) that must be performed after parts are removed and installed, or replaced during exhaust gas temperature sensor removal/installation are shown below.
| Replaced Part or Performed Procedure | Necessary Procedure | Effect/Inoperative Function when Necessary Procedure not Performed | Link |
|---|---|---|---|
| Gas leaks from exhaust system is repaired | Inspection after repair | ·
Poor idle, etc. ·
Engine start function, etc. |
( 202304,999999,_51,_080778,_0393982,RM100000002BDLI,) 202304,999999,_51,_080778,_0393982,RM100000002BDLI,)
|
- CAUTION:
-
-
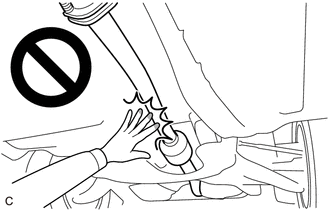
To prevent burns, do not touch the engine, exhaust pipe or other high temperature components while the engine is hot.
PROCEDURE

 58166A
1.REMOVE FRONT FLOOR COVER LH
58166A
1.REMOVE FRONT FLOOR COVER LH
2.REMOVE WIRE HARNESS CLAMP BRACKET
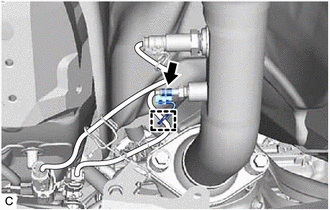
Remove the wire harness clamp bracket from the No. 1 exhaust gas temperature sensor.
89425
3.REMOVE NO. 1 EXHAUST GAS TEMPERATURE SENSOR
- CAUTION:
-
To prevent burns, do not touch the engine, exhaust pipe or other high temperature components while the engine is hot.
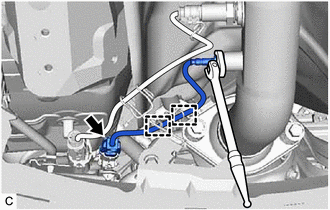
Disconnect the connector.
Detach the 2 clamps.
Using a 14 mm union nut wrench, remove the No. 1 exhaust gas temperature sensor.
- NOTICE:
-
If the No. 1 exhaust gas temperature sensor has been struck or dropped, replace it.
4.REMOVE WIRE HARNESS CLAMP BRACKET
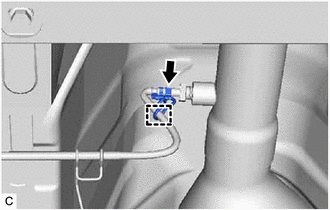
Remove the wire harness clamp bracket from the No. 2 exhaust gas temperature sensor.
89425A
5.REMOVE NO. 2 EXHAUST GAS TEMPERATURE SENSOR
- CAUTION:
-
To prevent burns, do not touch the engine, exhaust pipe or other high temperature components while the engine is hot.
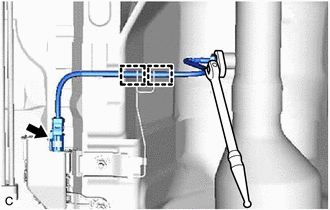
Disconnect the connector.
Detach the 2 clamps.
Using a 14 mm union nut wrench, remove the No. 2 exhaust gas temperature sensor.
- NOTICE:
-
If the No. 2 exhaust gas temperature sensor has been struck or dropped, replace it.