NAVIGATION / MULTI INFO DISPLAY NAVIGATION ECU INSTALLATION
CAUTION / NOTICE / HINT
- HINT:
- ·
Use the same procedure for RHD and LHD vehicles.
·The procedure listed below is for RHD vehicles.
PROCEDURE

 86841
1.INSTALL NAVIGATION ECU
86841
1.INSTALL NAVIGATION ECU
86212
2.INSTALL NO. 2 RADIO BRACKET
for Type A:
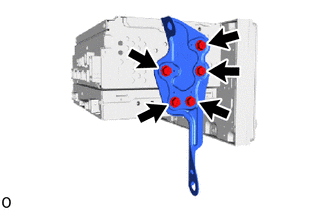
Install the No. 2 radio bracket with the 5 screws.
for Type B:
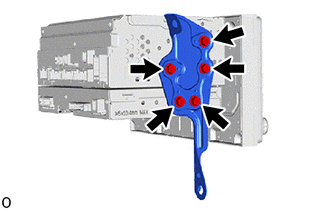
Install the No. 2 radio bracket with the 5 screws.
86211
3.INSTALL NO. 1 RADIO BRACKET
fro Type A:
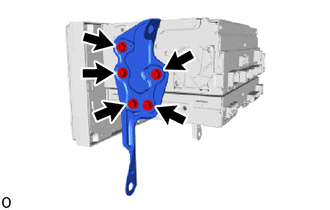
Install the No. 1 radio bracket with the 5 screws.
for Type B:
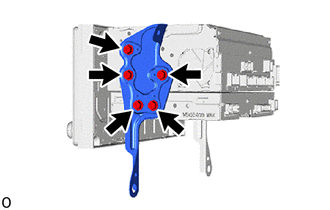
Install the No. 1 radio bracket with the 5 screws.
86842
4.INSTALL NO. 1 NAVIGATION WIRE
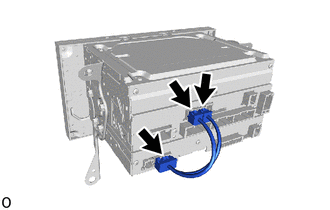
Connect the 3 connectors to install the No. 1 navigation wire.
5.INSTALL DISPLAY AND NAVIGATION ASSEMBLY WITH BRACKET
for Type A:
Connect each connector.
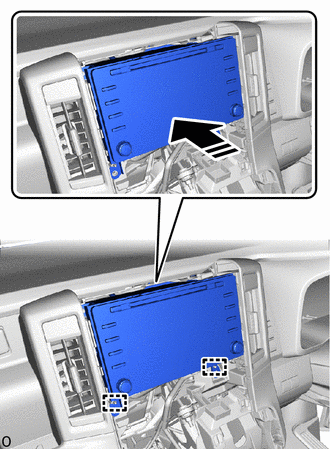

|
Install in this Direction |
Attach the guide to install the display and navigation assembly with bracket.

Install the 2 bolts.
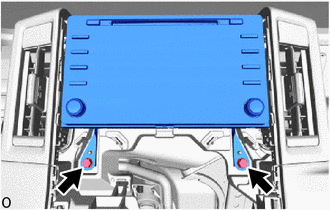
Install the 2 bolts.
for Type B:
Connect each connector.
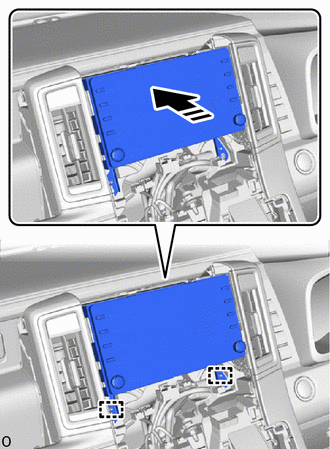
|
|
Install in this Direction |
Attach the guide to install the display and navigation assembly with bracket.
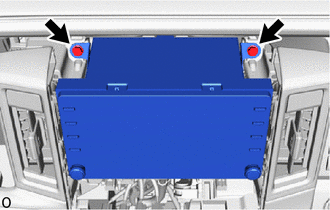
Install the 2 bolts.
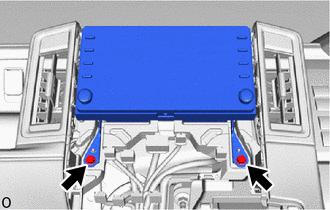
Install the 2 bolts.
55410C
6.INSTALL INSTRUMENT CLUSTER FINISH PANEL ASSEMBLY
55900
7.INSTALL AIR CONDITIONING CONTROL ASSEMBLY (for Automatic Air Conditioning System)
55405B
8.INSTALL CENTER INSTRUMENT CLUSTER FINISH PANEL SUB-ASSEMBLY (for Manual Air Conditioning System)
35970F
9.INSTALL POSITION INDICATOR HOUSING ASSEMBLY (for Automatic Transmission)
58840Q
10.INSTALL SHIFTING HOLE COVER ASSEMBLY (for Manual Transmission)
33504F
11.INSTALL SHIFT LEVER KNOB SUB-ASSEMBLY
for Manual Transmission:
for Automatic Transmission:
33622
12.CONNECT NO. 1 SHIFT LEVER KNOB COVER (for Automatic Transmission)