WINDOW / GLASS BACK DOOR GLASS(for Wagon) REMOVAL
PROCEDURE

 67938A
1.REMOVE BACK DOOR SIDE GARNISH LH
67938A
1.REMOVE BACK DOOR SIDE GARNISH LH
67937B
2.REMOVE BACK DOOR SIDE GARNISH RH
- HINT:
-
Use the same procedure described for the LH side.
67760A
3.REMOVE BACK DOOR UPPER TRIM BOARD ASSEMBLY
69291
4.REMOVE BACK DOOR INSIDE HANDLE ASSEMBLY (w/ Handle)
69783B
5.REMOVE BACK DOOR INSIDE HANDLE BEZEL (w/ Handle)
67961A
6.REMOVE BACK DOOR PULL STRAP
67751
7.REMOVE BACK DOOR TRIM BOARD
8.REMOVE REAR WIPER ARM AND BLADE ASSEMBLY
85110R
9.REMOVE REAR WIPER MOTOR ASSEMBLY
85143R
10.REMOVE REAR WIPER MOTOR GROMMET
76085
11.REMOVE REAR SPOILER SUB-ASSEMBLY
81570
12.REMOVE CENTER STOP LIGHT ASSEMBLY
82186
13.REMOVE NO. 1 REAR WINDOW WIRE
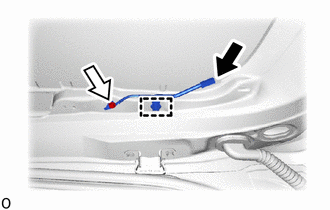

|
Wire Harness Connector |

|
Bolt |
Disconnect the wire harness connector.
Remove the bolt.
Detach the clamp and remove the No. 1 rear window wire.
68131
14.REMOVE BACK DOOR GLASS
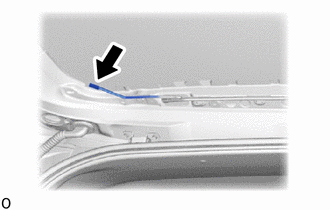
Disconnect the connector.
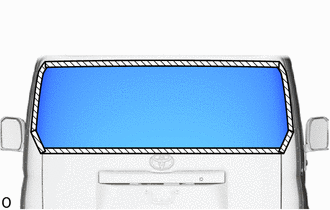

|
Protective Tape |
Apply protective tape to the outer surface of the vehicle body to prevent scratches.
- NOTICE:
-
When separating the back door glass from the vehicle, be careful not to damage the vehicle paint or interior/exterior ornaments.
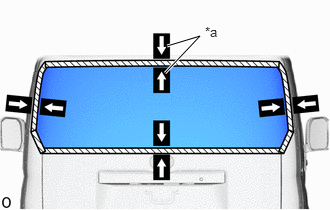
| *a | Matchmark |
When reusing the back door glass:
Place matchmarks over the glass and vehicle body at the locations indicated in the illustration.
Install the suction cups to the back door glass.

| *1 | Back Window Glass Clip LH |
| *2 | Back Window Glass Clip RH |
| *3 | No. 2 Back Door Glass Spacer |
| *4 | No. 1 Back Door Glass Spacer |
| *a | Piano Wire |
From the interior, insert a piano wire between the vehicle body and glass as shown in the illustration.
Tie objects that can serve as handles (for example, wooden blocks) to both wire ends.
- NOTICE:
-
When separating the glass from the vehicle, be careful not to damage the vehicle paint or interior/exterior ornaments.
Cut through the adhesive by pulling the piano wire around the back door glass.
Using suction cups, disconnect the No. 1 back door glass spacer and the No. 2 back window glass spacer and remove the back door glass.
- NOTICE:
-
Do not drop the back door glass.