EXTERIOR PANELS / TRIM SIDE MUDGUARD(for Wagon) DISASSEMBLY
CAUTION / NOTICE / HINT
- HINT:
- ·
Use the same procedure for the RH and LH sides.
·The procedure listed below is for the LH side.
PROCEDURE

 76921B
1.REMOVE NO. 1 SIDE MUDGUARD PROTECTOR
76921B
1.REMOVE NO. 1 SIDE MUDGUARD PROTECTOR
- HINT:
-
When removing the No. 1 side mudguard protector, if the double-sided tape is difficult to remove, heat the adhesive of the No. 1 side mudguard protector and fender panel mudguard sub-assembly LH using a heat light.
- Standard Value:
Part Temperature Fender Panel Mudguard Sub-assembly LH 20 to 30°C (68 to 86°F) No. 1 Side Mudguard Protector 20 to 30°C (68 to 86°F)
- CAUTION:
-
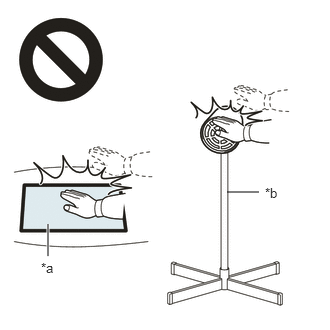 2.365,2 2.698,2 false 0.5,2.333 0.5,2.667 true 0.427,2.708 0.74,2.865 0.313,0.156 10 false *a 2.76,1.927 3.073,2.083 0.313,0.156 10 false *b
*a Heated Part *b Heat Light
- ·
Do not touch the heat light and heated parts.
·Touching the heat light may result in burns.
·Touching heated parts for a long time may result in burns.
- NOTICE:
-
Do not heat the No. 1 side mudguard protector and fender panel mudguard sub-assembly LH excessively.
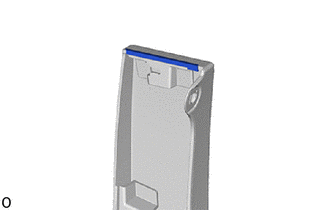
Remove the No. 1 side mudguard protector.
2.REMOVE GROMMET SCREW
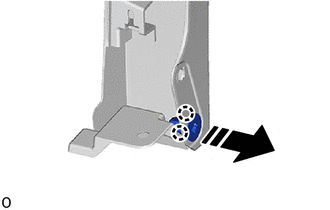

|
Remove in this Direction |
Detach the claw and remove the grommet screw.
75732B
3.REMOVE FRONT DOOR OUTSIDE MOULDING LH
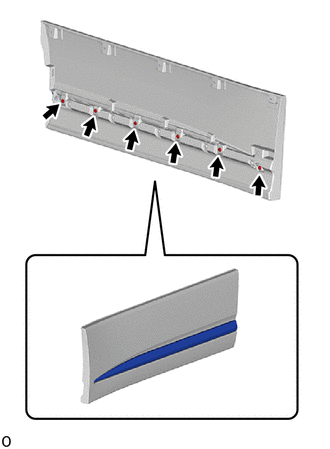
Remove the 6 screws and front door outside moulding LH.
76965A
4.REMOVE FRONT DOOR LOWER MUDGUARD PROTECTOR
- HINT:
-
When removing the front door lower mudguard protector, if the double-sided tape is difficult to remove, heat the adhesive of the front door lower mudguard protector and front door mudguard sub-assembly LH using a heat light.
- Standard Value:
Part Temperature Front Door Mudguard Sub-assembly LH 20 to 30°C (68 to 86°F) Front Door Lower Mudguard Protector 20 to 30°C (68 to 86°F)
- CAUTION:
-
2.365,2 2.698,2 false 0.5,2.333 0.5,2.667 true 0.427,2.708 0.74,2.865 0.313,0.156 10 false *a 2.76,1.927 3.073,2.083 0.313,0.156 10 false *b
*a Heated Part *b Heat Light
- ·
Do not touch the heat light and heated parts.
·Touching the heat light may result in burns.
·Touching heated parts for a long time may result in burns.
- NOTICE:
-
Do not heat the front door mudguard sub-assembly LH and front door lower mudguard protector excessively.
Remove the front door lower mudguard protector.
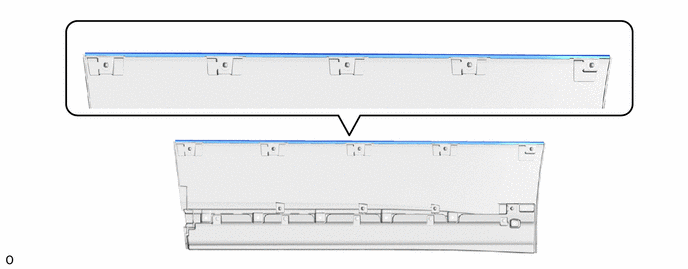
76932A
5.REMOVE NO. 1 SIDE MUDGUARD BRACKET LH
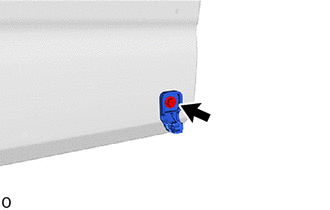
Remove the screw.
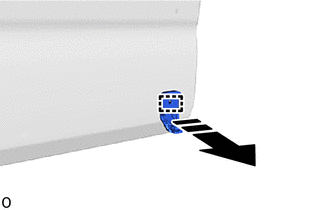
|
|
Remove in this Direction |
Detach the guide and remove the No. 1 side mudguard bracket LH.
75622C
6.REMOVE NO. 2 SIDE PANEL MOULDING LH
Remove the 3 screws and No. 2 side panel moulding LH.
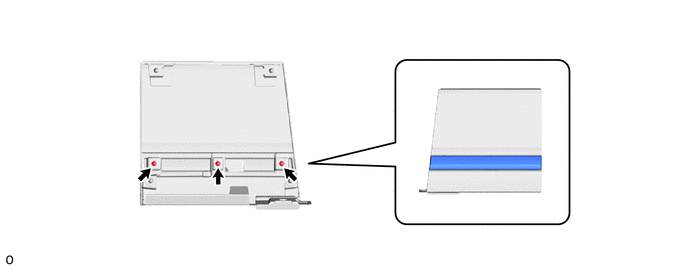
76922D
7.REMOVE NO. 2 SIDE MUDGUARD PROTECTOR
- HINT:
-
When removing the No. 2 side mudguard protector, if the double-sided tape is difficult to remove, heat the adhesive of the No. 2 side mudguard protector and side mudguard sub-assembly LH using a heat light.
- Standard Value:
Part Temperature Side Mudguard Sub-assembly LH 20 to 30°C (68 to 86°F) No. 2 side Mudguard Protector 20 to 30°C (68 to 86°F)
- CAUTION:
-
2.365,2 2.698,2 false 0.5,2.333 0.5,2.667 true 0.427,2.708 0.74,2.865 0.313,0.156 10 false *a 2.76,1.927 3.073,2.083 0.313,0.156 10 false *b
*a Heated Part *b Heat Light
- ·
Do not touch the heat light and heated parts.
·Touching the heat light may result in burns.
·Touching heated parts for a long time may result in burns.
- NOTICE:
-
Do not heat the No. 2 side mudguard protector and side mudguard sub-assembly LH excessively.
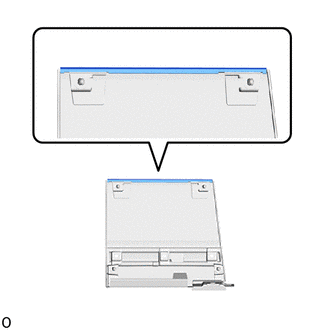
Remove the No. 2 side mudguard protector.
75742E
8.REMOVE REAR DOOR OUTSIDE MOULDING LH
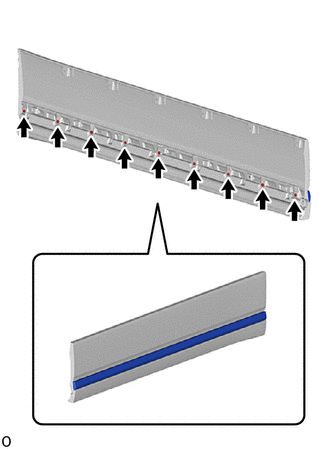
Remove the 9 screws and rear door outside moulding LH.
76966B
9.REMOVE SLIDE DOOR LOWER MUDGUARD PROTECTOR
- HINT:
-
When removing the slide door lower mudguard protector, if the double-sided tape is difficult to remove, heat the adhesive of the slide door lower mudguard protector and slide door mudguard sub-assembly LH using a heat light.
- Standard Value:
Part Temperature Slide Door Mudguard Sub-assembly LH 20 to 30°C (68 to 86°F) Slide Door Lower Mudguard Protector 20 to 30°C (68 to 86°F)
- CAUTION:
-
2.365,2 2.698,2 false 0.5,2.333 0.5,2.667 true 0.427,2.708 0.74,2.865 0.313,0.156 10 false *a 2.76,1.927 3.073,2.083 0.313,0.156 10 false *b
*a Heated Part *b Heat Light
- ·
Do not touch the heat light and heated parts.
·Touching the heat light may result in burns.
·Touching heated parts for a long time may result in burns.
- NOTICE:
-
Do not heat the slide door lower mudguard protector and slide door mudguard sub-assembly LH excessively.
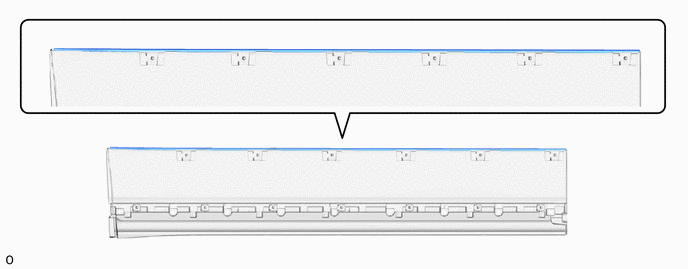
Remove the slide door lower mudguard protector.
76934A
10.REMOVE NO. 2 SIDE MUDGUARD BRACKET LH
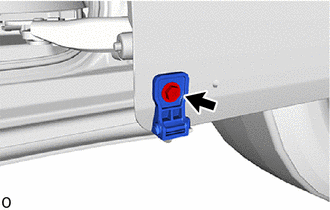
Remove the screw.
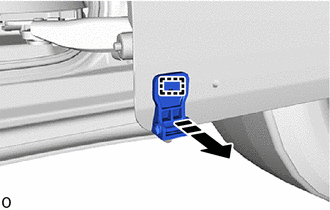
|
|
Remove in this Direction |
Detach the guide and remove the No. 2 side mudguard bracket LH.
76936
11.REMOVE NO. 3 SIDE MUDGUARD BRACKET LH
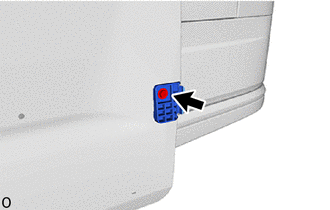
Remove the screw.
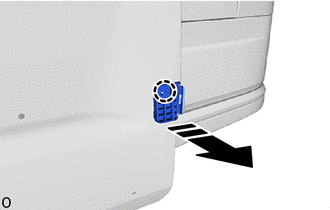
|
|
Remove in this Direction |
Detach the claw and remove the No. 3 side mudguard bracket LH.
75652D
12.REMOVE QUARTER OUTSIDE MOULDING LH
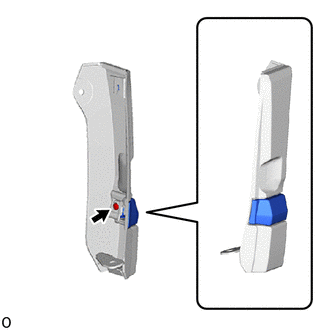
Remove the screw and quarter outside moulding LH.
76922J
13.REMOVE NO. 2 SIDE MUDGUARD PROTECTOR
- HINT:
-
When removing the No. 2 side mudguard protector, if the double-sided tape is difficult to remove, heat the adhesive of the No. 2 side mudguard protector and quarter panel mudguard sub-assembly LH using a heat light.
- Standard Value:
Part Temperature Quarter Panel Mudguard Sub-assembly LH 20 to 30°C (68 to 86°F) No. 2 Side Mudguard Protector 20 to 30°C (68 to 86°F)
- CAUTION:
-
2.365,2 2.698,2 false 0.5,2.333 0.5,2.667 true 0.427,2.708 0.74,2.865 0.313,0.156 10 false *a 2.76,1.927 3.073,2.083 0.313,0.156 10 false *b
*a Heated Part *b Heat Light
- ·
Do not touch the heat light and heated parts.
·Touching the heat light may result in burns.
·Touching heated parts for a long time may result in burns.
- NOTICE:
-
Do not heat the No. 2 side mudguard protector and quarter panel mudguard sub-assembly LH excessively.
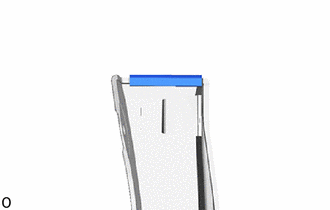
Remove the No. 2 side mudguard protector.
53822G
14.REMOVE FRONT NO. 1 SIDE PANEL PROTECTOR LH (w/ Front No. 1 Side Panel Protector LH)
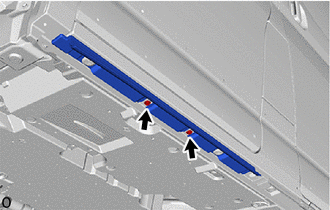
Remove the 2 screws.
Using a clip remover, detach the claw and remove the 2 retainers.
- NOTICE:
-
The retainer must not be reused.
- HINT:
-
Tape the clip remover tip before use.
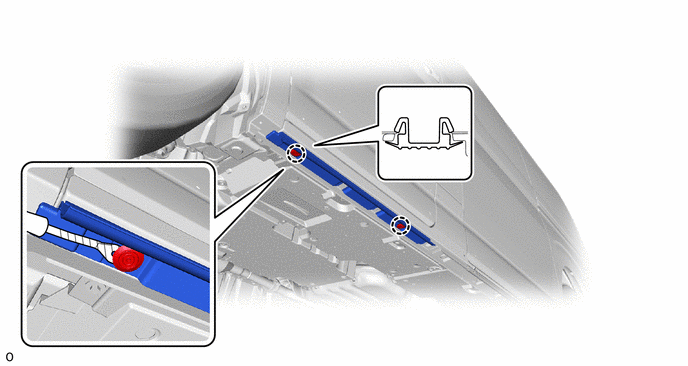

|
Protective Tape | - | - |

|
|
Remove in this Direction |
Detach the claw and remove the front No. 1 side panel protector LH as shown in the illustration.
65632D
15.REMOVE REAR FRONT WHEEL HOUSE PLATE LH
53824C
16.REMOVE FRONT NO. 2 SIDE PANEL PROTECTOR LH
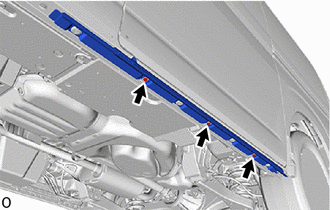
Remove the 3 screws.
Using a clip remover, detach the claw and remove the 4 retainers.
- NOTICE:
-
The retainer must not be reused.
- HINT:
-
Tape the clip remover tip before use.
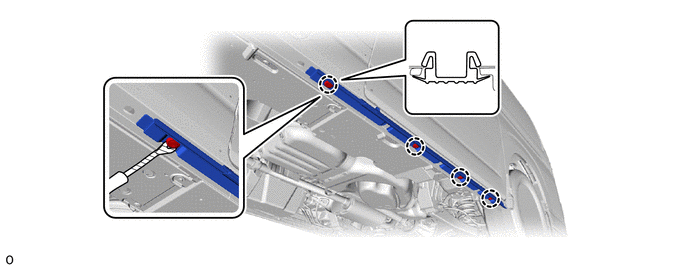
|
|
Protective Tape | - | - |
Using a thin-bladed screwdriver, detach the claw and remove the grommet.
- NOTICE:
-
The grommet must not be reused.
- HINT:
-
Tape the thin-bladed screwdriver tip before use.
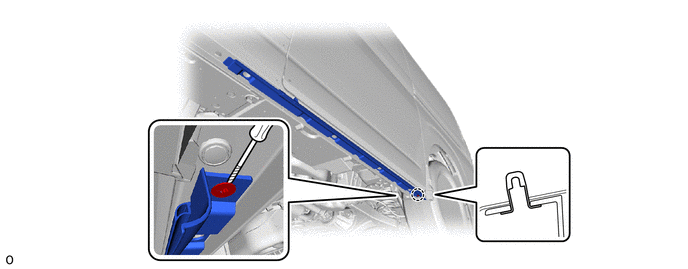
|
|
Protective Tape | - | - |
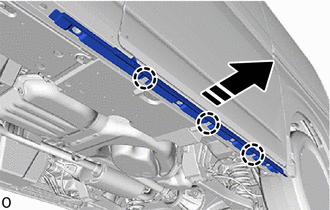
|
|
Remove in this Direction |
Detach the claw and remove the front No. 2 side panel protector LH as shown in the illustration.
17.REMOVE FRONT SIDE PANEL RETAINER
- HINT:
-
Use the same procedure for other front side panel retainers.

|
|
Protective Tape |
Apply protective tape around the front side panel retainer.
Using a clip remover, remove the front side panel retainer.
- HINT:
-
Tape the clip remover tip before use.