EXTERIOR PANELS / TRIM SIDE MUDGUARD(for Wagon) REMOVAL
CAUTION / NOTICE / HINT
- HINT:
- ·
Use the same procedure for the RH and LH sides.
·The procedure listed below is for the LH side.
PROCEDURE

 76622D
1.REMOVE FRONT FENDER MUDGUARD LH (w/ Mudguard)
76622D
1.REMOVE FRONT FENDER MUDGUARD LH (w/ Mudguard)
76902B
2.REMOVE FENDER PANEL MUDGUARD SUB-ASSEMBLY LH
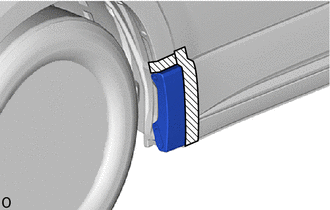

|
Protective Tape |
Apply protective tape around the fender panel mudguard sub-assembly LH.
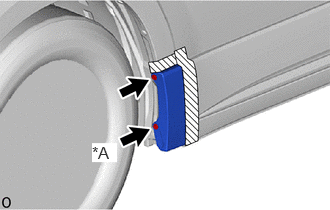
| *A | w/o Mudguard |
w/o Mudguard:
Remove the 2 screws.
w/ Mudguard:
Remove the screw.
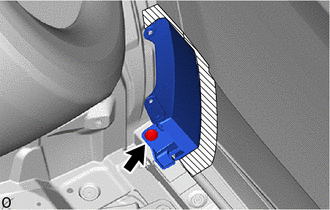
Remove the clip.
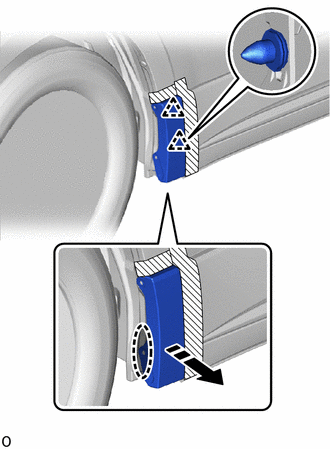

|
Place Hand Here |

|
Remove in this Direction |
Place your hand at the position shown in the illustration, detach the clip and remove the fender panel mudguard sub-assembly LH as shown in the illustration.
75734C
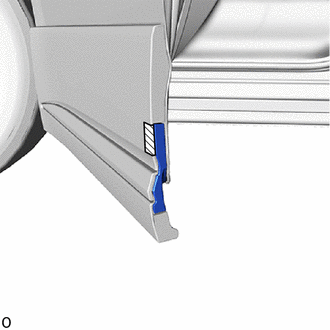
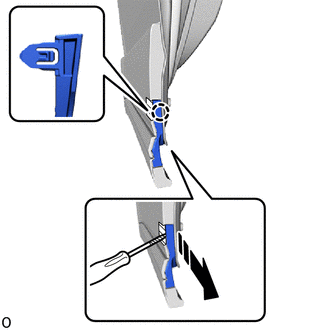
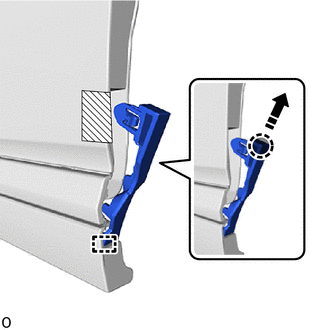
3.REMOVE FRONT DOOR REAR OUTSIDE MOULDING LH
|
|
Protective Tape |
Apply protective tape around the front door rear outside moulding LH.
|
|
Remove in this Direction |
|
|
Protective Tape |
Using a thin-bladed screwdriver, detach the claw as shown in the illustration.
- HINT:
-
Tape the thin-bladed screwdriver tip before use.
|
|
Place Hand Here |
|
|
Remove in this Direction |
Place your hand at the position shown in the illustration, detach the hook and remove the front door rear outside moulding LH.
76904A
4.REMOVE FRONT DOOR MUDGUARD SUB-ASSEMBLY LH

|
|
Protective Tape |
Apply protective tape around the front door mudguard sub-assembly LH.
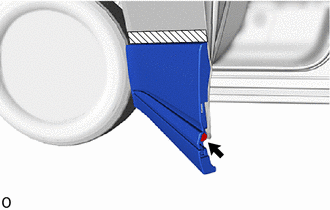
Remove the screw.
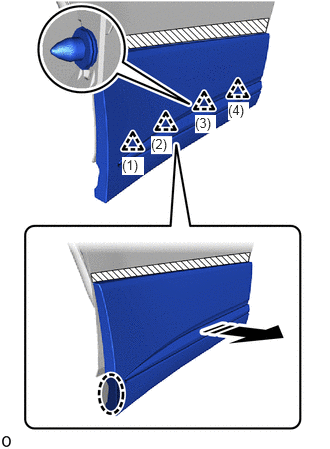
|
|
Place Hand Here |
|
|
Remove in this Direction |
Place your hand at the position shown in the illustration and detach the clip in the order shown in the illustration.
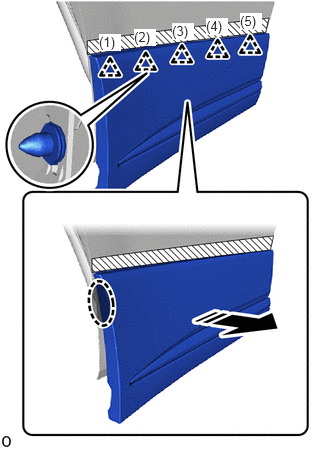
|
|
Place Hand Here |
|
|
Remove in this Direction |
Place your hand in the gap shown in the illustration, detach the clip in the order shown in the illustration and remove the front door mudguard sub-assembly LH.
76902C
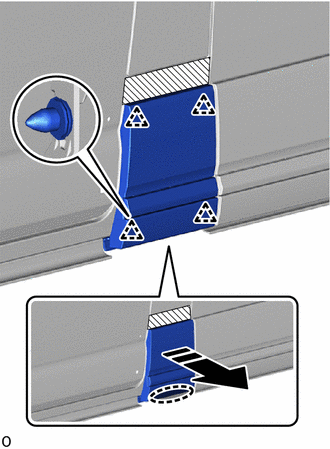
5.REMOVE SIDE MUDGUARD SUB-ASSEMBLY LH
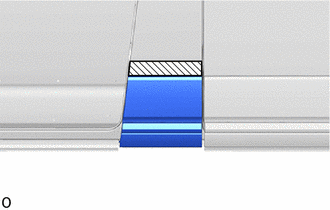
|
|
Protective Tape |
Apply protective tape around the side mudguard sub-assembly LH.
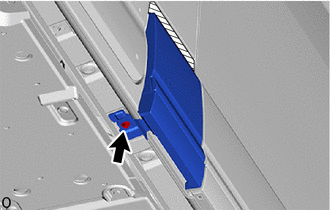
Remove the screw.
|
|
Place Hand Here |
|
|
Remove in this Direction |
Place your hand at the position shown in the illustration, detach the clip and remove the side mudguard sub-assembly LH.
76906C
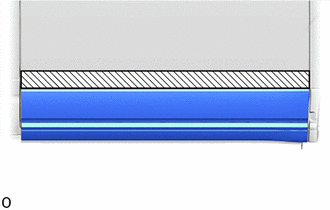
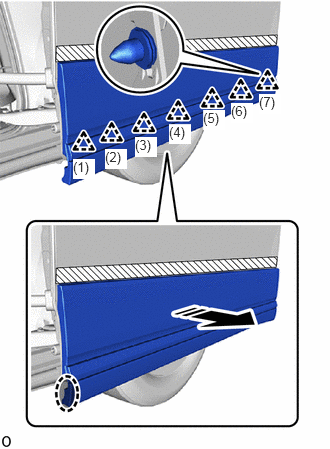
6.REMOVE SLIDE DOOR MUDGUARD SUB-ASSEMBLY LH
|
|
Protective Tape |
Apply protective tape around the slide door mudguard sub-assembly LH.
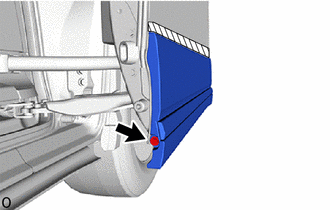
Remove the screw.
|
|
Place Hand Here |
|
|
Remove in this Direction |
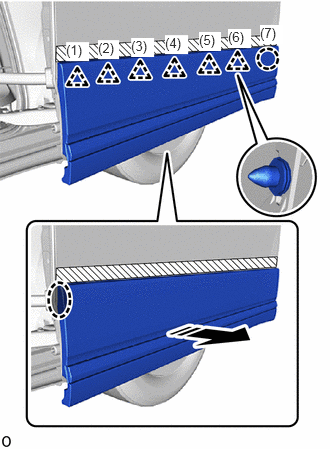
Place your hand at the position shown in the illustration and detach the clip in the order shown in the illustration.
|
|
Place Hand Here |
|
|
Remove in this Direction |
Place your hand in the gap shown in the illustration, detach the clip and claw in the order shown in the illustration and remove the slide door mudguard sub-assembly LH.
76908
7.REMOVE QUARTER PANEL MUDGUARD SUB-ASSEMBLY LH
|
|
Protective Tape |
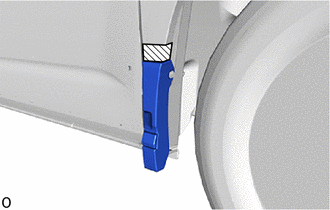
Apply protective tape around the quarter panel mudguard sub-assembly LH.
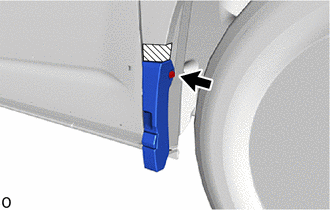
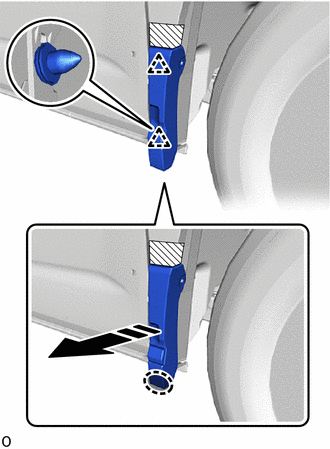
Remove the screw.
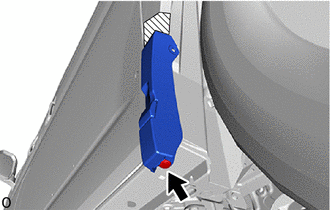
Remove the clip.
|
|
Place Hand Here |
|
|
Remove in this Direction |
Place your hand at the position shown in the illustration, detach the clip and remove the quarter panel mudguard LH.