HEATING / AIR CONDITIONING AIR CONDITIONING PANEL(for Front) INSTALLATION
PROCEDURE

 81942A
1.INSTALL NO. 1 HEATER CONTROL NAME SHEET (for Rear Side)
81942A
1.INSTALL NO. 1 HEATER CONTROL NAME SHEET (for Rear Side)
Remove the release paper from the No. 1 heater control name sheet.
- HINT:
-
After removing the release paper, keep the exposed adhesive free from foreign matter.
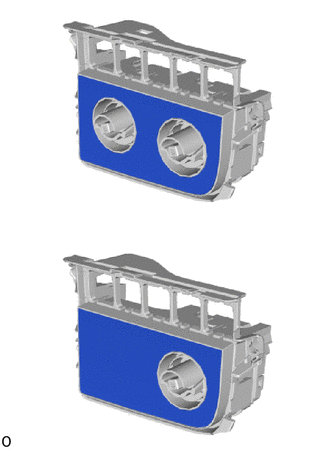
Install the No. 1 heater control name sheet as shown in the illustration.
84732H
2.INSTALL HEATER BLOWER SWITCH (for Rear Side)
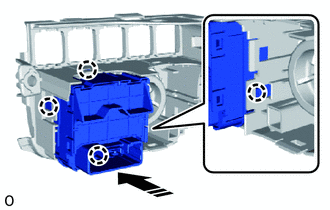

|
Install in this Direction |
for 2 Switches Type:
Attach the claw to install the heater blower switch as shown in the illustration.
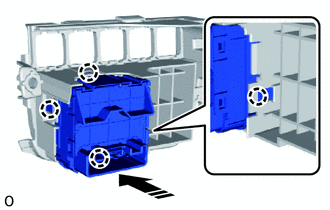
|
|
Install in this Direction |
except 2 Switches Type:
Attach the claw to install the heater blower switch as shown in the illustration.
84660H
3.INSTALL COOLER CONTROL SWITCH ASSEMBLY (for Rear Side)
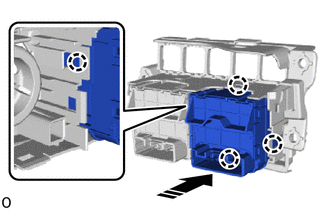
|
|
Install in this Direction |
for 2 Switches Type:
Attach the claw to install the cooler control switch assembly as shown in the illustration.
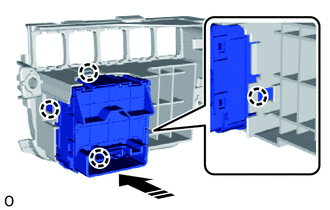
|
|
Install in this Direction |
except 2 Switches Type:
Attach the claw to install the cooler control switch assembly as shown in the illustration.
55905J
4.INSTALL CONTROL KNOB SUB-ASSEMBLY (for Rear Side)
for 2 Switches Type:
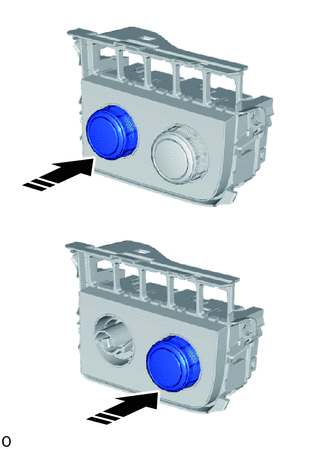
|
|
Install in this Direction |
Install each control knob sub-assembly as shown in the illustration.
except 2 Switches Type:
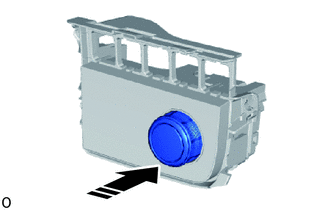
|
|
Install in this Direction |
Install the control knob sub-assembly as shown in the illustration.
55900D
5.INSTALL NO. 2 AIR CONDITIONING CONTROL ASSEMBLY (for Rear Side, Semi-trim)
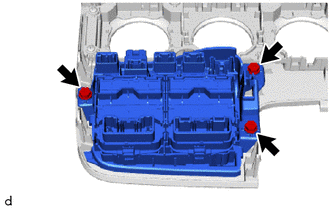
Install the No. 2 air conditioning control assembly with the 3 screws.
55900D
6.INSTALL NO. 2 AIR CONDITIONING CONTROL ASSEMBLY (for Rear Side, Full-trim)
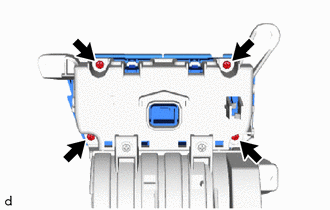
Install the No. 2 air conditioning control assembly with the 4 screws.
55308D
7.INSTALL CENTER INSTRUMENT PANEL BOX SUB-ASSEMBLY (for Rear Side, Full-trim)
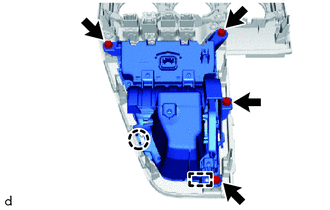
Attach the claw and guide to install the center instrument panel box sub-assembly.
Install the 4 screws.
55905B
8.INSTALL NO. 2 HEATER CONTROL KNOB
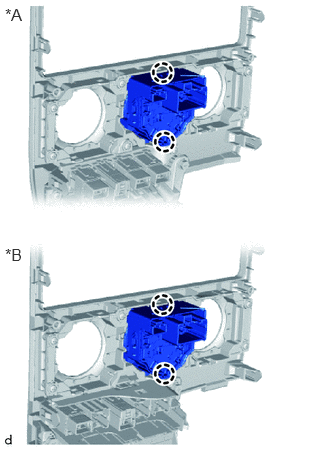
| *A | for Full-trim |
| *B | for Semi-trim |
Attach the claw to install the No. 2 heater control knob.
55905C
9.INSTALL NO. 3 HEATER CONTROL KNOB (w/o Heater)
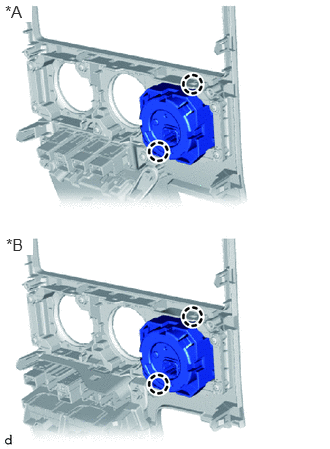
| *A | for Full-trim |
| *B | for Semi-trim |
Attach the claw to install the No. 3 heater control knob.
55905C
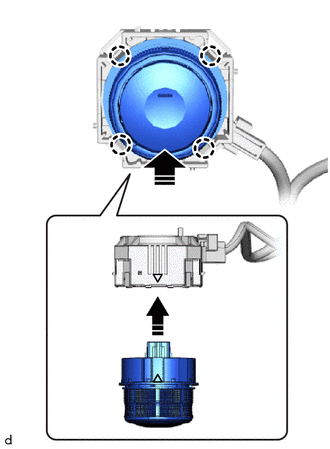
10.INSTALL NO. 3 HEATER CONTROL KNOB (w/ Heater)
|
|
Install in this Direction |
Attach the claw to install the No. 3 heater control knob shown in the illustration.
- HINT:
-
Before installing the No. 3 heater control knob, align the matchmark of the dial side with the matchmark of the cable side as shown in the illustration.
55905A
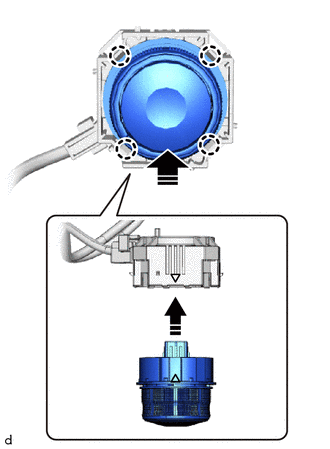
11.INSTALL HEATER CONTROL KNOB
|
|
Install in this Direction |
Attach the claw to install the heater control knob shown in the illustration.
- HINT:
-
Before installing the heater control knob, align the matchmark of the dial side with the matchmark of the cable side as shown in the illustration.
55942
12.INSTALL HEATER CONTROL GUARD (for Automatic Air Conditioning System)
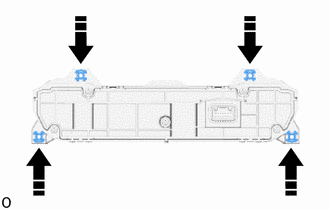
Install each new heater control guard shown in the illustration.
- NOTICE:
-
When the center cluster module control assembly is removed, the heater control guard is damaged at the screw fastening point. Therefore, always use a new heater control guard.
55930
13.INSTALL CENTER CLUSTER MODULE CONTROL ASSEMBLY (for Automatic Air Conditioning System)
except Wagon:
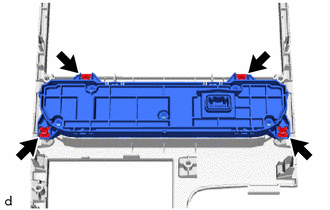
Install the center cluster module control assembly with the 4 screws.
- NOTICE:
-
When the center cluster module control assembly is removed, the heater control guard is damaged at the screw fastening point. Therefore, always use a new heater control guard.
for Wagon:
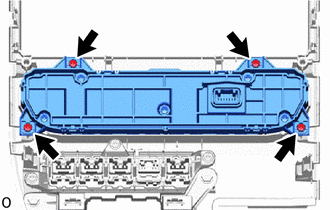
Install the center cluster module control assembly with the 4 screws.
- NOTICE:
-
When the center cluster module control assembly is removed, the heater control guard is damaged at the screw fastening point. Therefore, always use a new heater control guard.
55900
14.INSTALL AIR CONDITIONING CONTROL ASSEMBLY (for Automatic Air Conditioning System)
55405B
15.INSTALL CENTER INSTRUMENT CLUSTER FINISH PANEL SUB-ASSEMBLY (for Manual Air Conditioning System)
35970F
16.INSTALL POSITION INDICATOR HOUSING ASSEMBLY (for Automatic Transmission)
58840Q
17.INSTALL SHIFTING HOLE COVER ASSEMBLY (for Manual Transmission)
33504F
18.INSTALL SHIFT LEVER KNOB SUB-ASSEMBLY (for Automatic Transmission)
33622
19.CONNECT NO. 1 SHIFT LEVER KNOB COVER (for Automatic Transmission)
33504F
20.INSTALL SHIFT LEVER KNOB SUB-ASSEMBLY (for Manual Transmission)