EXTERIOR PANELS / TRIM BACK DOOR OUTSIDE GARNISH(for Wagon) REMOVAL
PROCEDURE

 67938A
1.REMOVE BACK DOOR SIDE GARNISH LH
67938A
1.REMOVE BACK DOOR SIDE GARNISH LH
67937B
2.REMOVE BACK DOOR SIDE GARNISH RH
- HINT:
-
Use the same procedure described for the LH side.
69291
3.REMOVE BACK DOOR INSIDE HANDLE ASSEMBLY (w/ Handle)
69783B
4.REMOVE BACK DOOR INSIDE HANDLE BEZEL (w/ Handle)
67961A
5.REMOVE BACK DOOR PULL STRAP
67751
6.REMOVE BACK DOOR TRIM BOARD
67290
7.REMOVE BACK DOOR DAMPER ASSEMBLY
76801
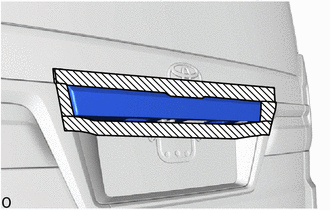
8.REMOVE BACK DOOR OUTSIDE GARNISH SUB-ASSEMBLY

|
Protective Tape |
Apply protective tape around the back door outside garnish sub-assembly.
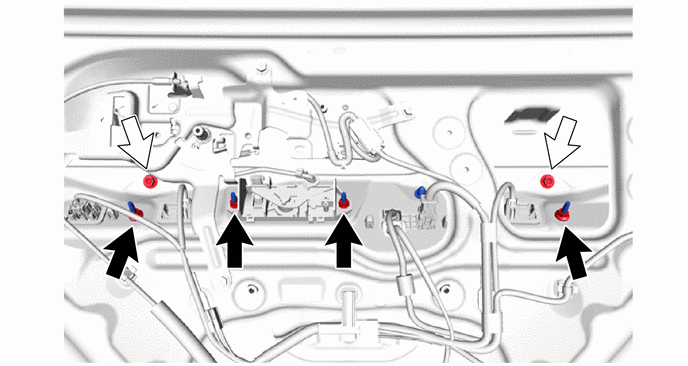
Remove the 2 bolts and 4 nuts.

|
Nut | 
|
Bolt |

|
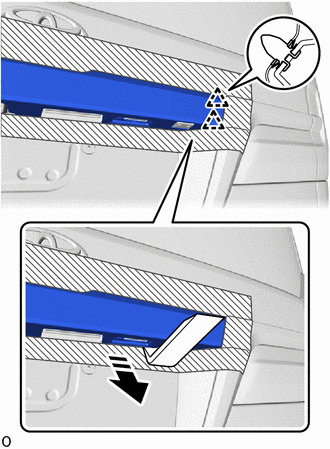
Remove in this Direction |
Using moulding remover D, pull toward the rear of the vehicle and detach the clip.

|
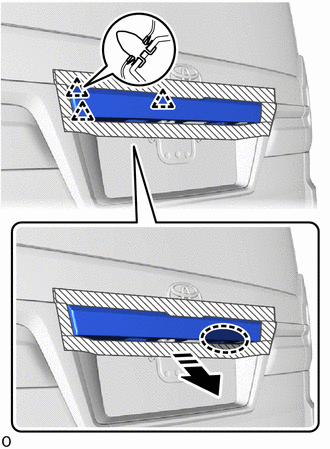
Place Hand Here |
|
|
Remove in this Direction |
Place your hands at the position in the illustration, detach the clip and remove the back door outside garnish sub-assembly.
76802E
9.REMOVE BACK DOOR LOWER OUTSIDE GARNISH SUB-ASSEMBLY
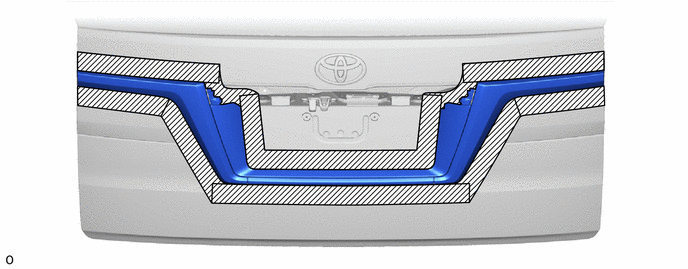
Apply protective tape around the back door lower outside garnish sub-assembly, back door upper outside garnish sub-assembly LH and back door upper outside garnish sub-assembly RH.
|
|
Protective Tape | - | - |
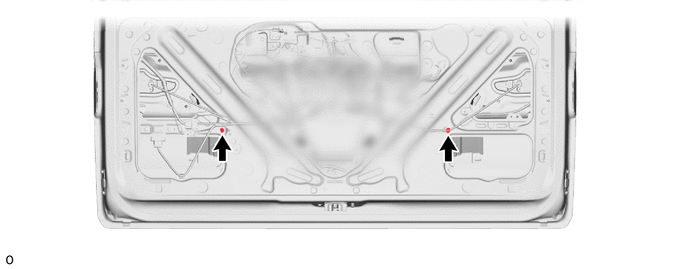
Remove the 2 bolts.
|
|
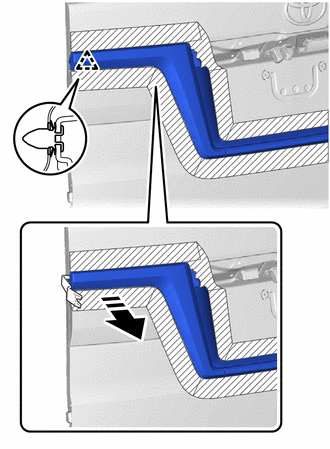
Remove in this Direction |
Using moulding remover B, detach the clip.
- HINT:
-
Use the same procedure for the RH and LH sides.
|
|
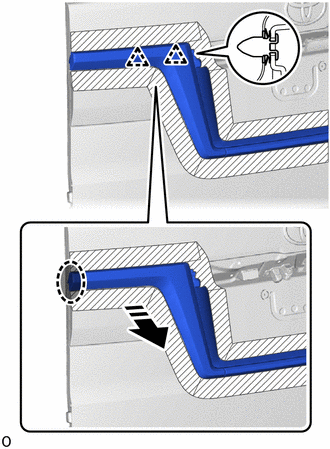
Place Hand Here |
|
|
Remove in this Direction |
Place your hand in the gap shown in the illustration and detach the clip.
- HINT:
-
Use the same procedure for the RH and LH sides.
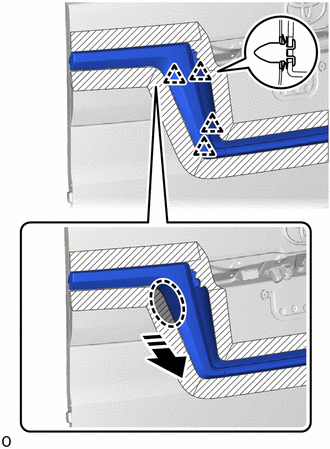
|
|
Place Hand Here |
|
|
Remove in this Direction |
Placing your hand in the gap, detach the clip.
- HINT:
-
Use the same procedure for the RH and LH sides.
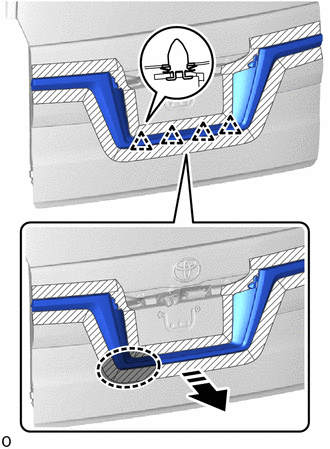
|
|
Place Hand Here |
|
|
Remove in this Direction |
Place your hand in the gap shown in the illustration, detach the clip, and remove the back door lower outside garnish sub-assembly together with the back door upper outside garnish sub-assembly LH and back door upper outside garnish sub-assembly RH.
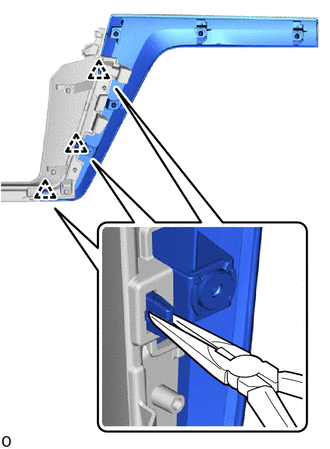
Using needle-nose pliers, detach the clip and remove the back door upper outside garnish sub-assembly LH from the back door lower outside garnish sub-assembly.
- HINT:
-
Use the same procedure for the back door upper outside garnish sub-assembly RH.
76804
10.REMOVE BACK DOOR UPPER OUTSIDE GARNISH SUB-ASSEMBLY LH
76803A
11.REMOVE BACK DOOR UPPER OUTSIDE GARNISH SUB-ASSEMBLY RH