EXTERIOR PANELS / TRIM RADIATOR GRILLE(for Wagon) REASSEMBLY
PROCEDURE

 53123L
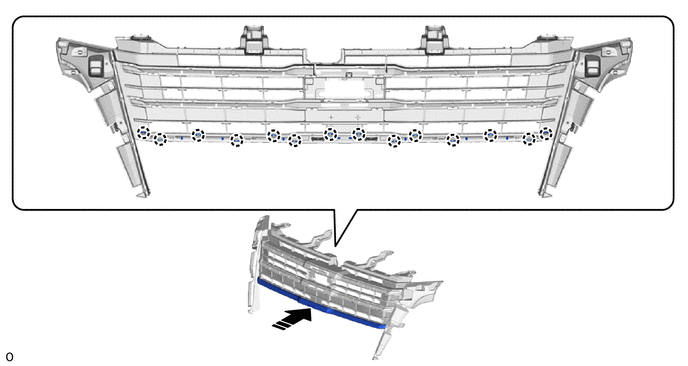
1.INSTALL NO. 3 RADIATOR GRILLE MOULDING
53123L
1.INSTALL NO. 3 RADIATOR GRILLE MOULDING
Attach the claw and install the No. 3 radiator grille moulding as shown in the illustration.

|
Install in this Direction | - | - |
53122F
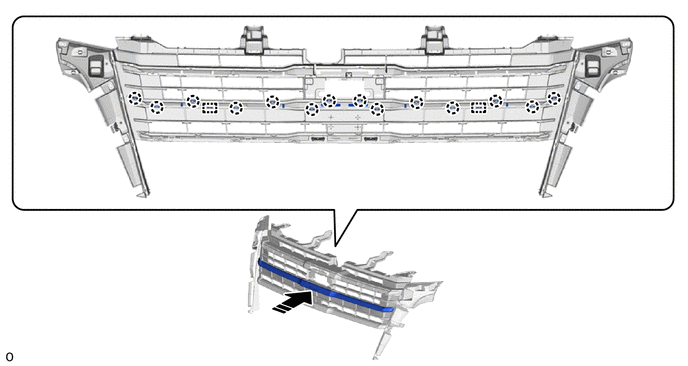
2.INSTALL NO. 2 RADIATOR GRILLE MOULDING
Attach the claw and install the No. 2 radiator grille moulding as shown in the illustration.
|
|
Install in this Direction | - | - |
53121J
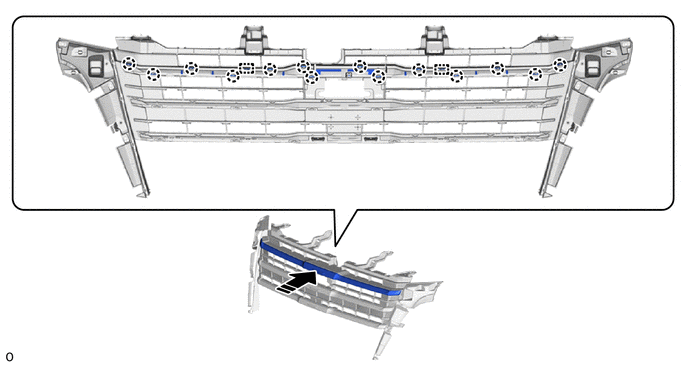
3.INSTALL NO. 1 RADIATOR GRILLE MOULDING
Attach the claw and install the No. 1 radiator grille moulding as shown in the illustration.
|
|
Install in this Direction | - | - |
53126A
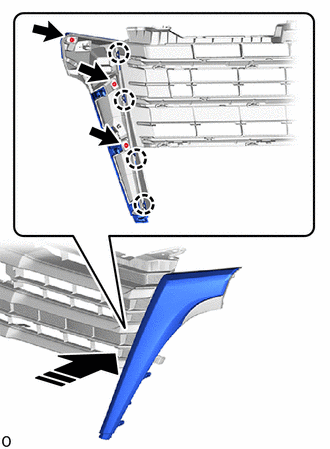
4.INSTALL CENTER RADIATOR GRILLE MOULDING LH
|
|
Install in this Direction |
Attach the claw and install the center radiator grille moulding LH as shown in the illustration.
Install the 3 screws.
53125A
5.INSTALL CENTER RADIATOR GRILLE MOULDING RH
- HINT:
-
Use the same procedure described for the LH side.
53141C
6.INSTALL NO. 2 RADIATOR GRILLE GARNISH (w/o Pre-collision System)
|
|
Install in this Direction |
Attach the claw and install the No. 2 radiator grille garnish as shown in the illustration.
Install the 2 screws.
53141C
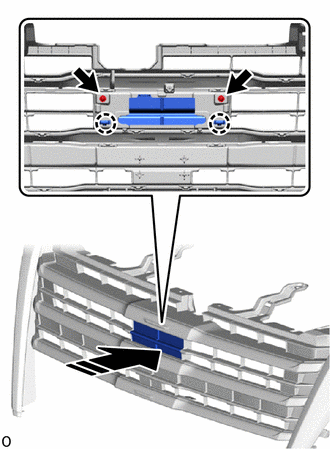
7.INSTALL RADIATOR GRILLE GARNISH (w/ Pre-collision System)

|
|
Install in this Direction |
Attach the claw and install the radiator grille garnish as shown in the illustration.
Install the 2 screws.
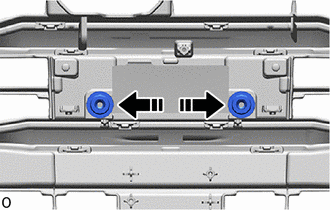
8.INSTALL NUT WITH WASHER (w/ Pre-collision System)
|
|
Install in this Direction |
Install the 2 nut with washers as shown in the illustration.
88211B
9.INSTALL MILLIMETER WAVE RADAR SENSOR ASSEMBLY (w/ Pre-collision System)
86790B
10.INSTALL FRONT TELEVISION CAMERA ASSEMBLY (w/ Panoramic View Monitor System)
86799
11.INSTALL TELEVISION CAMERA WIRE (w/ Panoramic View Monitor System)