STEERING GEAR / LINKAGE STEERING GEAR(for RHD) INSPECTION
CAUTION / NOTICE / HINT
- NOTICE:
- ·
When using a vise, place aluminum plates between the part and vise.
·When using a vise, do not overtighten it.
PROCEDURE

 1.INSPECT TIE ROD END SUB-ASSEMBLY
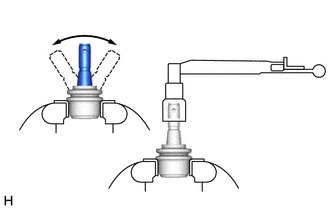
Move the ball joint stud back and forth 5 times as shown in the illustration, before installing the nut.
Using a torque wrench, turn the nut continuously at a rate of 3 to 5 seconds per turn and take the torque reading on the fifth turn.
- Standard turning torque:
0.98 to 3.92 N*m (10 to 39 kgf*cm, 9 to 34 in.*lbf)
If the turning torque is not within the specified range, replace the tie rod end sub-assembly with a new one.
2.INSPECT POWER STEERING LINK ASSEMBLY
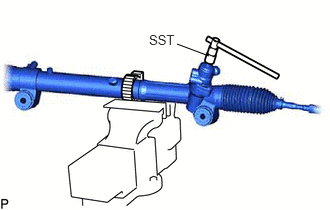
Using SST, check that the steering rack boots stretches smoothly when the control valve shaft is being rotated.
- SST
- 09616-00011
If there is any abnormality, replace the steering rack end boots with a new one.
3.INSPECT TOTAL PRELOAD
Temporarily install the 2 steering rack ends to the steering rack.
- NOTICE:
-
Do not fully turn the steering rack without the steering rack ends installed as it may damage the oil seal in the rack housing.
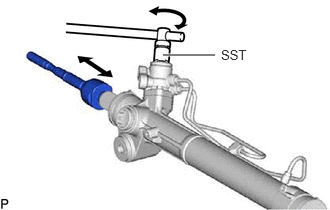
Using SST, fully turn the steering rack right and left 10 times to settle it.
- SST
- 09616-00011
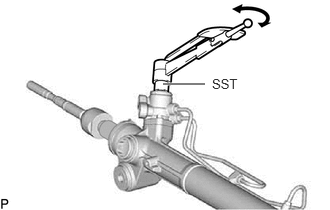
Using SST, turn the control valve and measure the preload.
- SST
- 09616-00011
- Standard preload (turning):
2.0 to 2.8 N*m (21 to 28 kgf*cm, 18 to 24 in.*lbf)
If the turning torque is not as specified, replace the steering gear assembly.
- HINT:
- ·
Measure the standard preload at the steering rack neutral point.
·The steering control valve is fully turned when turned 3.0 times. Half of the distance from the fully turned position is the neutral point.